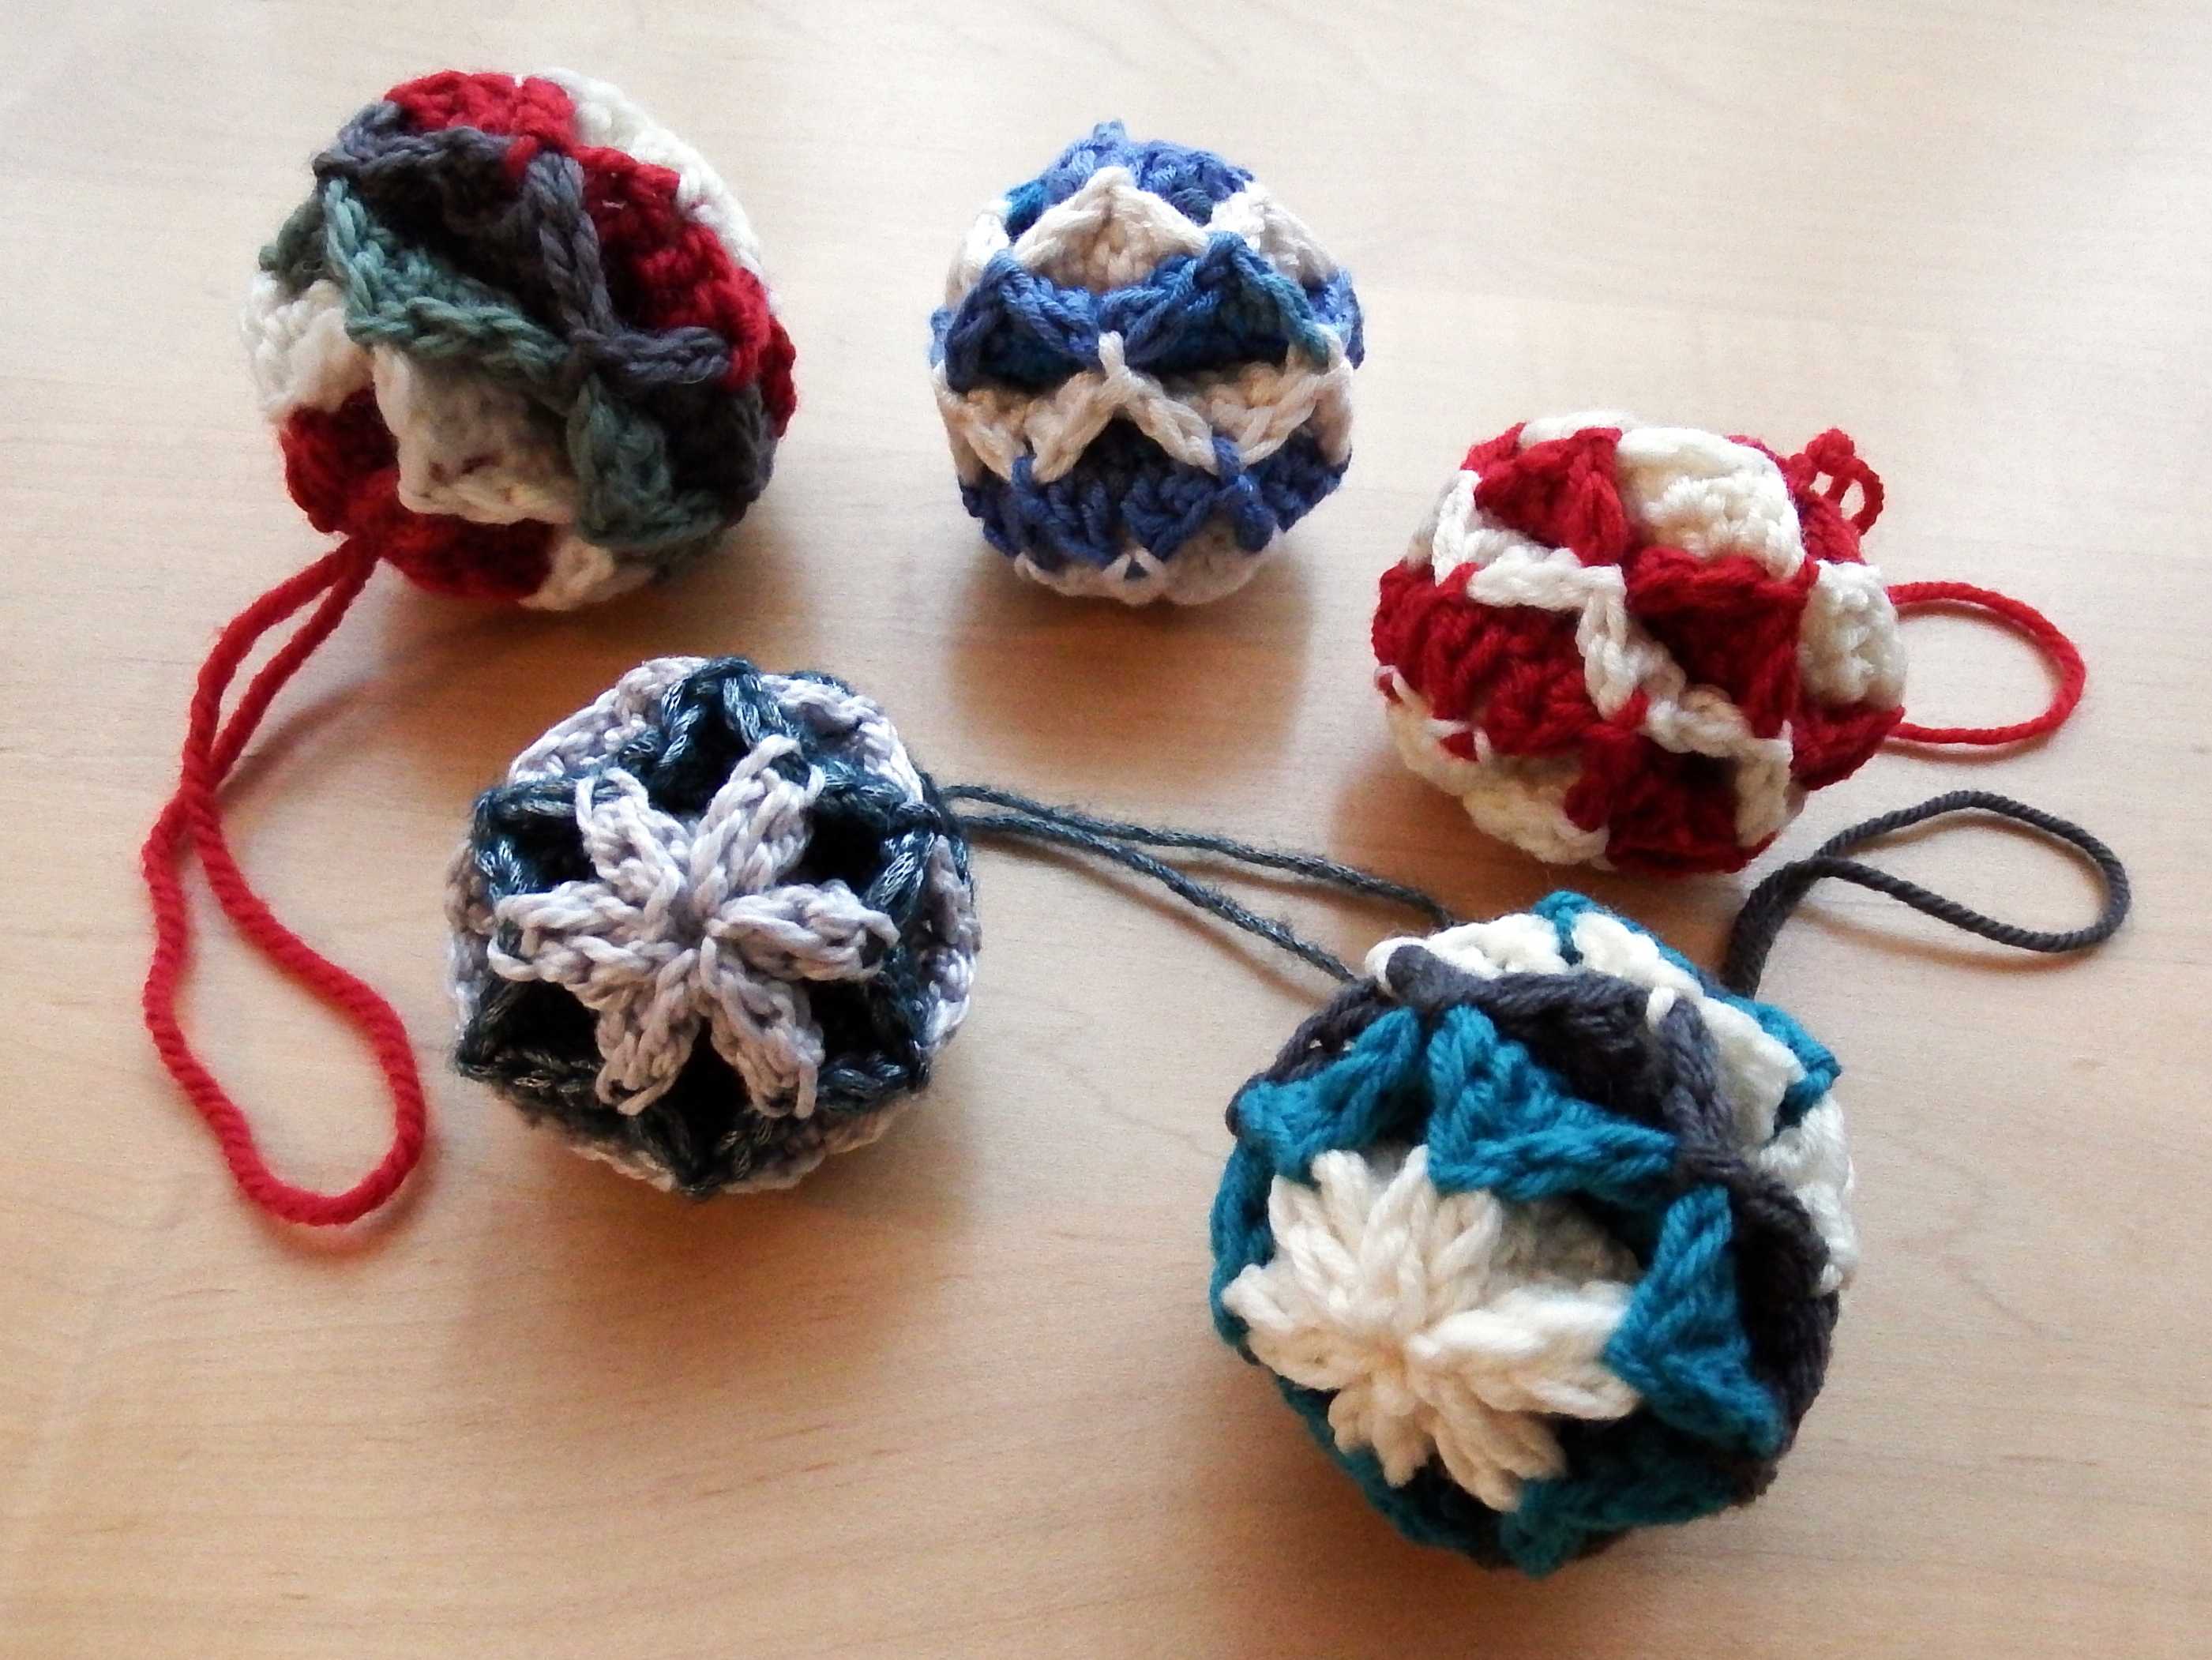
Simple Origami Christmas Baubles – Free crochet ornament pattern
 Ok, so these aren’t exactly origami – but they look like it, and what’s even better, they are super simple and fast to make up. Yes, really! All you need to know how to do is double crochet and slip stitch. And there’s minimal weaving in of ends and barely any seaming!
With the added bonus of clearing out some stash to make way for your Christmas yarn (or for post-Christmas Sale yarn), why not make a couple now and add a few extra’s to your tree? Or make a few as Christmas gifts for friends or family?
Simple Origami Christmas Baubles – Free crochet ornament pattern
Scroll down for pdf patterns! (US and UK notation). And if you need more help, check out the video tutorial on how to make these! And did you know you can find this pattern on Ravelry?
Materials
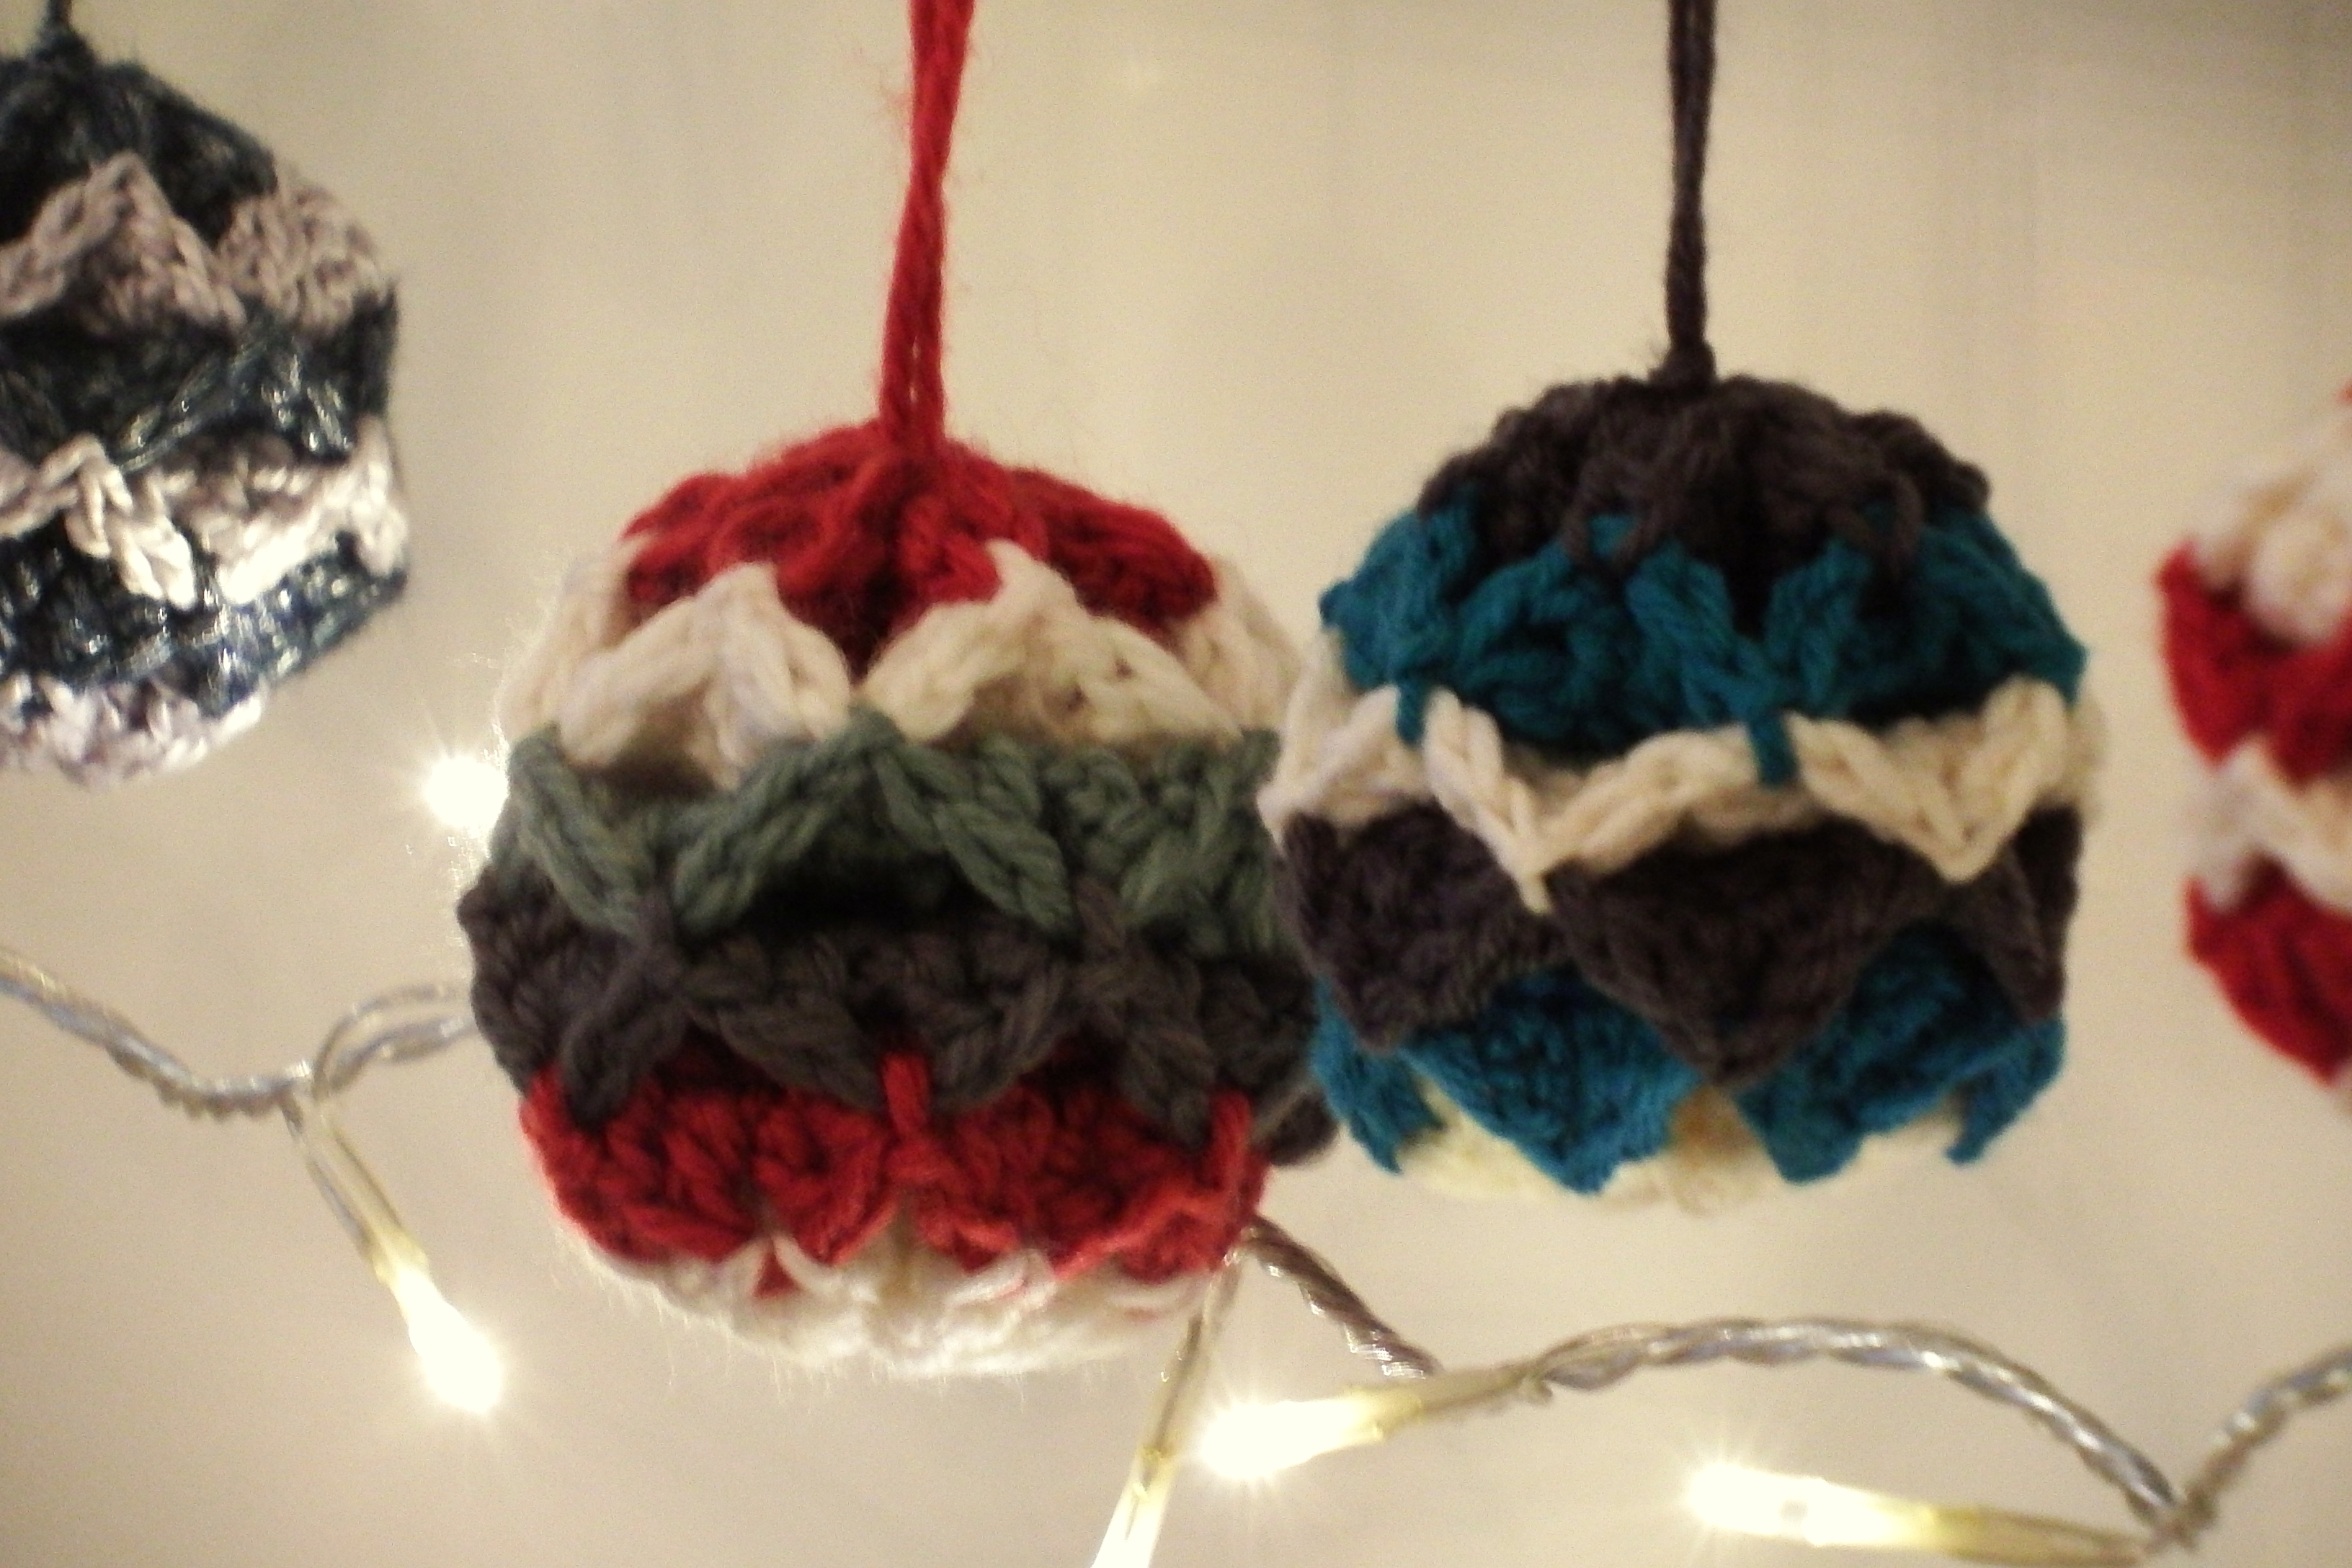
Any stash dk yarn and a size 4mm hook in two or more colours. You can also try making these in light worsted with a 5mm hook (I used up the left overs from my Christmas Stocking project)
A tapestry needle to fit your yarn.
Pattern
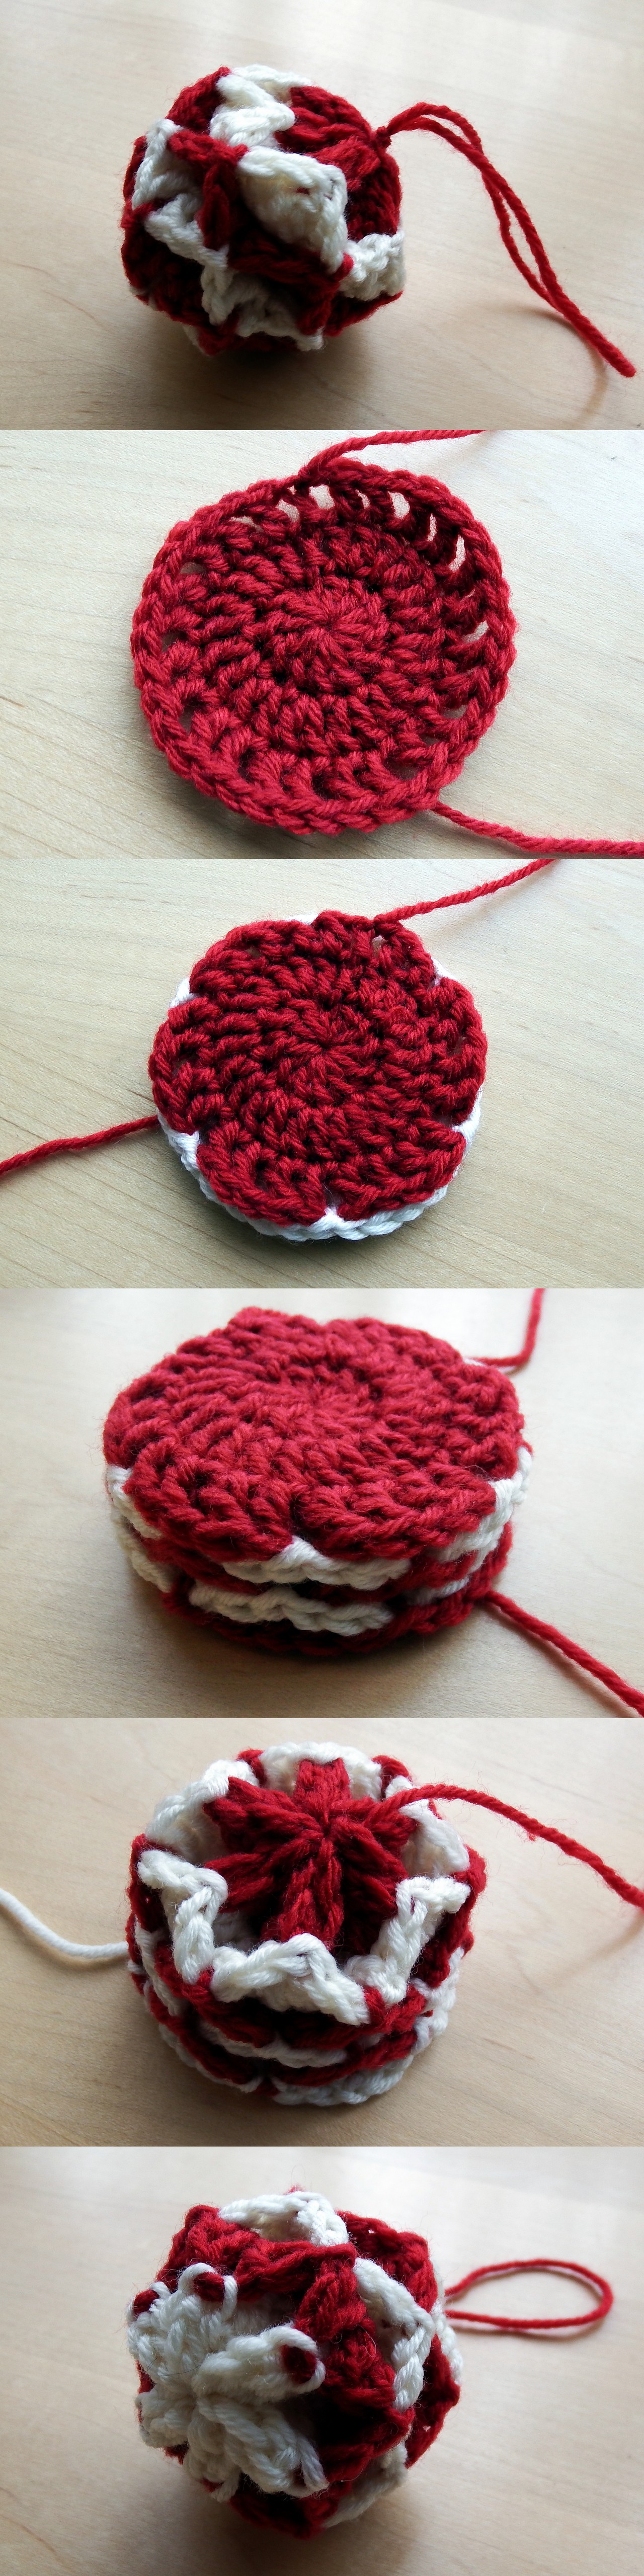
Each bauble is made from 6 discs which are worked in the round and slip stitched together as you go. The middle four discs have holes in the centres to reduce the bulk. Use a different colour from the previous disc each time you start a new one.
Disc 1:
Make a magic circle, or chain 4 and join with a sl-st if you prefer.
R1: ch2 (counts as dc here and throughout), 11dc into ring, draw the ring closed, join with a sl-st into the starting ch (12sts)
R2: ch2, dc into same st, (2dc) into each st around, join with a sl-st (24 sts)
R3: ch2, dc into next st, ch1, *dc into each of next 2 sts, ch1, repeat from *around, join with a sl-st (36 sts)
Disc 1 has 12 chain spaces. Fasten off leaving a long tail (this will be used later to make the hanging loop). Do not weave in ends!
Disc 2:
Chain 12, join with a sl-st to make a ring. Crochet round 1 over the end so that you can trim it later and avoid having to weave it in.
R1: ch2, 23dc into the ring, join with a sl-st (24dc)
R2: ch2, dc into next st. Place disc 1 in front of disc 2 and sl-st through the ch-sp on disc 1 which is one before the final chain space you made. Dc into each of next 2 sts, ch1, *dc into next two stitches, skip one chain space on disc 1 and sl-st into the next, dc into each of next 2 sts, ch1, repeat from *around, join with a sl-st (36 sts)
Disc 2 is joined to disc one by 6 sl-sts in alternating chain spaces. The 6 empty chain spaces on disc 2 will be used to attach disc 3 in the exact same way. Trim off the tail from the centre of disc 2 and weave in the tail at the finishing end. Pull the tail from the centre of disc 1 through the hole in disc 2.
Disc 3-5:
Repeat as for Disc 2, but work the sl-sts into the empty chain spaces of the previous disc made.
Simple Origami Christmas Baubles – Free crochet ornament pattern
Disc 6:
Repeat rounds 1-2 of Disc 1. Take the tail from disc 1 which is pulled through the middle of all the other discs, and tie it together tightly with the tail of disc 6 so that the centres of disc 1 and 6 are drawn together through the other discs.
Now work Round 2 as per disc 2. Fasten off leaving a tail for sewing.
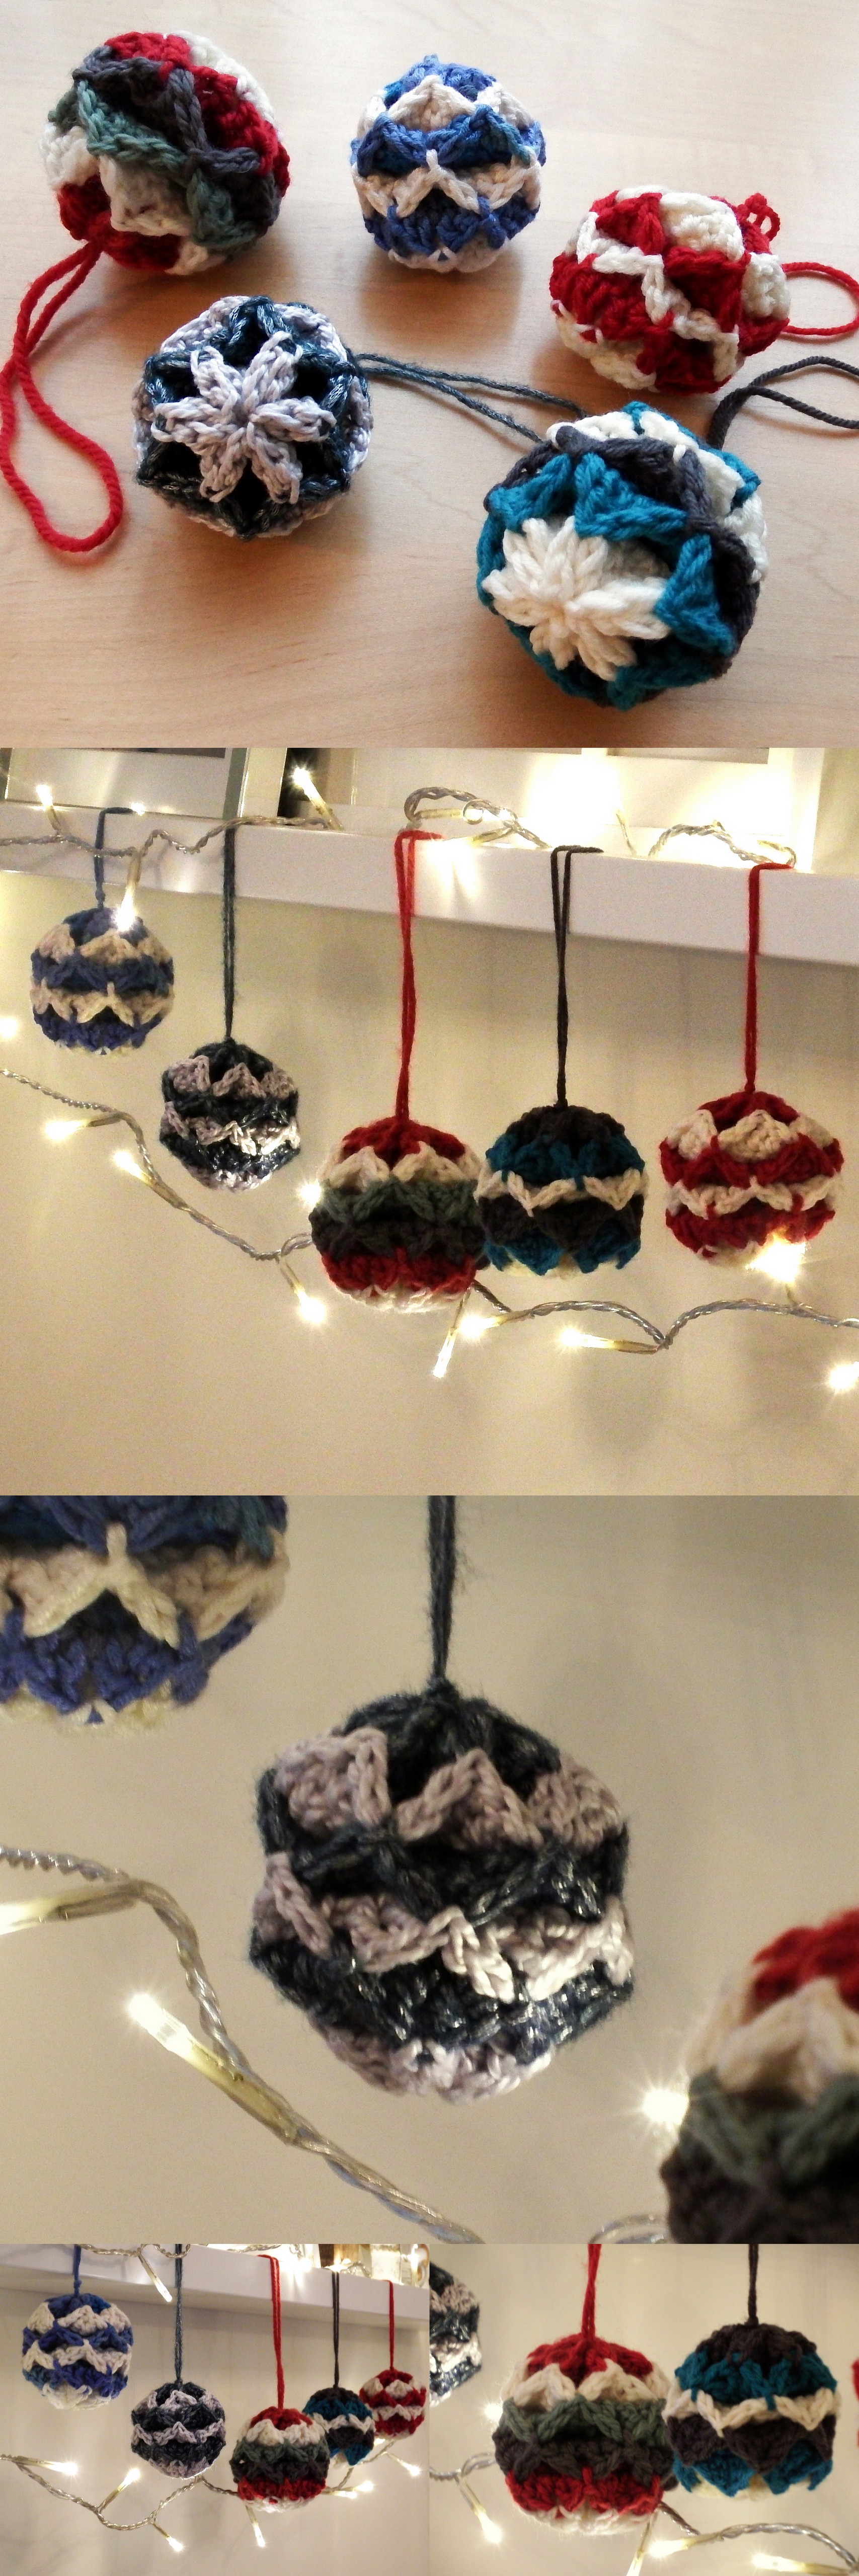
You will now have a layered cylinder of discs which make a nice concertina when stretched out!
Thread the tail from disc 6 onto the needle and pass this through each of the chain spaces from the inside out for each one, and for the starting chain space. Pull the thread tight to draw the chain spaces together, and weave in the end.
Repeat on the other side, using the length to make a hanging loop before fastening off.
Simple Origami Christmas Baubles – Free crochet ornament pattern
So, what colour ways will you try? Are you lucky enough to have some metallic yarn in your stash to try this with?


Pingback: Simple Origami Christmas Baubles Video Tutorial | Make My Day Creative
Pingback: 12/13/14 Free Crochet Patterns | Free Crochet Patterns
These are great. Thank you
I think these are great! Perfect use of scraps into a lovely ornament!
Thank you! I’m thinking of making one every time I finish a project. Then next year I can have a tree decorated in baubles that remind me of each thing I’ve made! :)
Pingback: 1/2/15 Free Crochet Pattern Links | Free Crochet Patterns
Beautiful pattern, but I have a question and a little bit of criticism(I hope you don’t mind!)
When you’re making the first disk, on the third row you say that after it’s all done there should be 36 stitches. If you’re not counting chains as stitches, then I keep getting 24, the same as the previous row. Could you please clarify this for me?
Also, I tried to watch what you were doing in the video but you started partway into one already, well past my 36 stitches issue. I couldn’t see in the video where I had went wrong because of this.
Anyways, if anyone could help out a crochet artist, please let me know!
Hi Tsukihime! The chains do count as stitches – you’ll have 24 dc’s and 12 chains, which is 36 total.
Same row…is there in an error in the beginning when you have 2 dc in the first stitch but only singular in each stitch afer?
Hi Rita! The pattern should read dc in next stitch, not same stitch, sorry about that! Good spot, thanks. I have corrected it now.
I’ve done this 3 times now…your count on that row has got to be off somewhere…I wind up with a leftover empty stitch at the end
Thanks for this stash busting pattern! I will try some of my NFL football team colors:) lol I enjoy your blog!
That’s a fun idea! :)
Pingback: Christmas Crochet | Make My Day Creative
Pingback: Christmas : 8 tiny crochet pattern to make with your leftover scrap yarn | Ahookamigurumi
Pingback: Noël : 8 modèles minuscules pour utiliser ses fins de pelotes | Ahookamigurumi