Moroccan Hexagon Motif – Free Crochet Pattern by Make My Day Creative – use this to make a cushion or blanket or scarf

Do you find Arabic geometry as interesting as I do? It fascinates me how a minor change in a repeat pattern can give a whole different look and feel to the resulting effect.
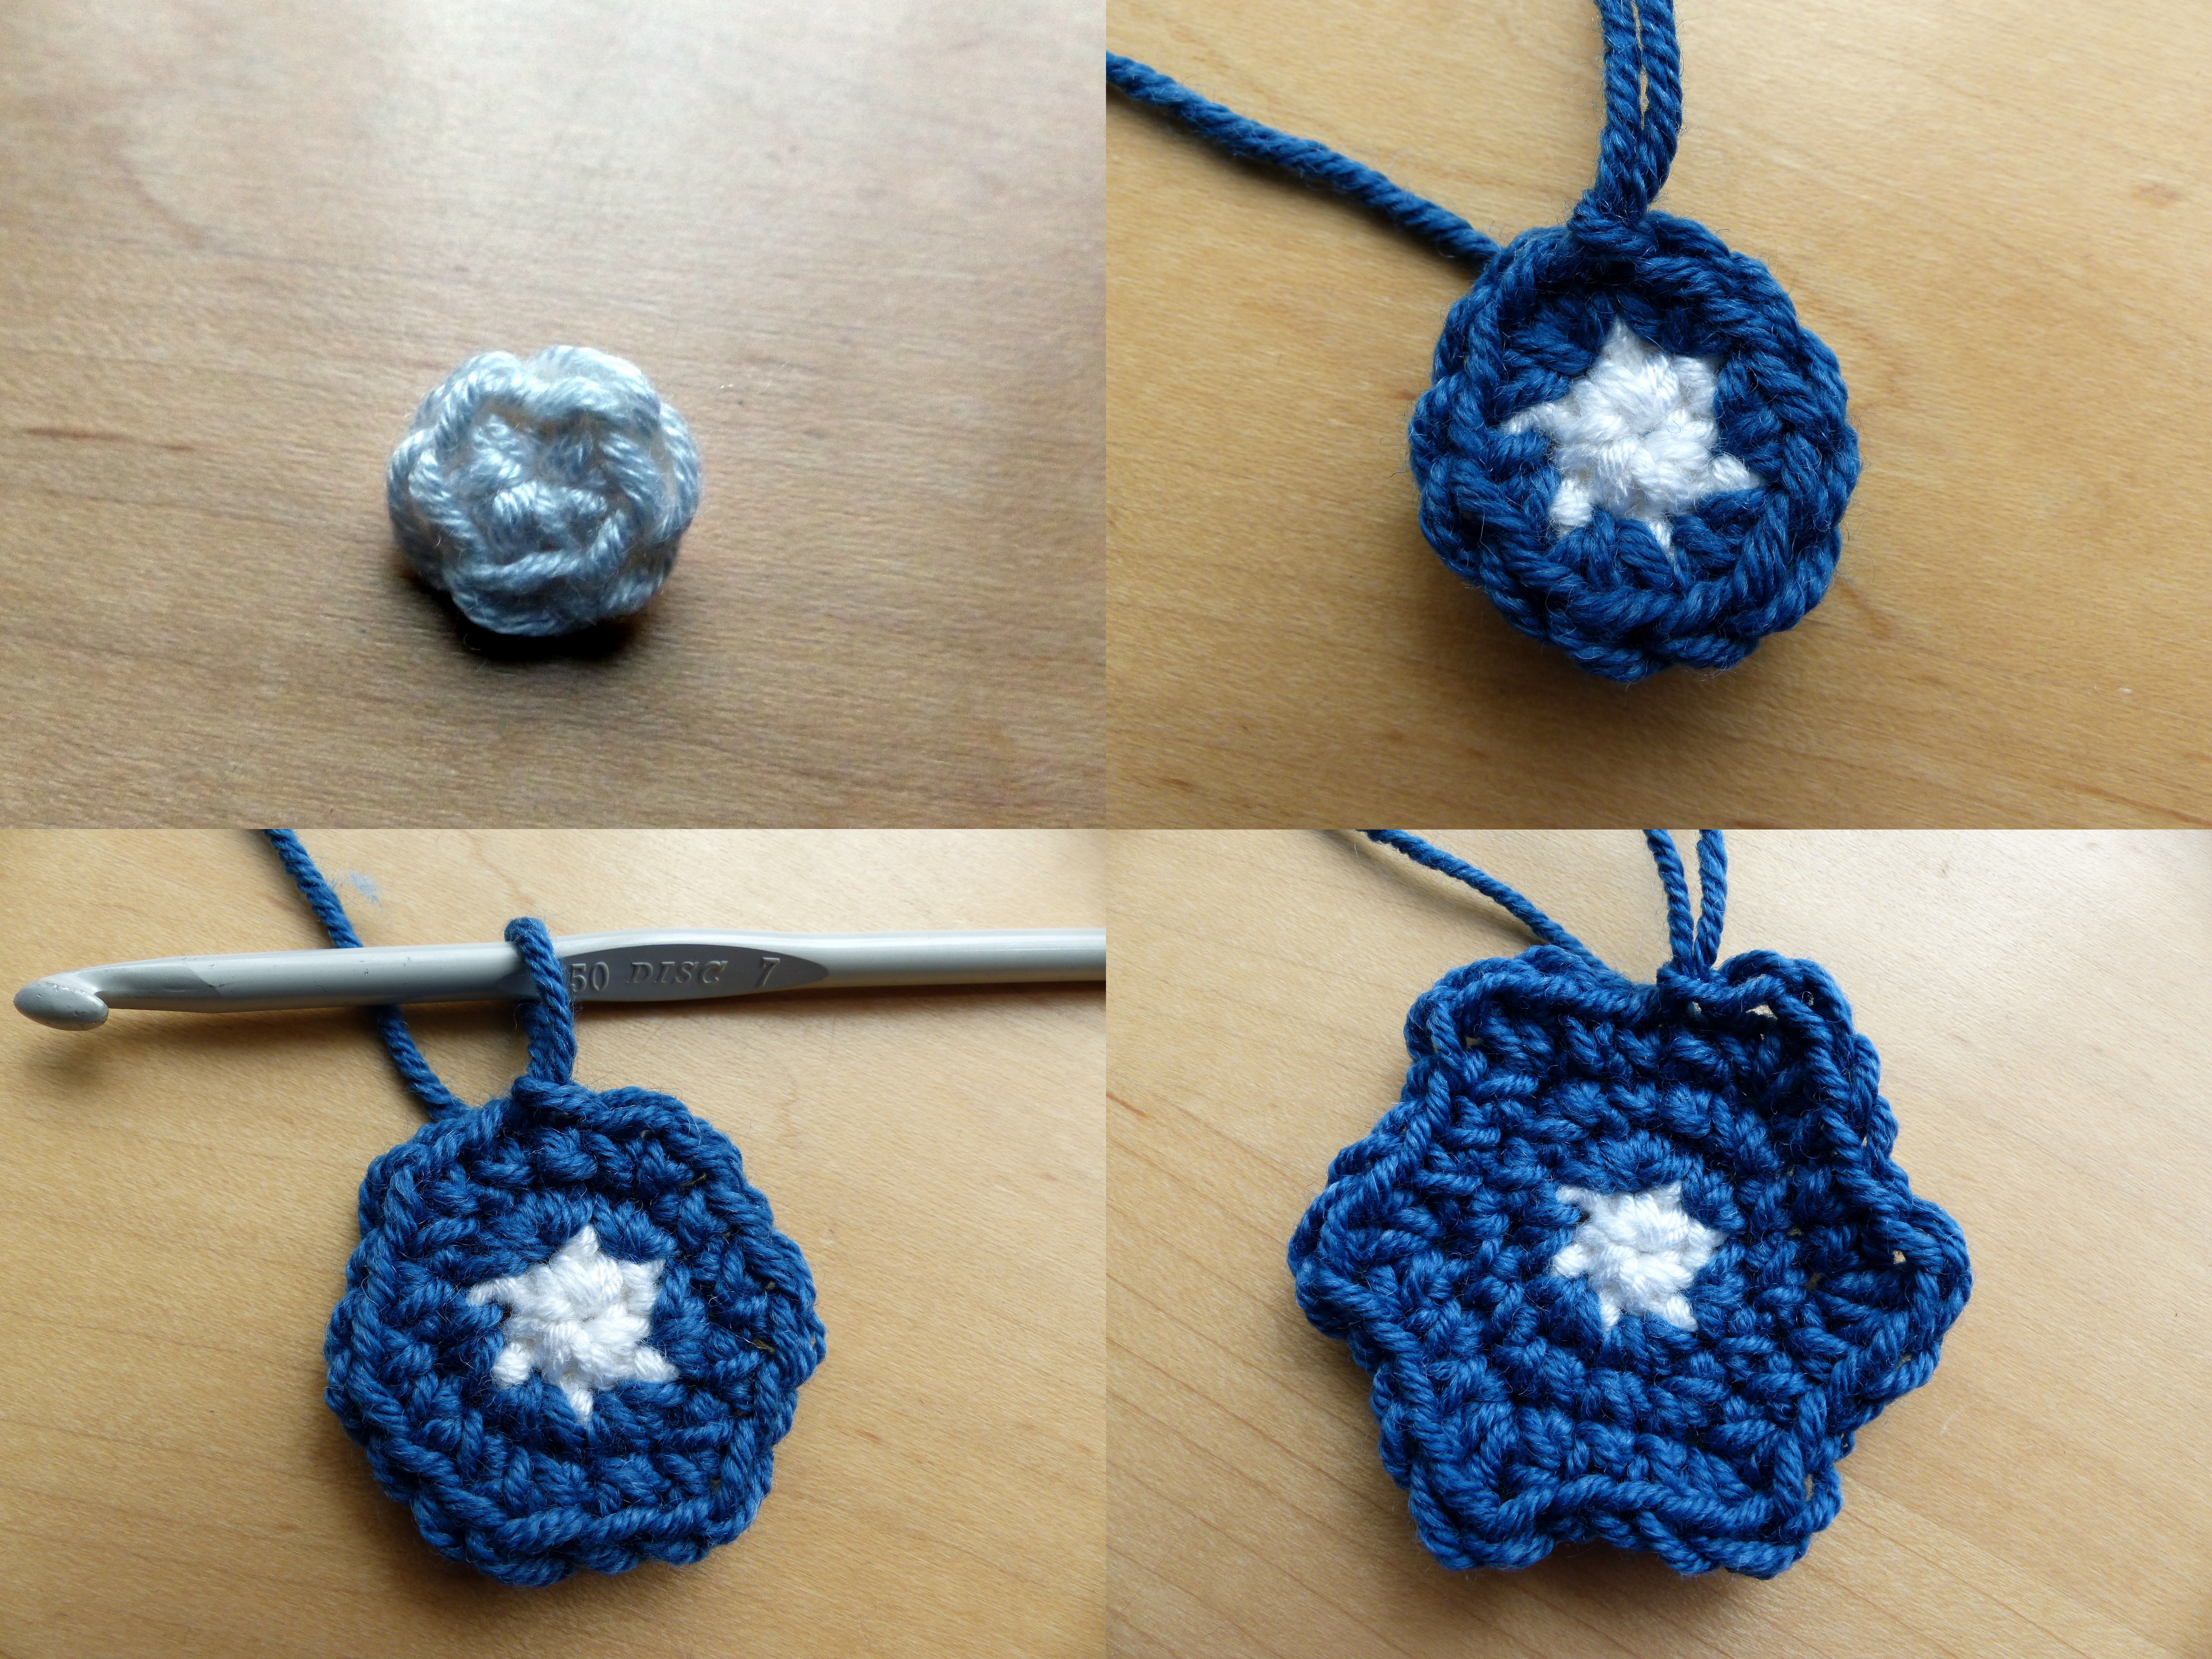
The repeats of Moroccan style tiles have an affinity with crochet motifs and I’ve been wondering if I could recreate the effect in crochet for a while. At first glance this pattern looks like overlapping circles but it is actually a fairly simple hexagon repeat.
Moroccan Motif Inspiration
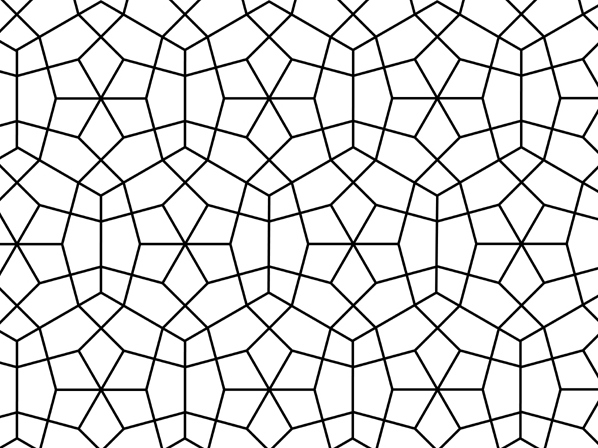
So here is my crochet pattern based on it. I used one ball of blue and one of white to make 10 motifs and sewed them together to make the front of this cushion (it matches these). There was just enough yarn left over to crochet around the edges to even them out. The back is made from fabric because this was all the yarn I had – although I did contemplate buying more and doing the reverse in mustard yellow to contrast with the blue…
Of course you can use the motifs for anything you like – scarves, blankets etc. I’m thinking of using something variegated as the background for a scarf if I do this design again.
Materials:
4.5mm crochet hook
Contrasting dk yarn in two colours. I used Debbie Bliss Prima (white) – 150m approx. used including that used for the cushion border – and Rowan Wool Cotton -113m.
1 ball each in white and blue makes approximately 10 motifs with left over white for the border – but you may want more for the border depending on how many rounds you add.
Special Stitch: Front Post Treble Crochet – fptr
A post stitch worked in front of the work so it is only visible on the right side.
Yarn over hook twice, insert hook as directed (into a stich several rows below where you are working or about a post of the stitch several rows below). Draw up a loop (4 loops on hook). *Yarn over, draw through 2 loops, repeat from *2 more times to complete the stitch.
Note that a post stitch always counts as being worked in the next stitch even though the loops remain unused.
Pattern:
The motif is made in the round and uses post stitches.
Begin with white and make a magic ring.
R1: work 6sc into the ring and draw closed. Join with a sl-st. Fasten off.
With blue yarn:
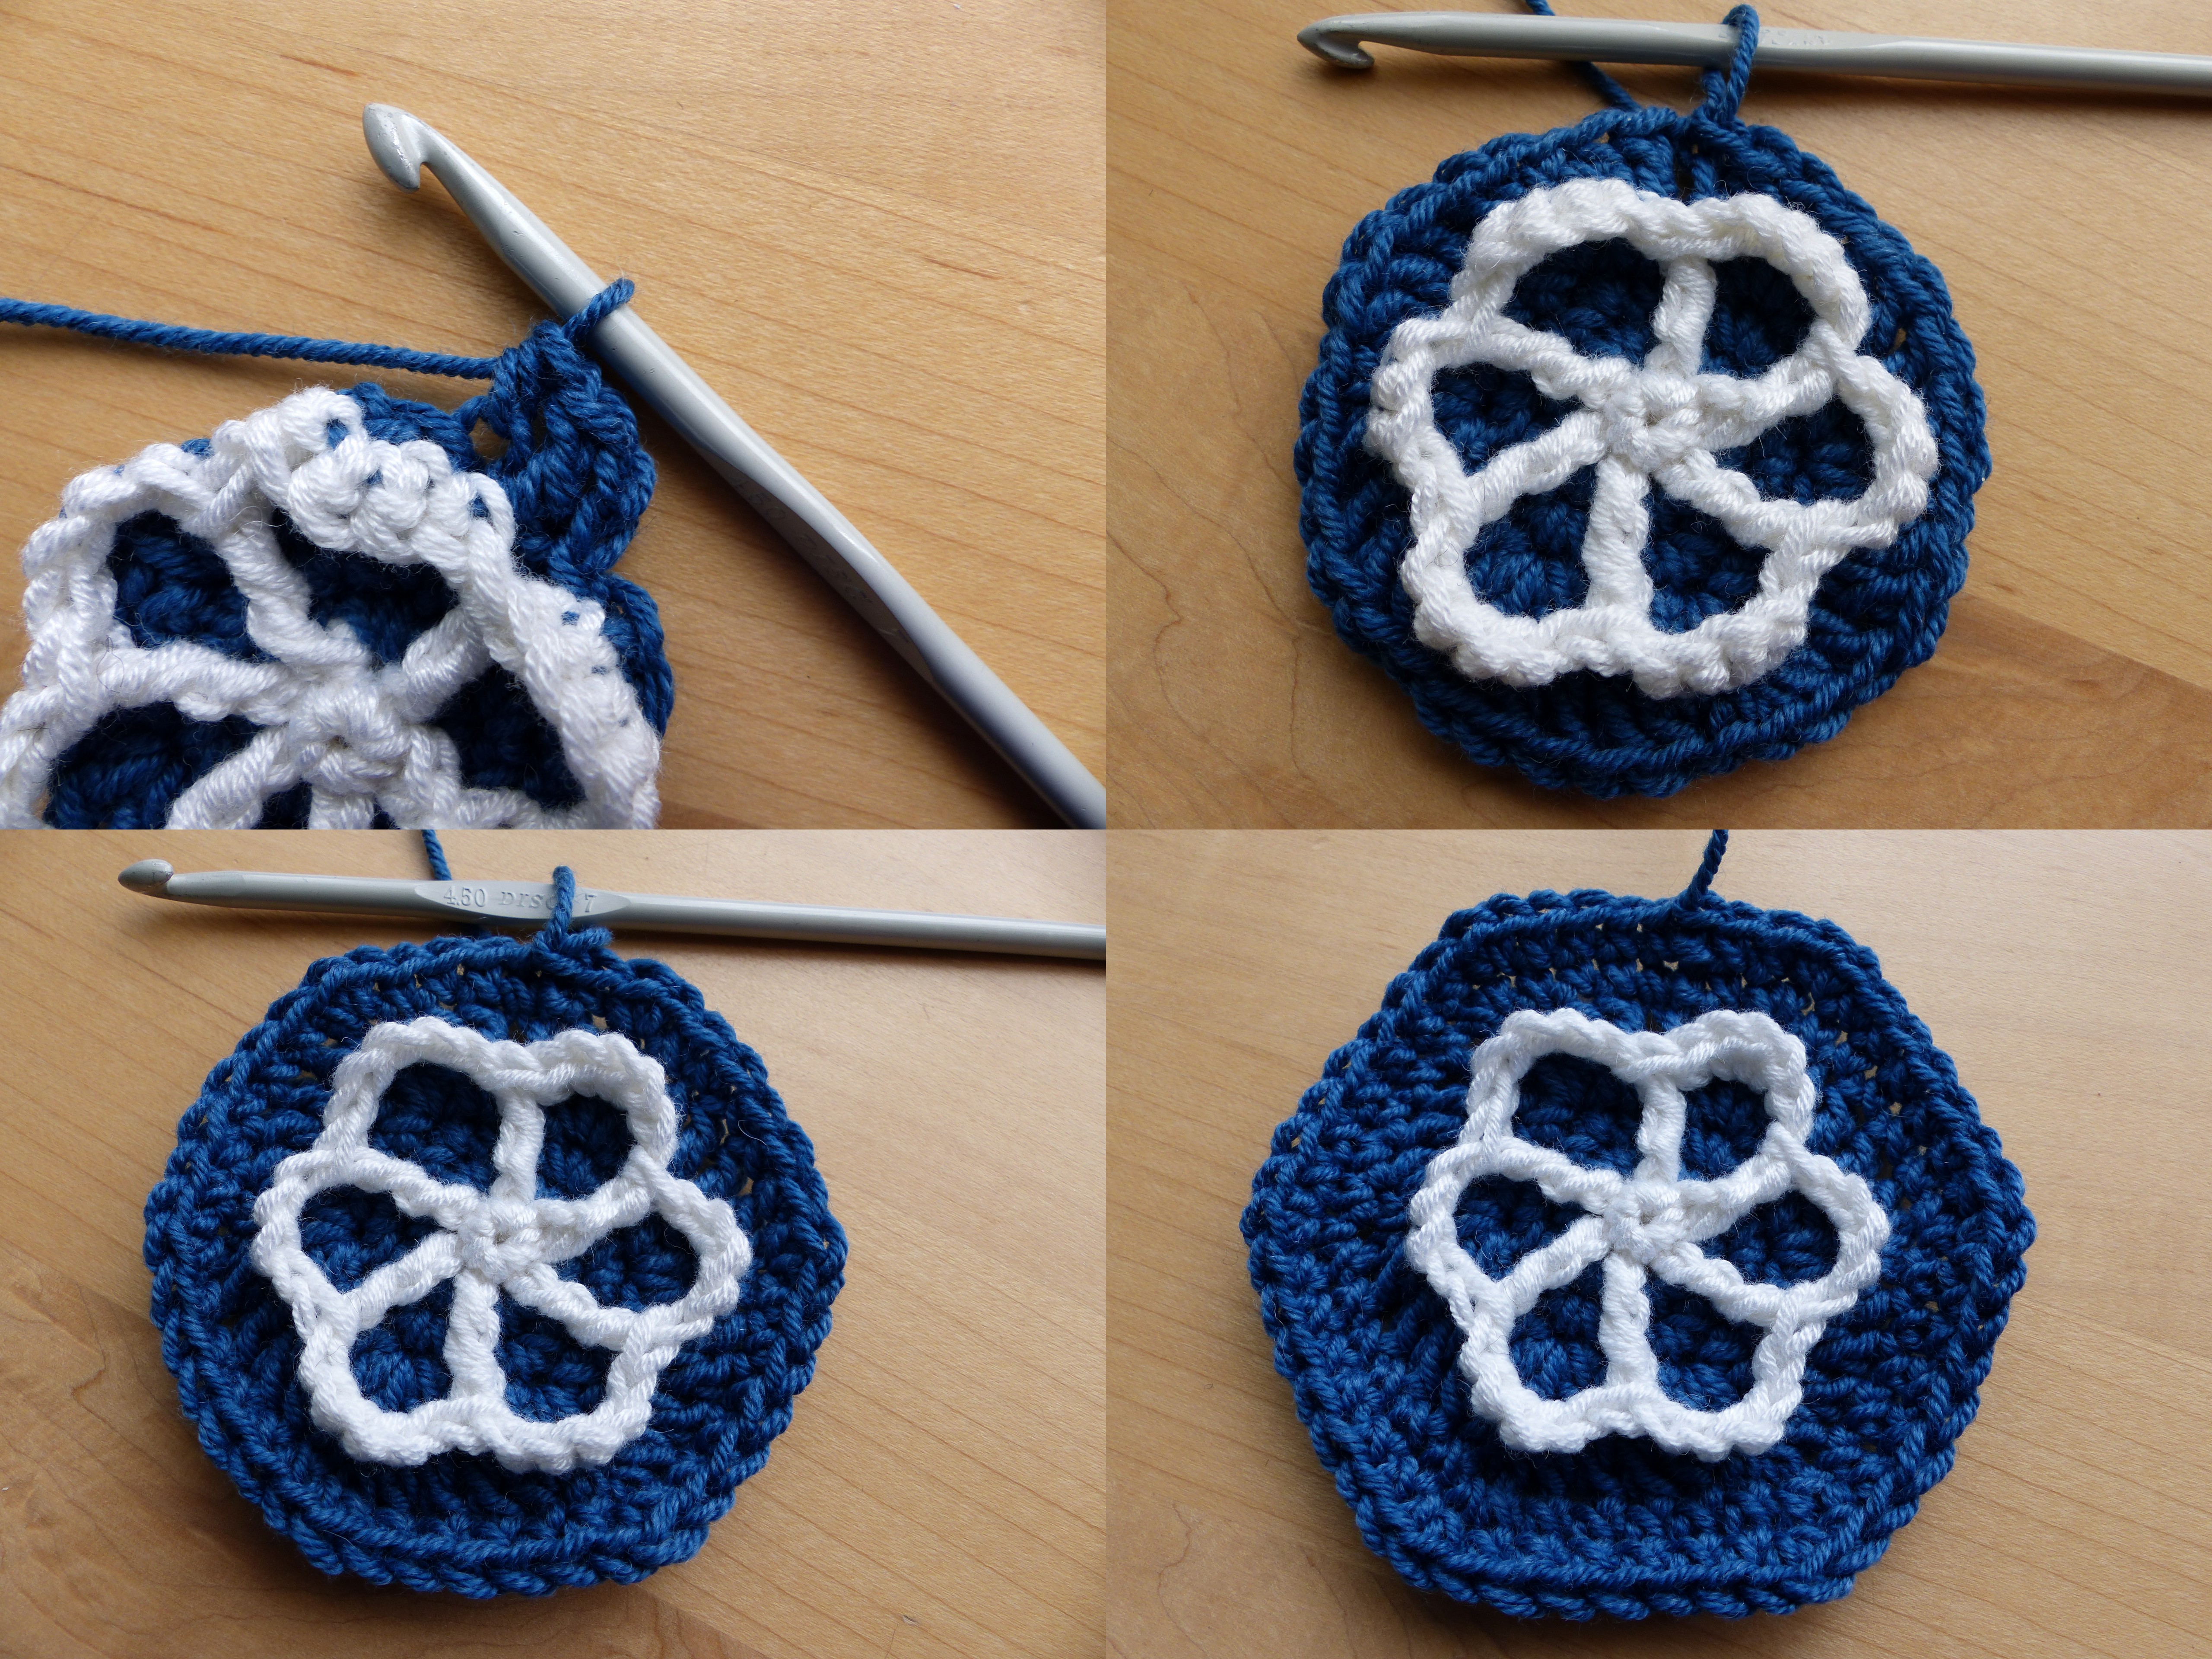
R2: ch1, 2sc into each st around, join with a sl-st (12sts)
R3: ch1 *sc, (2sc), repeat from * around, join with a sl-st (18sts)
R4: ch1, *sc, sc, (hdc, dc, hdc), repeat from *around, join with a sl-st (30 sts)
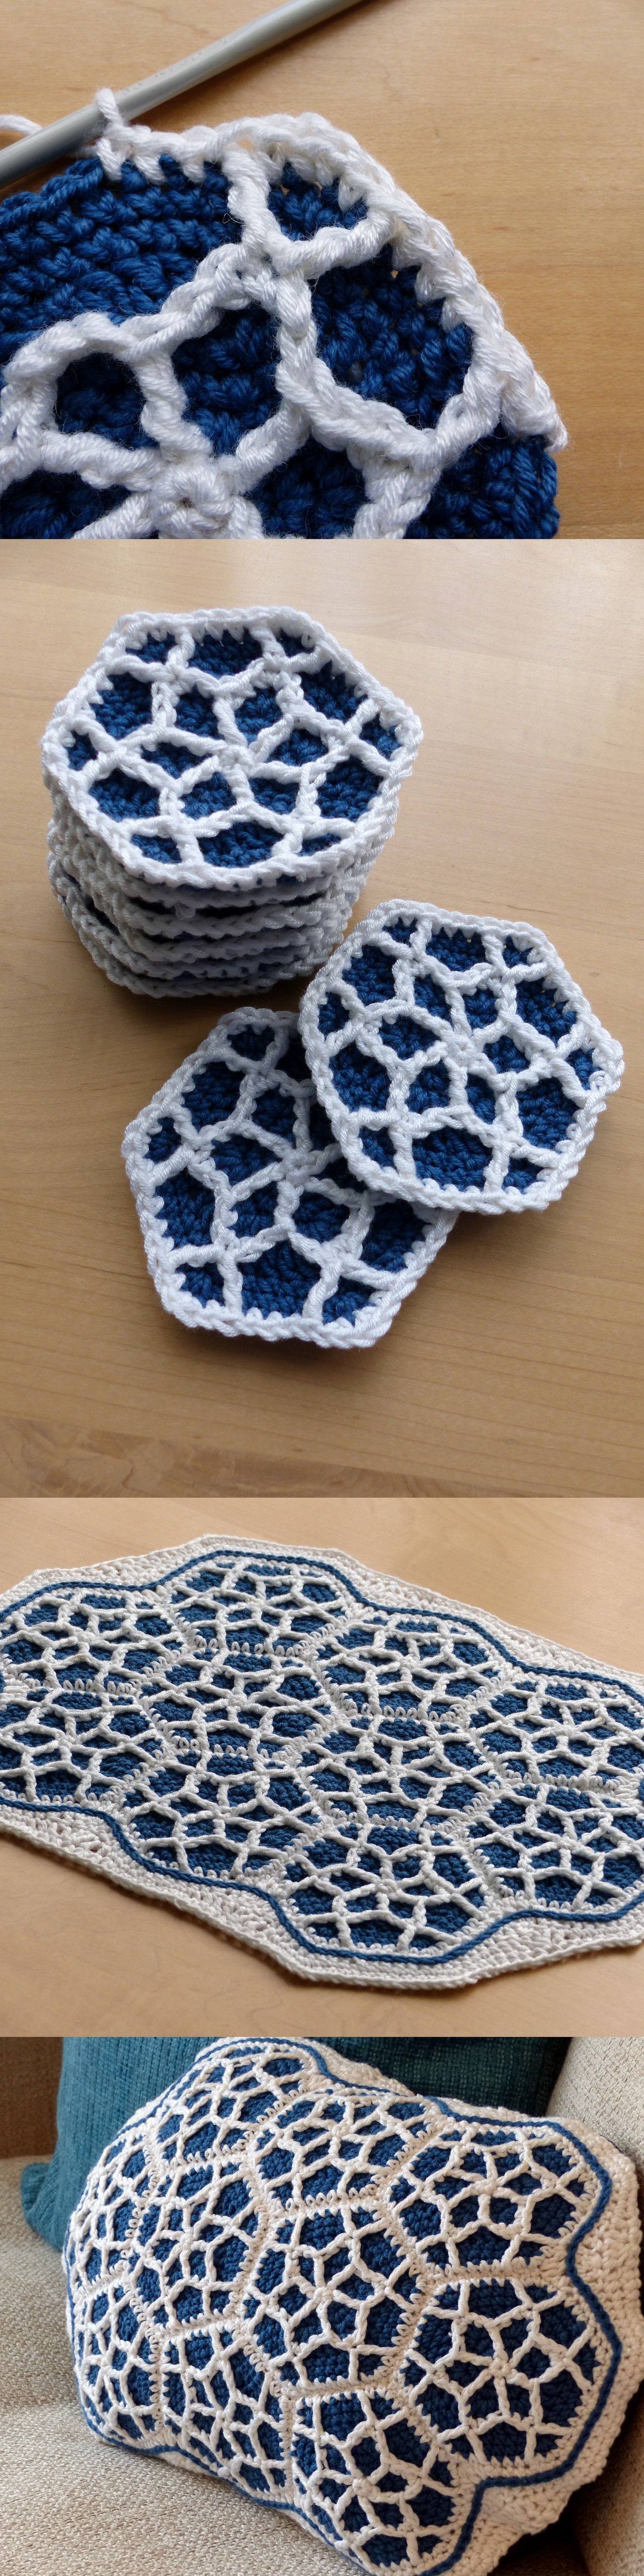
Moroccan Hexagon Motif Rounds 1-4 – Free Crochet Pattern by Make My Day Creative
Do not fasten off blue yarn as we will come back to this later. Join the white yarn into the front loop only (f.l.o) of the next hdc st and ch1. Work round 5 in the f.l.o.
R5: *sc in hdc, (3sc) in dc, sc in hdc, fptr about sc post in R1 (use whichever post is most directly below), sk next st (so that both sc sts in R4 remain unworked), repeat from * around, join with a sl-st (36sts in R5). Fasten off white and weave in white ends now if you like, to keep things neat.
Moroccan Hexagon Motif Round 5 – Free Crochet Pattern by Make My Day Creative
Pick up the blue yarn from where you left off. Work R6 in the unused sc sts of R4 and the back loops left unworked by R5.
R6: ch2 (counts as dc), *dc, hdc, (2sc), hdc, dc, repeat from * around omitting the final dc and join with a sl-st (36 sts)
R7: ch1, 4sc, *(2sc), 5sc, repeat from * 4 more times, (2sc), sc, join with a sl-st (42sts)
R8: ch1, 4sc, *(2sc), 6sc, repeat from * 4 more times, (2sc), 2sc, join with a sl-st (48sts)
Moroccan Hexagon Motif Rounds 6 to 8 – Free Crochet Pattern by Make My Day Creative
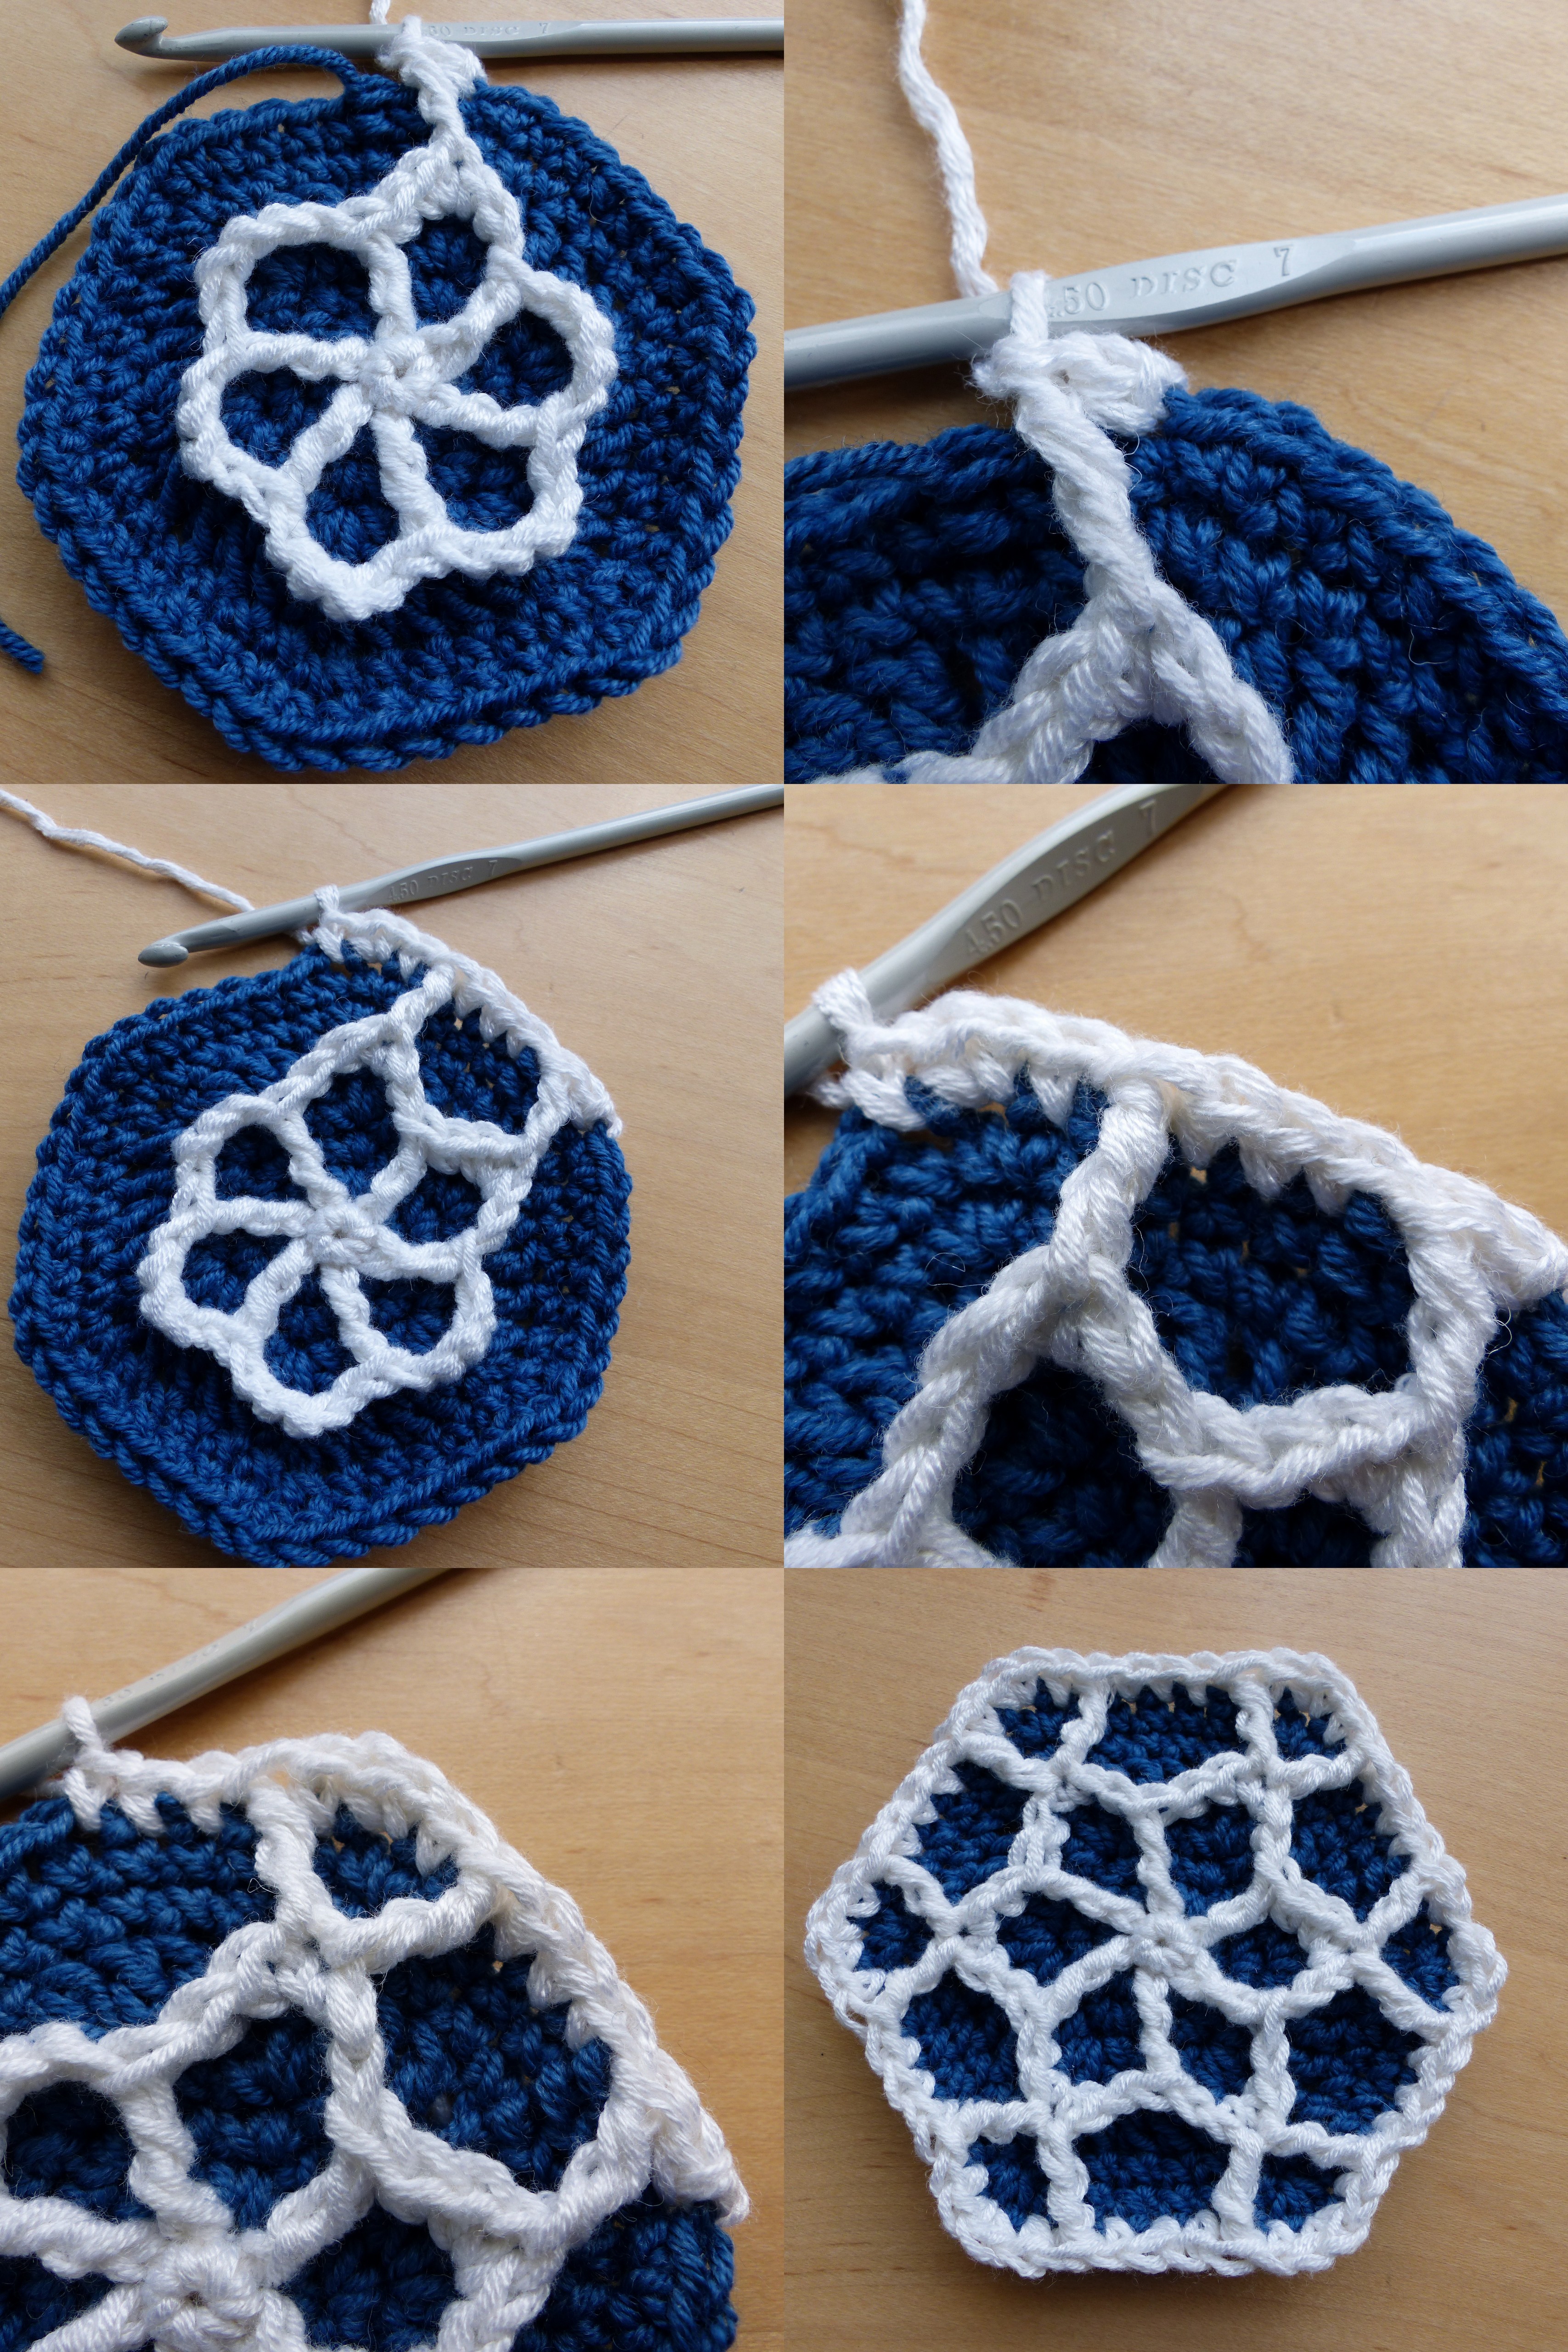
Fasten off blue and rejoin white into the first st after a (2sc) group, ch1.
When working the fptr in round 9, work the first one into the centre sc of the (3sc) group made in R5 which is angled slightly backwards of where you are. Work the second into the centre sc of the (3sc) group made in R5 which is angled slightly forward of where you are. When you work the next fptrc do the same – there will end up being 2fptr in each sc around.
R9: *sc, fptr, 3sc, fptr, sc, (2sc), repeat from * 5 more times, join with a sl-st (54 sts).
Moroccan Hexagon Motif Round 9 – Free Crochet Pattern by Make My Day Creative
Fasten off and weave in ends.
Finishing:
Block your motifs using your preferred method for your yarn choice. Stitch together using your preferred joining technique. I slip stitched my hexagons together on the reverse to give a quilted effect.

Moroccan Hexagon Motif – Blocking and Making Up – Free Crochet Pattern by Make My Day Creative
To make a cushion cover like mine, single crochet around the joined hexagons, working a hdc2tog, dc3tog, hdc2tog into the 7 stitches centred at each inverted corner, to smooth out the edges. Work 2sc into each regular corner as before. Work as many rounds as you like. I also added a round of surface crochet in blue around my hexagons, worked in slip stitch over each post of each stitch around.
So, what will you make with your motifs? And what colours will you choose for yours?


Very interesting! It’s a long time since i’ve seen something so new to me .i’d also make it in white and blue like Azuleros tiles.Bravo !
It is one of my favourite colour combinations :)
Genius :)
Thanks! :)
This is so beautiful I can’t wait to make it.
Thank you! I hope you enjoy it :)
Beautiful! Thanks for sharing the pattern! <3
Thank you! :)
This is fantastic! Well done!
Thank you Meladora! :)
Beautiful and a clever pattern!
Thanks! :)
So beautifull!!! Thanks fot the instructions!
Thank you! :)
Thank you so much for this pattern, I just need to put it on my to-do-list!
I’m glad you like it! And it’s quite quick to make 10 hexagons :)
Make a video
Send me a free day and I’d be happy to :)
Reblogged this on banneh and commented:
I can’t wait to get started on this beauty!
I’m glad you like it! :)
This is completely beautiful! Thanks so much for sharing the “How to” & pattern.
Thank you! I’m glad you like it :)
Wow! Love this Esther!
Would love to try it with t-shirt yarn.
I’d love to see how that turned out! :)
grazie grazie mille mi piace moltissimo
I’m glad you like it! :)
I absolutely love this, I can not wait to start it, will also do mine in Blue an white, thank you for this pattern Tutorial. <3
Glad you like it Sonja! A classic colour combination :)
Pingback: Free Crochet Pattern: Moroccan Cushion – Make It Crochet
I am planning on stopping short of making the cushion and just sewing the hexagons together and making them placemats for eating at the dinning room table. I am also doing white and a dark blue. I love this pattern and the instructions are very well done! I have already made 4 hexagons. I have a lot more to do! Thanks for sharing your wonderful creation!
Oooh that’s a nice idea! You could do single ones for coasters too :) Glad you are enjoying it!
That is the plan! So I am trying to decide how to stitch/sew the hexagons together…. You said you slip stitched them together. Did that leave a bump on the backside? I cant decide if just doing a whip stitch will help it lay flat better since they will be placemats and not cushions :) What do you think? :) Thanks!
Yes the slip stitching did leave a bump on the reverse, which I liked for the quilting effect on my cushion. But I’d definitely go for whip stitching for place mats myself. :)
Pingback: Moroccan Motif | Gitte Kim's Kreative Hjørne
Reblogged this on adornosmalulu.
Pingback: Hexagon Crochet Inspiration