Happy New Year to you all! After all that hard work crafting for Christmas, why not treat yourself to making one of my latest crochet patterns?

Atlantic Lace Shawl – with beaded edge. Free crochet pattern from Make My Day Creative
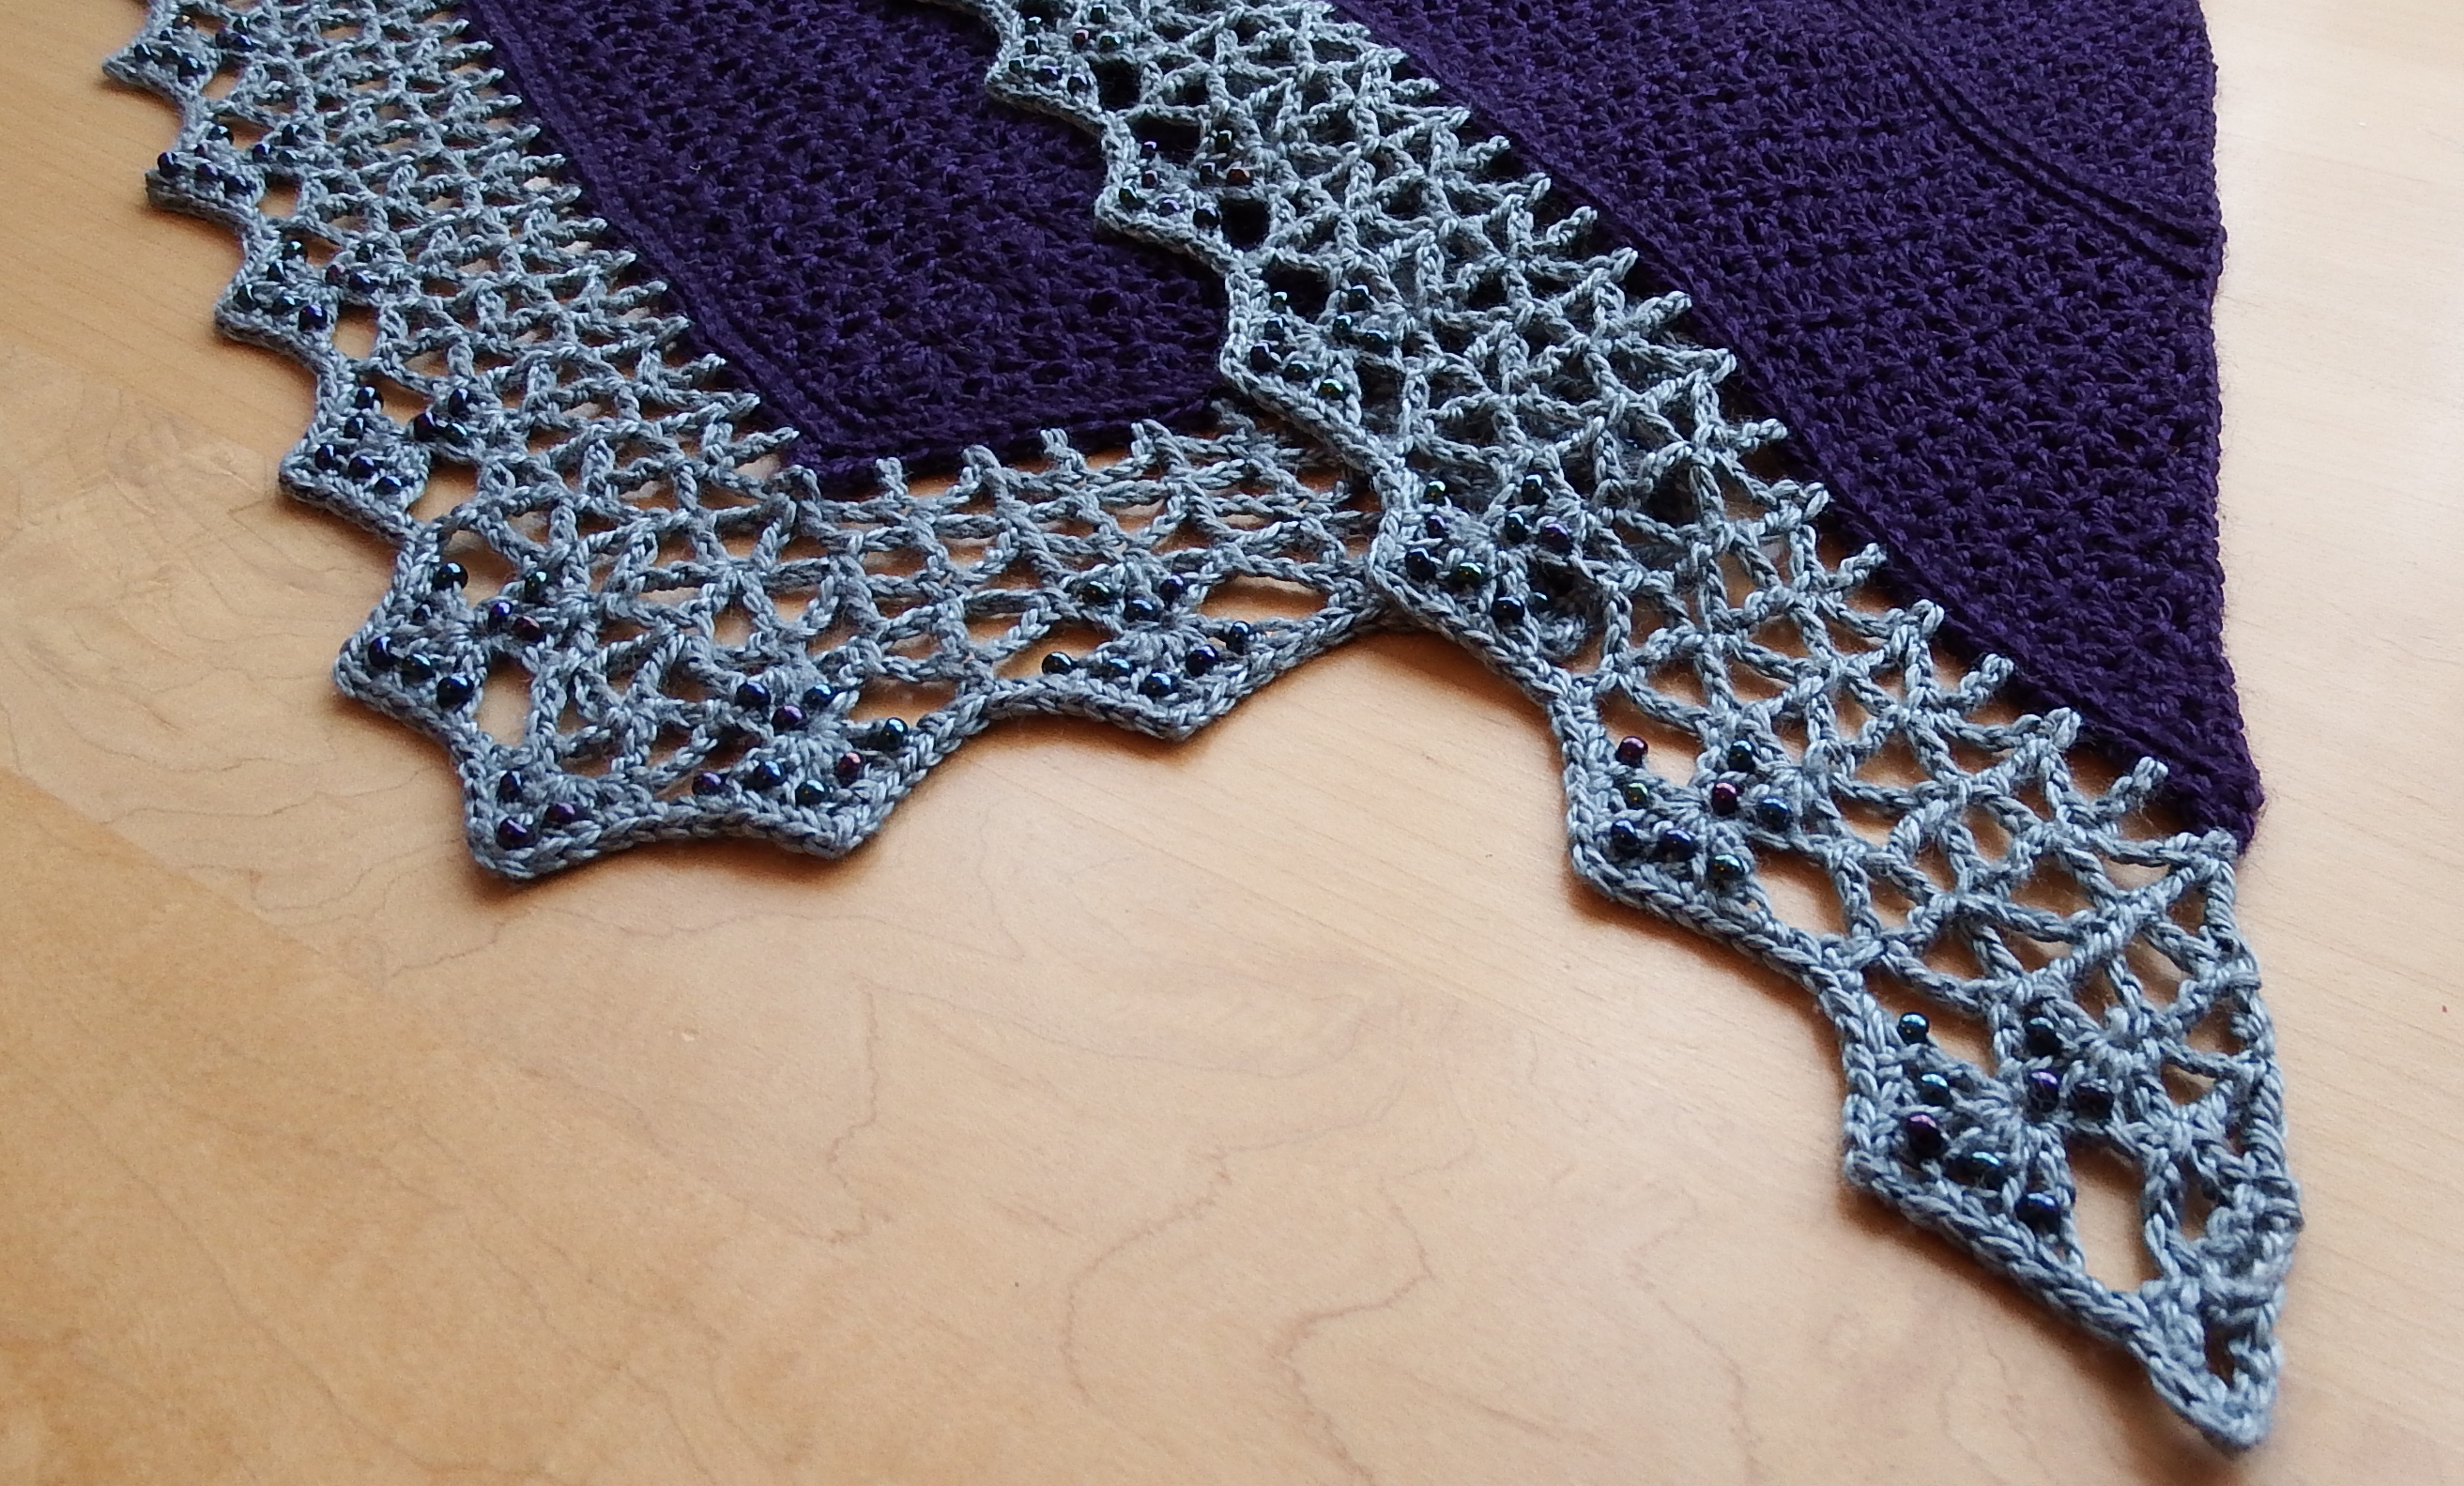
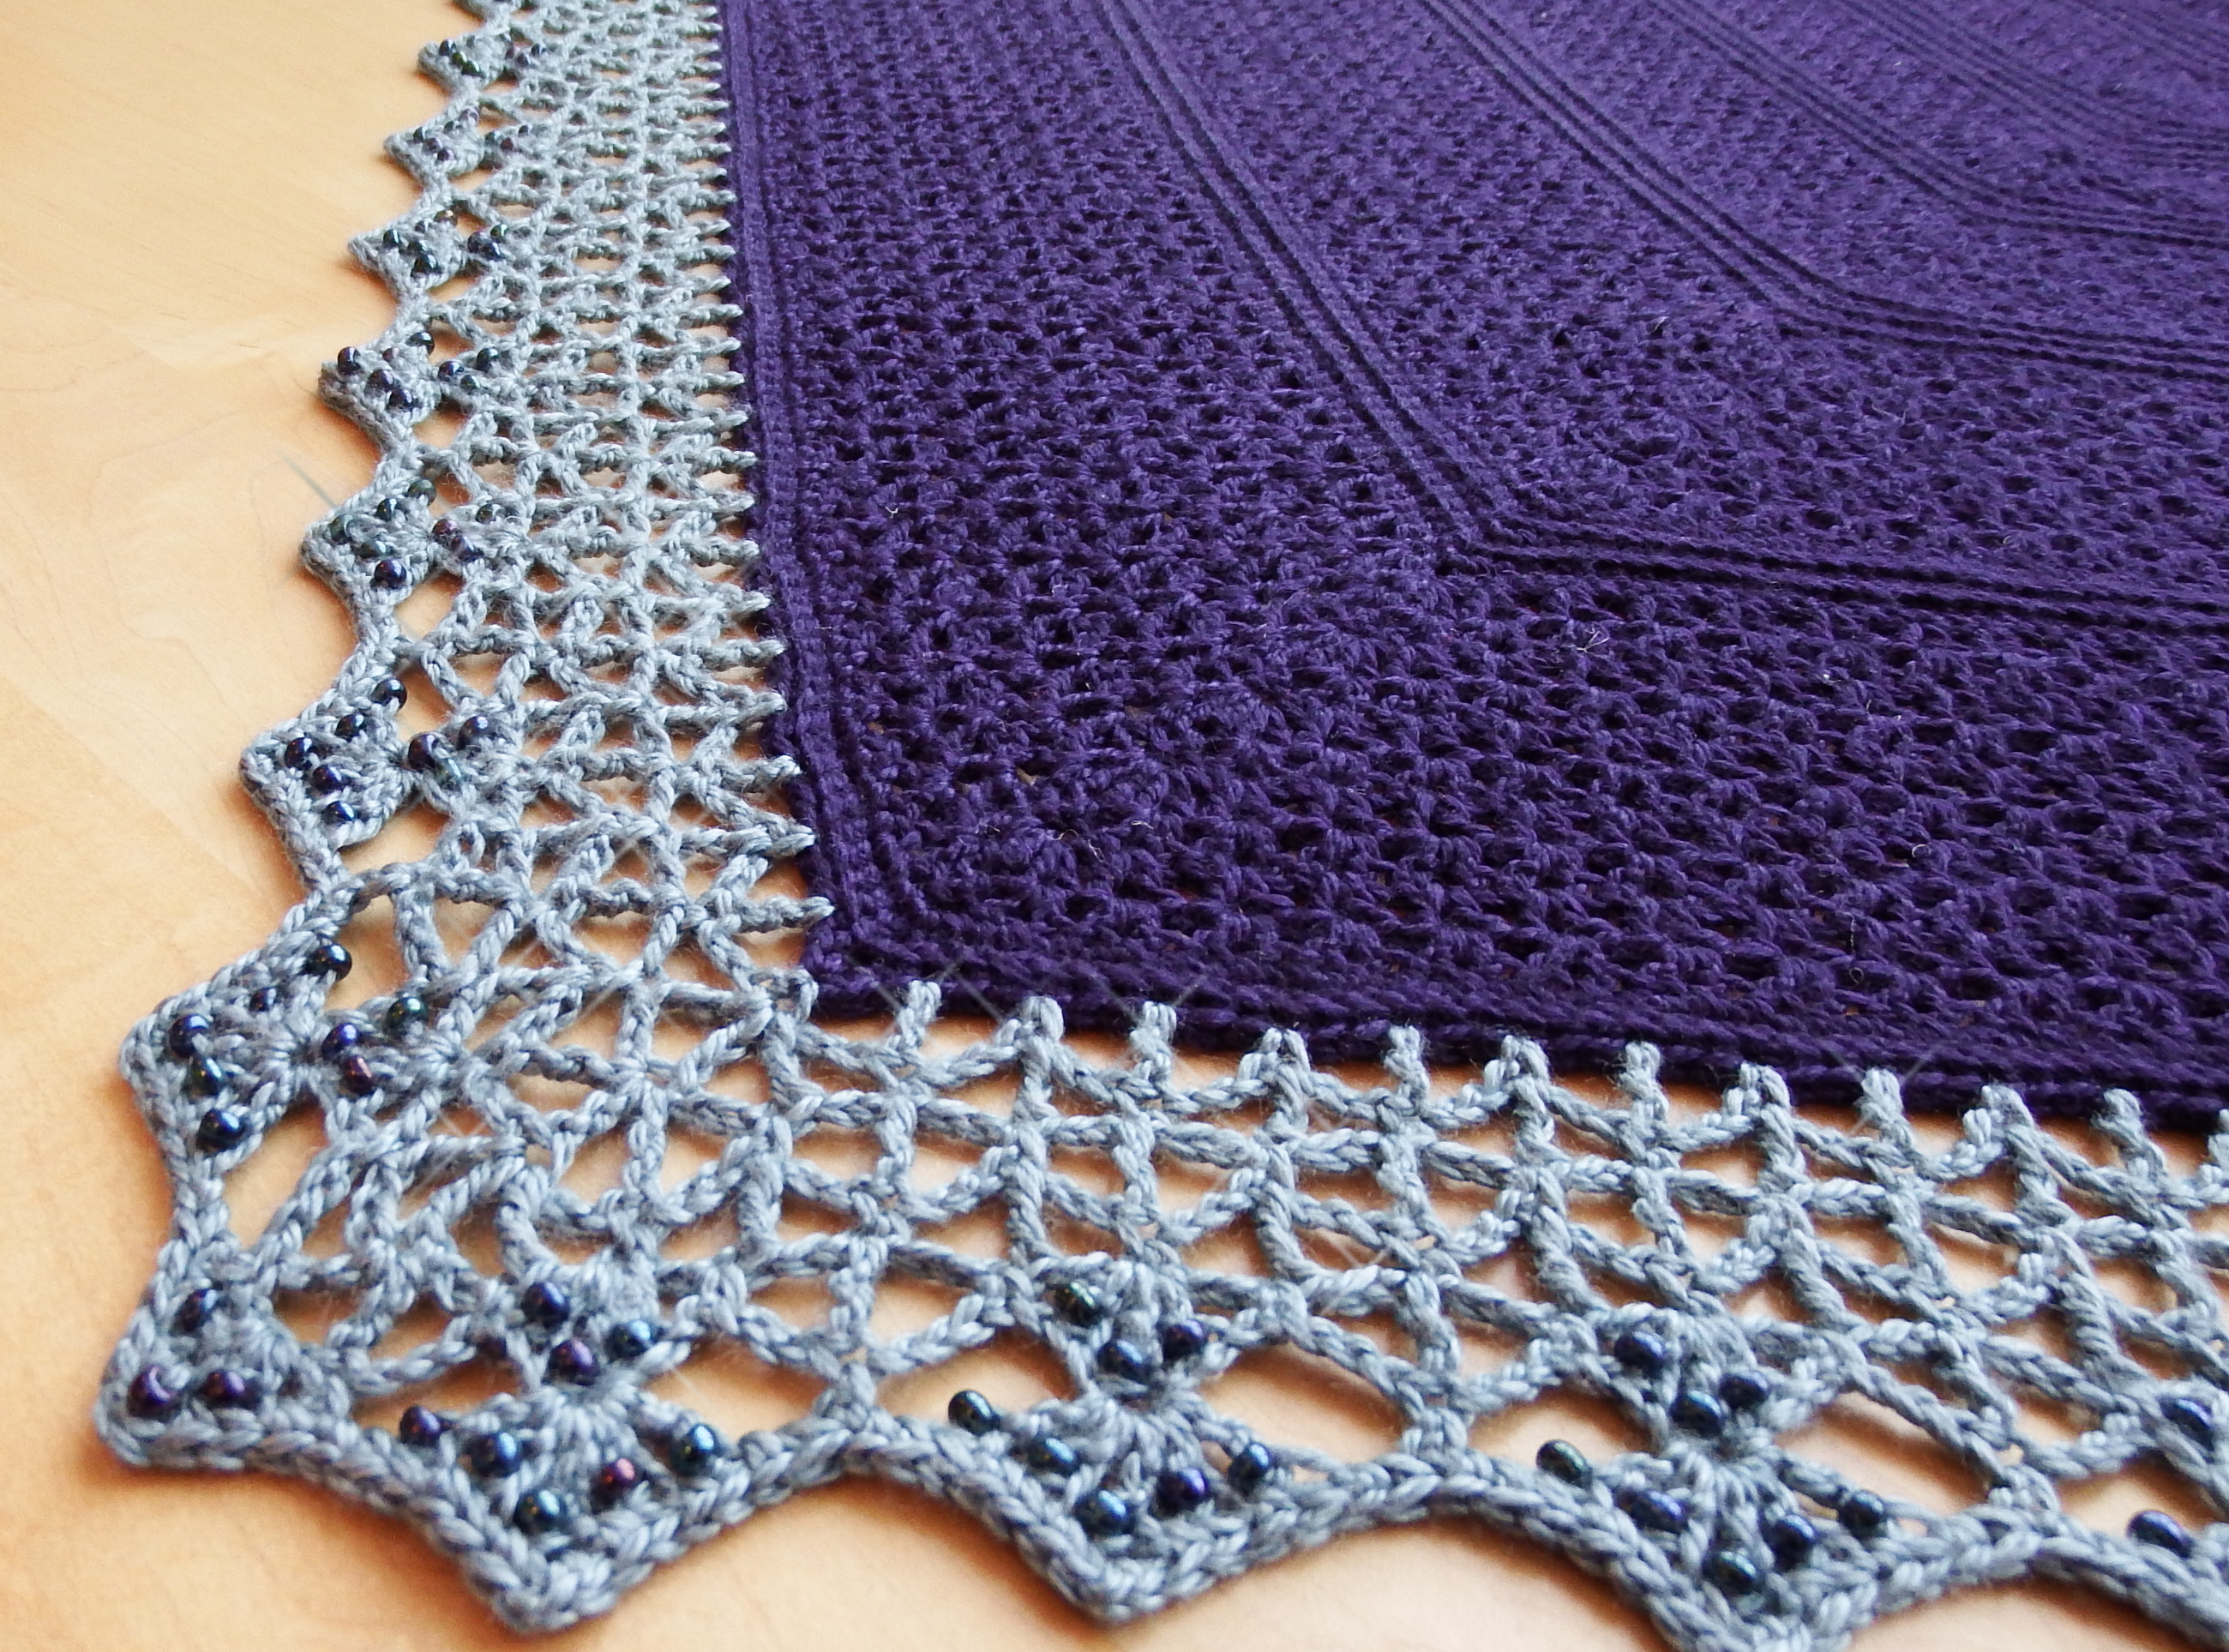
 I’ve named this shawl “Atlantic” because I crocheted the majority of it whilst on the plane over this ocean during my recent trip to North America. I think it’s an apt name since the deep inky purple colour of this yarn is not unlike the ocean itself at night. I chose a grey border to represent cresting waves and added sprays of petrol blue-purple beads to keep with the theme.

Atlantic lace shawl with beaded crochet border- free pattern
The pattern had to be simple so that it didn’t take much concentration whilst spending so much time in transit. In fact it’s not at all dissimilar to my Easy Textured Cowl and Fingerless Gloves – but in a silky sock weight fibre the effect is quite different!
Atlantic lace shawl beaded crochet border- free pattern
The beaded border is also quite easy to do – if you haven’t tried it before then give it a go!
Scroll down for pdf patterns! (US and UK notation)
Materials:
730m (200g) fyberspates scrumptious 4ply sock yarn in Dandelion and Burdock (Dark Purple)
110m (32g) fyberspates scrumptious 4ply sock yarn in Water (Grey Border)
3mm hook
192 Beads (optional)
Stitch markers (at least one for the central stitch, and more to help with counting if you like)
Pattern:
The pattern is worked from the centre top out in rows. Increases are made at the start, centre and end of the rows. Ch1 at the start of an sc row does not count as a stitch. The first 3 chains at the start of a v-stitch row count as a dc stitch. Please see the pdf pattern for full stitch counts (omitted here for clarity). Refer to the pdf pattern for charts also.
The first section forms a Ridged Single Crochet stripe:
Aside from the first row of single crochet in any stripe, work in the back loop only to make the ridges.
R1: ch2, 5sc in 2nd ch from hook (5sts).
Place a stitch marker in the central stitch – mark the central stitch throughout the project.
R2: ch1, turn, (2sc) in first st, sc, (3sc) in centre stitch, sc, (2sc) in final stitch (9sts).
R3-9: ch1, turn, (2sc) in first st, sc in each st until the marked central stitch, (3sc) in centre stitch, sc in each st until the final stitch, (2sc) in final stitch (37sts at end of R9).

Main stitch pattern on Atlantic lace shawl with beaded crochet border- free pattern
The second section forms a V-stitch stripe:
R10: ch3, turn, *(dc, ch1, dc) in next stitch, sk2 sts, repeat from * until there is one stitch before the central stitch, sk1 st, (2dc, tr,2dc) in central st, sk1 st, *(dc, ch1, dc) in next stitch, sk2 sts, repeat from * until one stitch remains, dc in final stitch (43 sts).
R11: ch4, turn, dc in same st (this counts as a v-stitch), *(dc, ch1, dc) in next chain space, repeat from * until 2sts before central st, (dc, ch1, dc) in the space between these two dc sts, dc in central st, , (dc, ch1, dc) in the space between the next two dc sts, *(dc, ch1, dc) in next chain space, repeat from * into each remaining ch-sp, (dc, ch1, dc) in final st (this is the top of the turning chain from the last row) (49sts)
R12: ch3, turn, *(dc, ch1, dc) in next ch-sp, repeat from * until the central stitch, (2dc, tr,2dc) in central st, *(dc, ch1, dc) in next ch-sp, repeat from * into each remaining ch-sp, dc in final stitch (this is the top of the turning chain from the last row) (55sts)
R13: Repeat R11 (61sts)
Now work the second Ridged Single Crochet Stripe (R14-22):
R14: Repeat R3, but through both loops of the sts (or into the ch-sp as appropriate) (65sts)
R15-22: Repeat R3 working in the back loops only (97sts at the end of R22)
Continue working stripes as follows:
R23-26: Repeat R10-13 (4 rows of v-stitch) (121 sts at end of R26)
R27-35: Repeat R14-22 (9 rows of sc) (157sts at end of R35)
R36-39: Repeat R10-13 (4 rows of v-stitch) (181 sts at end of R39)
R40-48: Repeat R14-22 (9 rows of sc) (217sts at end of R48)
R49-54: Repeat R10-13 and then R12 and R13 (6 rows of v-stitch) (253 sts at end of R54)
R55-60: Repeat R14-19 (6 rows of sc) (277sts at end of R60)
R61-68: Repeat R10-13 and then R12-13 twice (8 rows of v-stitch) (325 sts at end of R68)
R69-74: Repeat R14-19 (6 rows of sc) (349sts at end of R74)
R75-84: Repeat R10-13 and then R12-13 three times (10 rows of v-stitch) (409 sts at end of R84)
R85-87: Repeat R14-16 (3 rows of sc) (421sts at end of R87)
At the end of R87 you will have 210 sts on each side and one central stitch. Ch1 and rotate to work across the top edge of the shawl.
Sc evenly along the top edge (to neaten this edge). (Alternately skip this step and instead single crochet along the top edge in the border colour once you have completed the border.)
Fasten off and weave in ends.
Border:
Read the notes on adding beads before starting the border.
Adding Beads:
I suggest threading on the beads after Edge Row 4 by fastening off the yarn, threading on the beads, and then rejoining. This saves on constantly sliding the beads down the yarn. However you may thread them on before you start the border if you prefer.
All beads are placed either on a dc or tr post by working as follows: work the stitch as usual until 2 loops remain on hook. Slide up a bead close to the work. Yarn over hook (making sure the bead is caught behind the hook) and draw through both loops to complete the stitch. The bead will be on one side of the post of the stitch you have just worked.
Beaded Shell 1:
(Ch1, dc,ch1, tr, ch1, dc, ch1) in to the next sc stitch. Insert a bead on each dc and tr so that 3 beads are inserted.
Beaded Shell 2:
(Ch2, tr, ch1, dc, ch1, tr, ch1, dc, ch1, tr, ch2) into the tr st made in Beaded Shell 1 in the row below. Insert a bead on each tr and dc made so that 5 beads are inserted.
Join the yarn to the final stitch of R87.
Edge Row 1 (ER1): Ch1, *sc, ch3, sk2sts, tr, ch3, sk2sts, repeat from * to end (there will be a sc in the central st – keep this marked).
ER2: ch6, turn, *tr in sc, ch2, sc in tr, ch2, repeat from * until you have just worked a tr into the central st, (ch3, dtr, ch3, tr) also into central st, *ch2, sc in tr, ch2,tr in sc, repeat from * to end, ch2, tr into final st (so there are two tr’s in this stitch).

Atlantic lace shawl beaded crochet border- free pattern
ER3: Ch6, turn, tr into tr, ch3, sc into tr, ch3, *tr into sc, ch3, sc into tr, ch3, repeat from *until central stitch, (tr, ch3, dtr, ch3, tr) into central st, *ch3, sc into tr, ch3, tr in sc, repeat from *to end, ch3, tr in 3rd ch of the ch6 loop, ch3, dc in same ch.
ER4: ch6, turn, tr in dc just made, ch2, sc in tr, ch2, *tr in sc, ch2, sc in tr, ch2, repeat from * until you have just worked a tr into the central st, (ch3, dtr, ch3, tr) also into central st, *ch2, sc in tr, ch2,tr in sc, repeat from * to end, *ch2, tr into 3rd ch of the ch6 loop, repeat from *(so there are two tr’s in this stitch).
Fasten off and thread on the beads (if you have not already threaded them on and are adding beads). Rejoin the yarn.
ER5: Ch6, turn, tr into tr, ch3, sc into tr, Beaded Shell 1, sc into tr, *ch3, tr into sc, ch3, sc into tr, Beaded Shell 1, sc into tr, repeat from *until central stitch, (ch3, tr, ch3, tr, ch3) into central st, sc in tr, Beaded Shell 1, *ch3, tr into sc, ch3, sc in tr, Beaded Shell 1, repeat from * to end, ch3, tr in 3rd ch of the ch6 loop, ch3, dc in same ch.
You will notice that the beads are appearing on one side of the work. As we want all the beads to appear on the same side, fasten off and rejoin into the first st made on ER5 to work in the same direction. If you are not adding beads, simply turn and work back along ER5 as usual.
ER6: ch6, *sc in next tr, Beaded Shell 2, repeat from * to centre, sc in first tr of centre two tr’s, work a Beaded Shell 1 into the centre of the ch3 between the two tr’s, sc in tr, *Beaded Shell 2, sc in next tr, repeat from * to end, ch3, tr into 3rd of the turning ch from row below.
ER7: ch1, turn, (2sc) in ch3 sp (i.e. before the first sc), *(2sc) in next ch sp, ch1, sc in next ch-sp, ch1, sc in next ch-sp (before the central tr of the beaded shell 2), ch1, sc in tr, ch1, sc in ch-sp (directly after the central tr), ch1, sc in next ch-sp, ch1, (2sc) in next ch-sp, repeat from * to centre, sc in next ch-sp, ch1, sc in next ch-sp (before the central tr of the beaded shell 1), ch1, sc in tr, ch1, sc in ch-sp (directly after the central tr), ch1, sc in next ch-sp, *(2sc) in next ch sp, ch1, sc in next ch-sp, ch1, sc in next ch-sp (before the central tr of the beaded shell 2), ch1, sc in tr, ch1, sc in ch-sp (directly after the central tr), ch1, sc in next ch-sp, ch1, (2sc) in next ch-sp, repeat from * to end, (2sc) in ch-sp, sc in 3rd ch.
Fasten off. Weave in all ends.
Atlantic lace shawl beaded crochet border- free pattern
Block well to open out the lace v-stitch stripes and border edge (this ensures the edge will drape well).


It is just beautiful! I just love the edging with beads.
Thanks Deborah! :)
Wonderful! 😍
Thank you!
Lovely and I’m definitely going to have to try it when I can get the right yarn for it. By the way, the first border chart link is currently going to the main link instead (though I figured out what the name must be and got it by changing the link for the second border PDF to have a 1 instead of a 2 in it).
I’m glad you like it! And thanks I’ll fix the link shortly :)
Your work is very beautiful & shows creativity..
Thank you Debrah! :)
Beautiful!
Thank you!
It’s so *purty*! And thank you for having a North American terminology version of the pattern.
However, the link to the “Atlantic Lace Shawl Border 1” points (currently) to the main body PDF. But, I got that part by cutting, pasting, and editing the part 2 PDF URL. But, some other person might not know (or be able) to do this.
Hi Ped! Thanks for your comment! I have fixed the link now! Sorry about that. :)
You’re welcome. Glad I could help!
This is so lovely! Maybe I will make this when I’m done crocheting your Multiplicity Shawl
Thank you! I hope you’re enjoying Multiplicty too :)
Gorgeous! Thank you for sharing.
You’re welcome Vanessa! :)
Thank you for the lovely Atlantic shawl pattern. It looks difficult, but I will try it. In the US, we don’t have fyberspates yarn, but we do have sock yarn. I will try to match the colors, as they are so beautiful.
You’re welcome! I think this is worth a try as the pattern is quite straightforward so I hope you give it a go! Any problems, let me know :) Good look getting the yarn you want!
Another fab pattern from you, that I MUST try out! I think I will make one for a dear friend of mine, she always makes me the most beautiful things.
You are great!
Thank you Stella! I hope she likes it :)
Love this.. especially the edging. i have been searching for an edging for a baby blanket and this looks like a possibility (without the beads) so delicate. Thank you for sharing!! :)
Pingback: showing off (again) | Willow's Corner
Es precioso,me gustaría seguirlo por un gráfico,muchas gracias.
I’m glad you like this Maria! :)
Pingback: Pattern Gallery: Scarves for Spring | Morale Fiber
Hi Esther, this is Regina from Morale Fiber – thanks for the shout-out! I mentioned in my post that I will soon be completing a project using this pattern – I plan on posting it in my blog before the week is out. Just wanted to say thanks personally for this awesome pattern! One question – do crafters have permission to sell items made from this design? Thanks,
Regina (MF)
Hi Regina! I’m glad you like this and thanks for sharing the link! :) Yes you can sell items made from any of my designs. Love your blog name by the way!
Pingback: The Sweet and the Sass | Morale Fiber
Pingback: Pacific Rim Shawl | Make My Day Creative
Hi! I am trying to finish this shawl. Since I bought a 1270m of yarn with different colors, I wanted to use it all for the shawl. So I added 12 extra rows of V-stitch and 3 rows of dc’s, since you described this in the comments. Now I’m doing row 5 (double checked if I got it right), but I don’t finish the way you drew the pattern. So, how can I solve this problem? I’ve counted all stitches in the dc and V-stitch rows and according to the drawn pattern it should be OK.
Hi Joyce! You can add rows as you describe and the pattern will work. As long as you add a multiple of 2 V-stitch rows and/or a multiple of 3 sc (dc in UK terms) rows it will be fine! When you say you are doing row 5 and you don’t finish as shown on the chart, do you have 21sts at this point? Remember that the ch1 at the start of a dc row (UK terminology) does not count as a stitch,
Pingback: How to Design Crochet Patterns: Triangular Shawl Bonus | Make My Day Creative
This is a fabulous pattern. A perfect use for the bamboo silk yarn I fell in love with! Do you know what the finished measurements for the main section are (before the border rows are added)? I’m running out of yarn, but I used a bigger hook, so mine’s a little bigger already. Thanks!
This is such a GORGEOUS pattern and so well written. I am so anxious to try it. I looked for your finished size but have not seen it. Can you tell me what the size is—with your sock yarn and hook, please? I only have a sport weight yarn available to use and am trying to decide what hook size to use. With the sport weight I am guessing perhaps a US G hook? I like the size of yours in the photos and do not want mine to be TOO large in comparison. Thank you so much for this and your other patterns that you so generously have shared. Carol Ann
Hi Carol! I’m glad you are looking forward to trying this pattern! The pattern is made from the centre top out which means you can just keep crocheting until it is your desired size, so you don’t need to worry about getting it right before you start. Mine was 142cm wide after blocking
Oh thank you! so much for answering so quickly! Glad to have your measurement and glad to feel confident about getting started with the materials I have on hand. I know I am going to love, love, love it!
No problem Carol! You caught me on a blog day :)
Pingback: 15 Free Triangular Shawl Crochet Patterns | Inklings and Tea
The shawl is absolutely beautiful, but I do want to point out that the bead count is way off. To do as the pattern states we need just over 300 beads, not 192. ER 5 uses 114 beads, and then ER6 needs 193, for a total of 307 beads. I also used WAY more yarn, probably 1300 yards to do the pattern with the exact stitch counts on a 3.25 mm hook. Yes, my hook is a tad bigger, but it should not nearly double the amount of yarn needed.
Hi Megan! You are right about the beads. I’m not sure what I was thinking, I have clearly done some dodgy maths there so thanks for pointing that out. I will update the pattern. Also, I have double checked the weight of my shawl and I have not made an error in the amount of yarn I used. There could be a couple of reasons for this – firstly, if you have not used the same yarn but one which is thicker, you will need a little more yarn to work each stitch as each loop has to go a little bit further. Over a shawl with this many stitches this is likely to add up! Also, as you say you have used a different hook size, and probably your gauge and my gauge are a little different so that could also explain the difference. This is probably reflected in your finished item size, which I would expect to come out a little bigger than mine. You should also note that I have used metres, not yards, and as 840m is 920yards the numbers are a little closer than you mentioned! In any case, I’m glad that you had enough yarn to finish your shawl and I hope you are enjoying wearing it.
This a nice pattern. :). Am working on it now. Just curious, how much does your finished shawl measure.
Thanks Lakshmi! I hope you are enjoying it :) Mine is 144cm accross – after blocking and including the border.
I knew I loved this pattern the first time I saw it. I finally have had a chance to actually use it — make the shawl — and love it even more!!! What a pure delight it is! My husband and everyone else that has seen it all say they like it the best of all of the shawls I have crocheted or knit. Wow! How is THAT for a compliment to the designer!!! Thank you again for such a special pattern. ( I used DK weight yarn and an “F” hook for this one. Finished measurements are approximately 61″ wingspan by 27″ center back neck to center back point. The next one will be in fingering weight and will be beaded).
I’m so pleased you like it Carol! And great to get all those compliments too, you must have done a good job with it :) Fab that you will use the pattern again too!