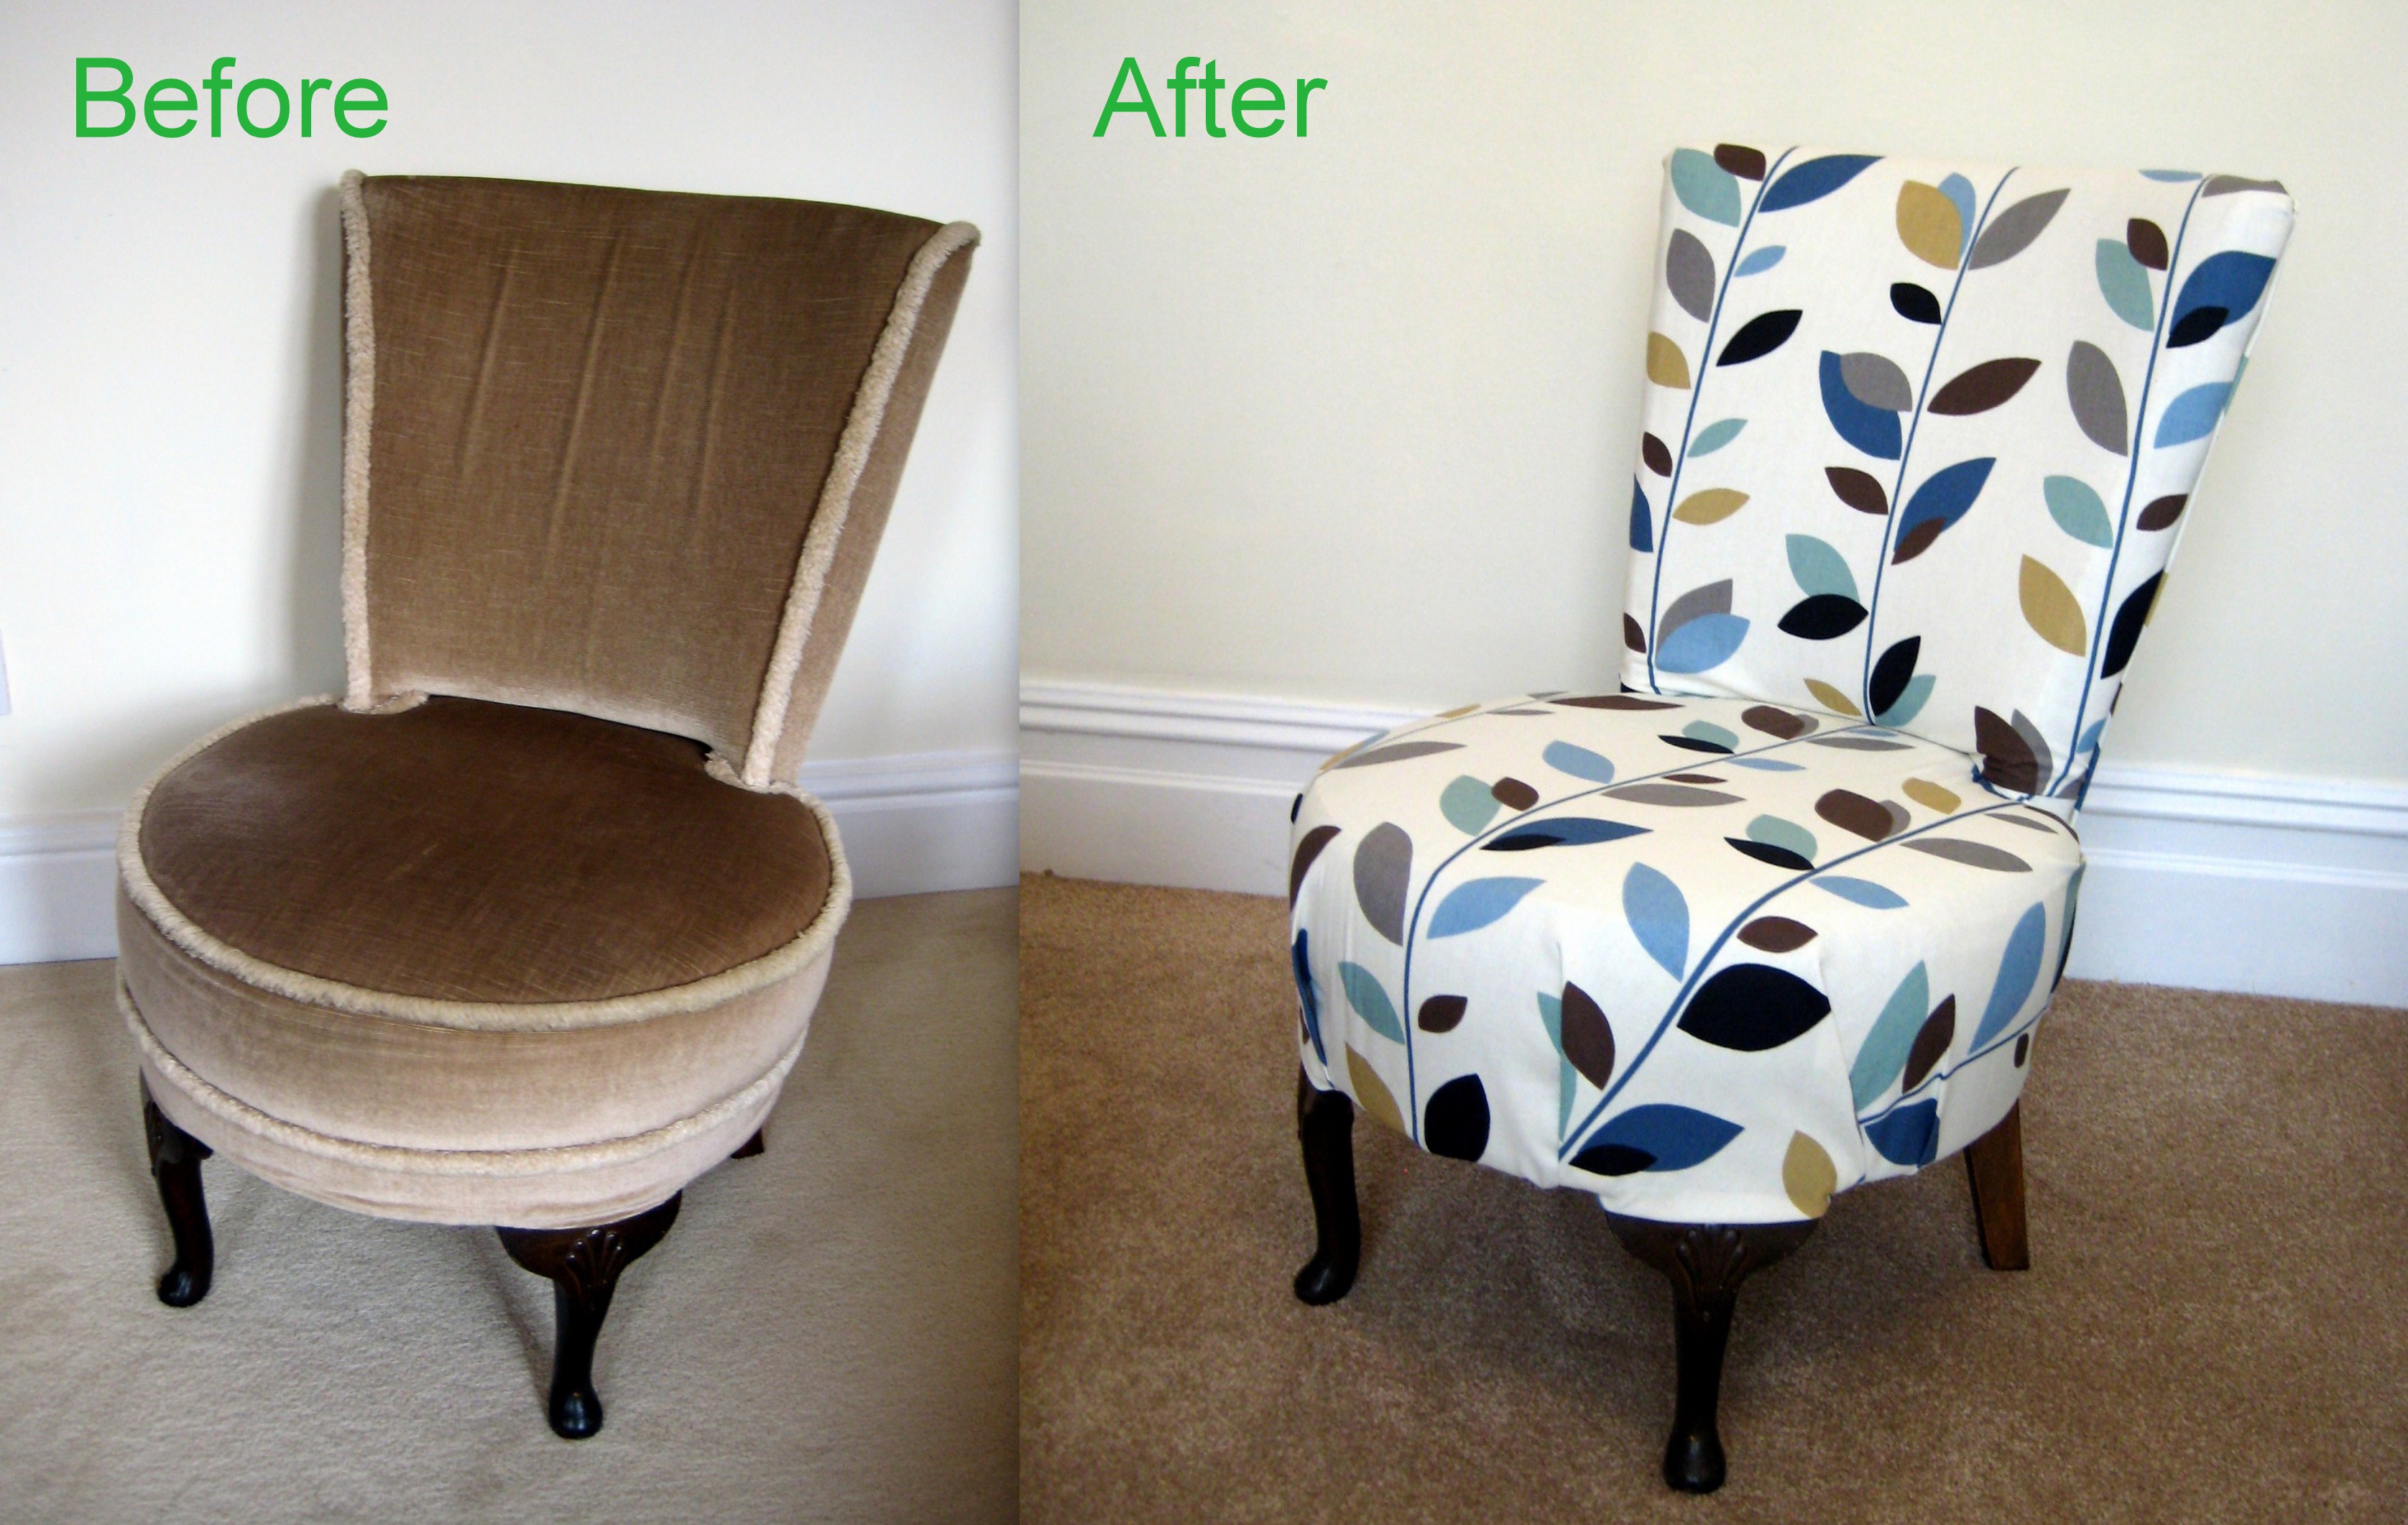
Before and after
This chair was inherited from my Great Aunty Marjorie (I have had a lot of aunts who are great in every sense of the word). I really like the shape of it and have also found that it is very useful to have a small chair which is easy to move around the house when we have lots of people round.
Having said that, my husband hated this chair! It’s funny because to me it is kind of neutral (in fact it is almost the exact same colour as our carpet). Apparently it is because of the “hairy” trim. And the fabric is worn in a lot of places, so the solution was to re-cover it. Having never tried upholstery before I started by watching this video on re-upholstery: YouTube
How to re-upholster a chair
I didn’t want to buy lots of equipment and materials because I’m really not expecting to be doing lots of this kind of thing, and I decided I could just cover right over the existing fabric. The worst that could happen is that I would end up wasting the remnant of fabric I picked up for less than £10, right?
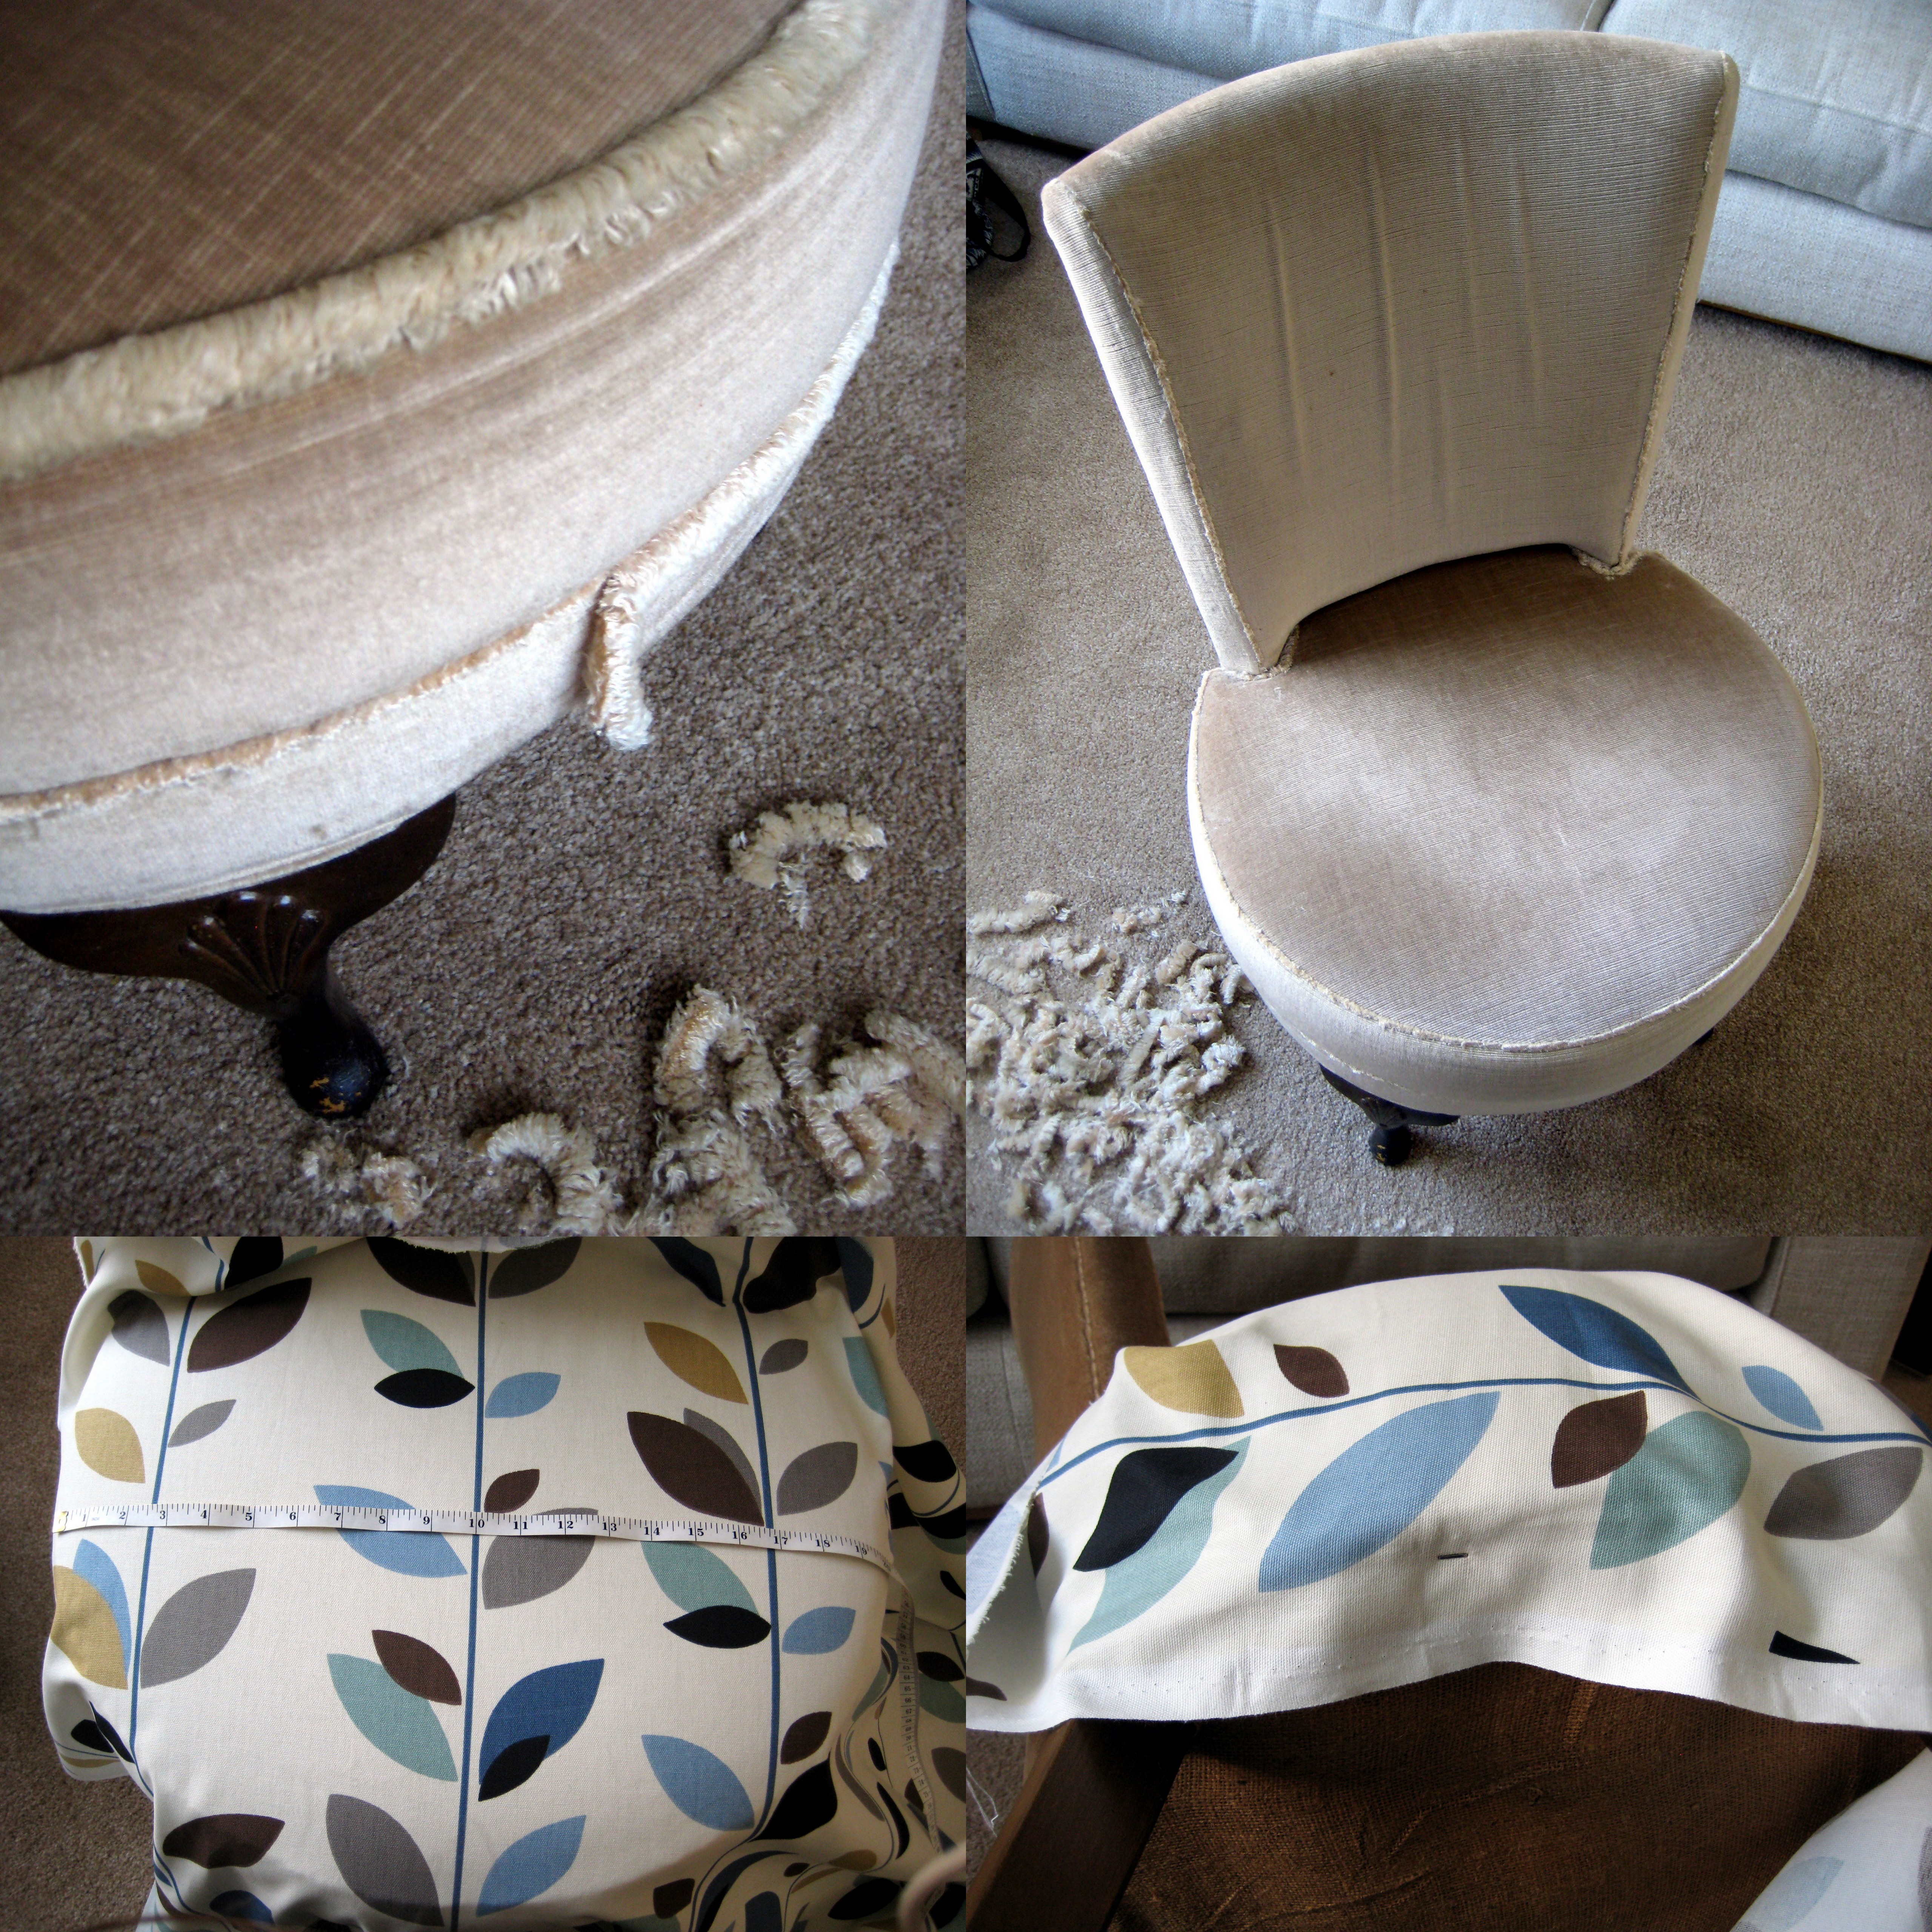
Preparing the chair
I started by trimming away the “hairy” edges so that they wouldn’t show through. There was actually rather a lot of it! Then I cut my fabric larger than the seat and lay it over, centring the design on the chair. (A little later I discovered that the stems on this print are not actually equidistant from each other, which was a little frustrating!)
I stapled the fabric to the base and the front and sides. Then cut a split for the back of the chair. I found I had to cut open the existing fabric of the chair to get into the back of it. If you watch the video you will see that she pulls the fabric taught at the back. This is how I got access to this part of the chair!
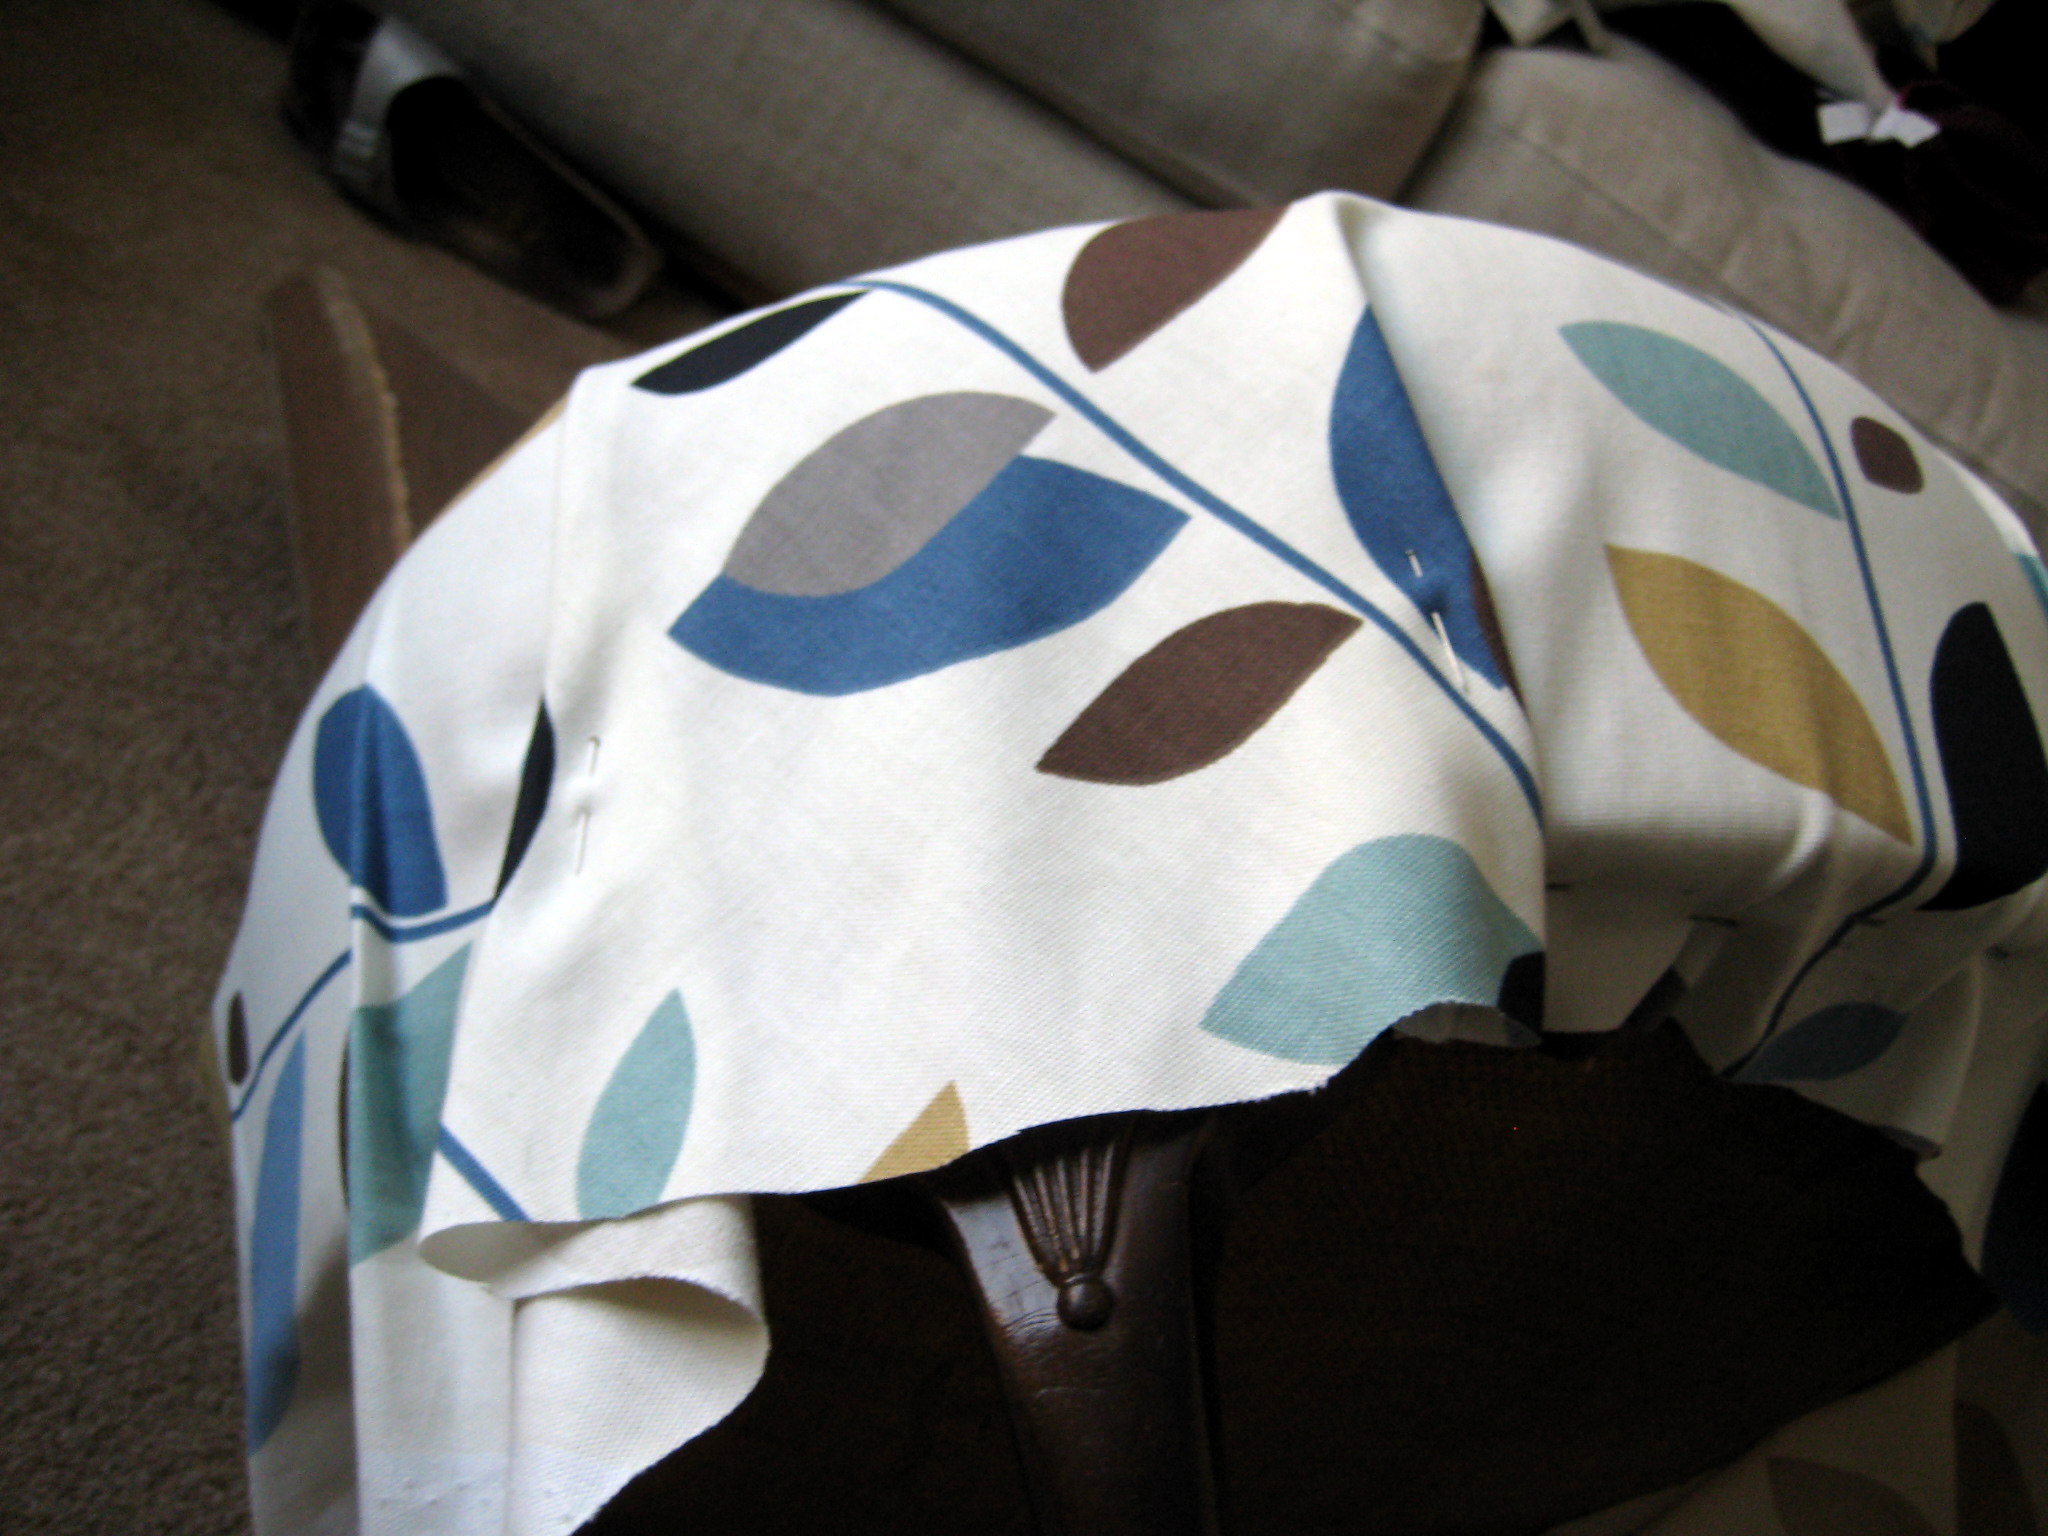
Making the folds around the front legs
Then I just tucked it all through to the back and underneath, stapling as I went, making sure I mirrored my folds on both sides (yes, I am obsessed with symmetry). I also made pleats around the front legs which are quite wide at the top. I pinned them into place before stapling to get them as neat and symmetrical as possible. I also cut away the excess fabric and folded the edge under along the front of the legs.
Seat done, It was a similar process for the front panel. I found that as this was a concave shape, stapling the bottom centre into place and then the top centre after pulling the fabric as taught as possible was the easiest way of getting it neat. Then I worked my way up the sides from the bottom.
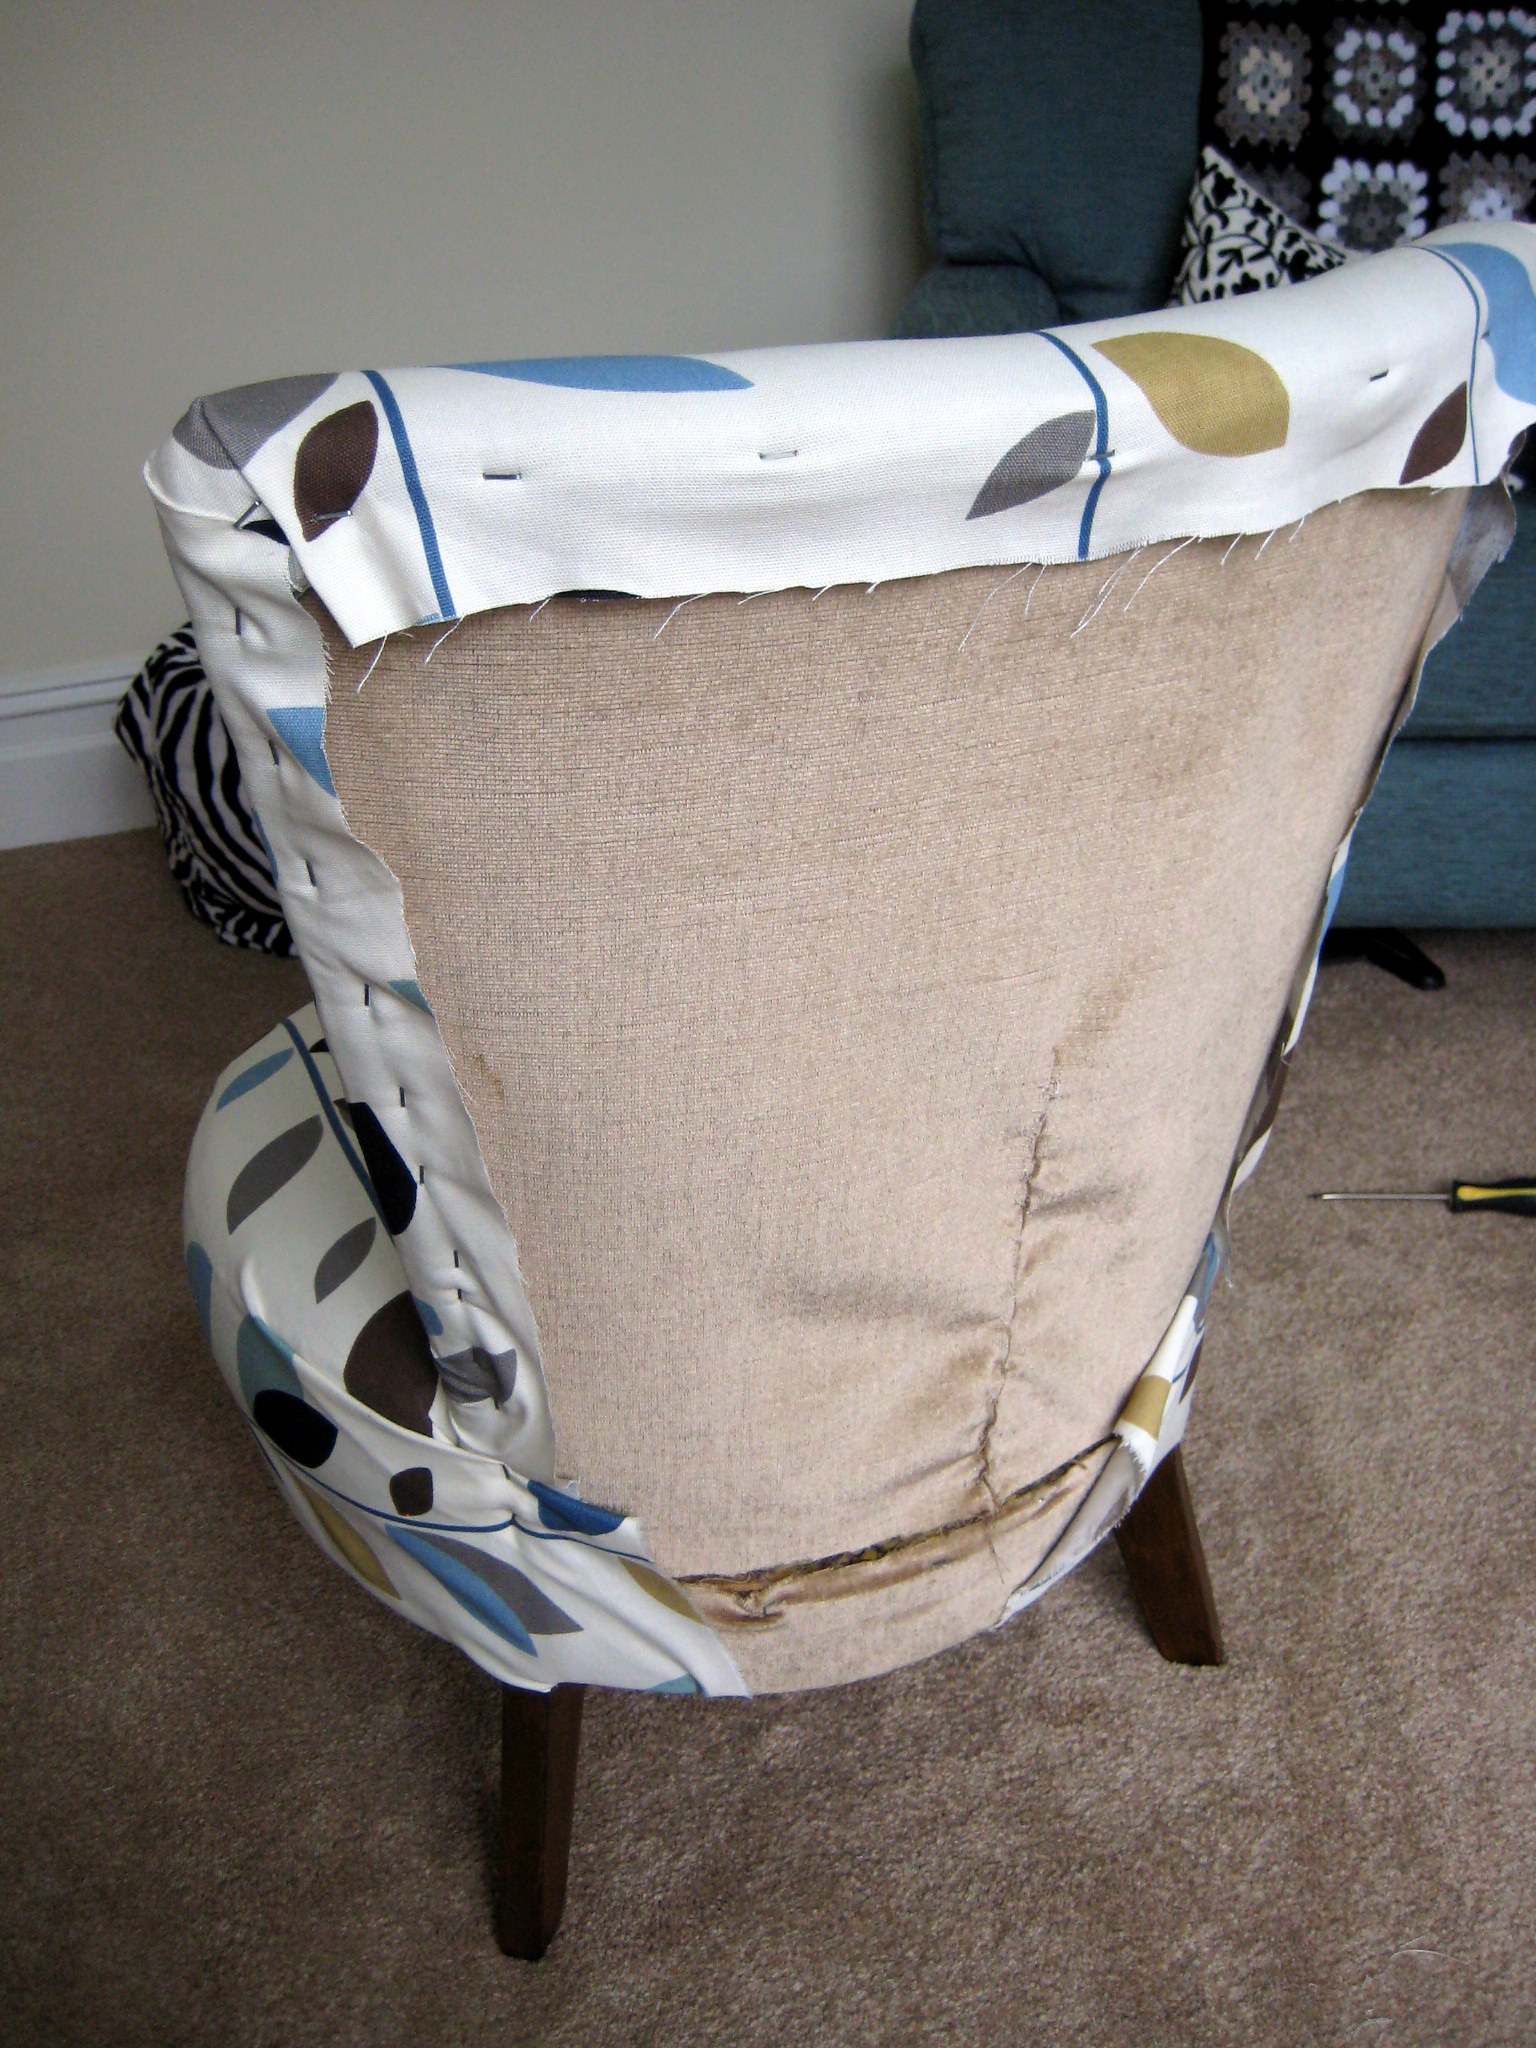
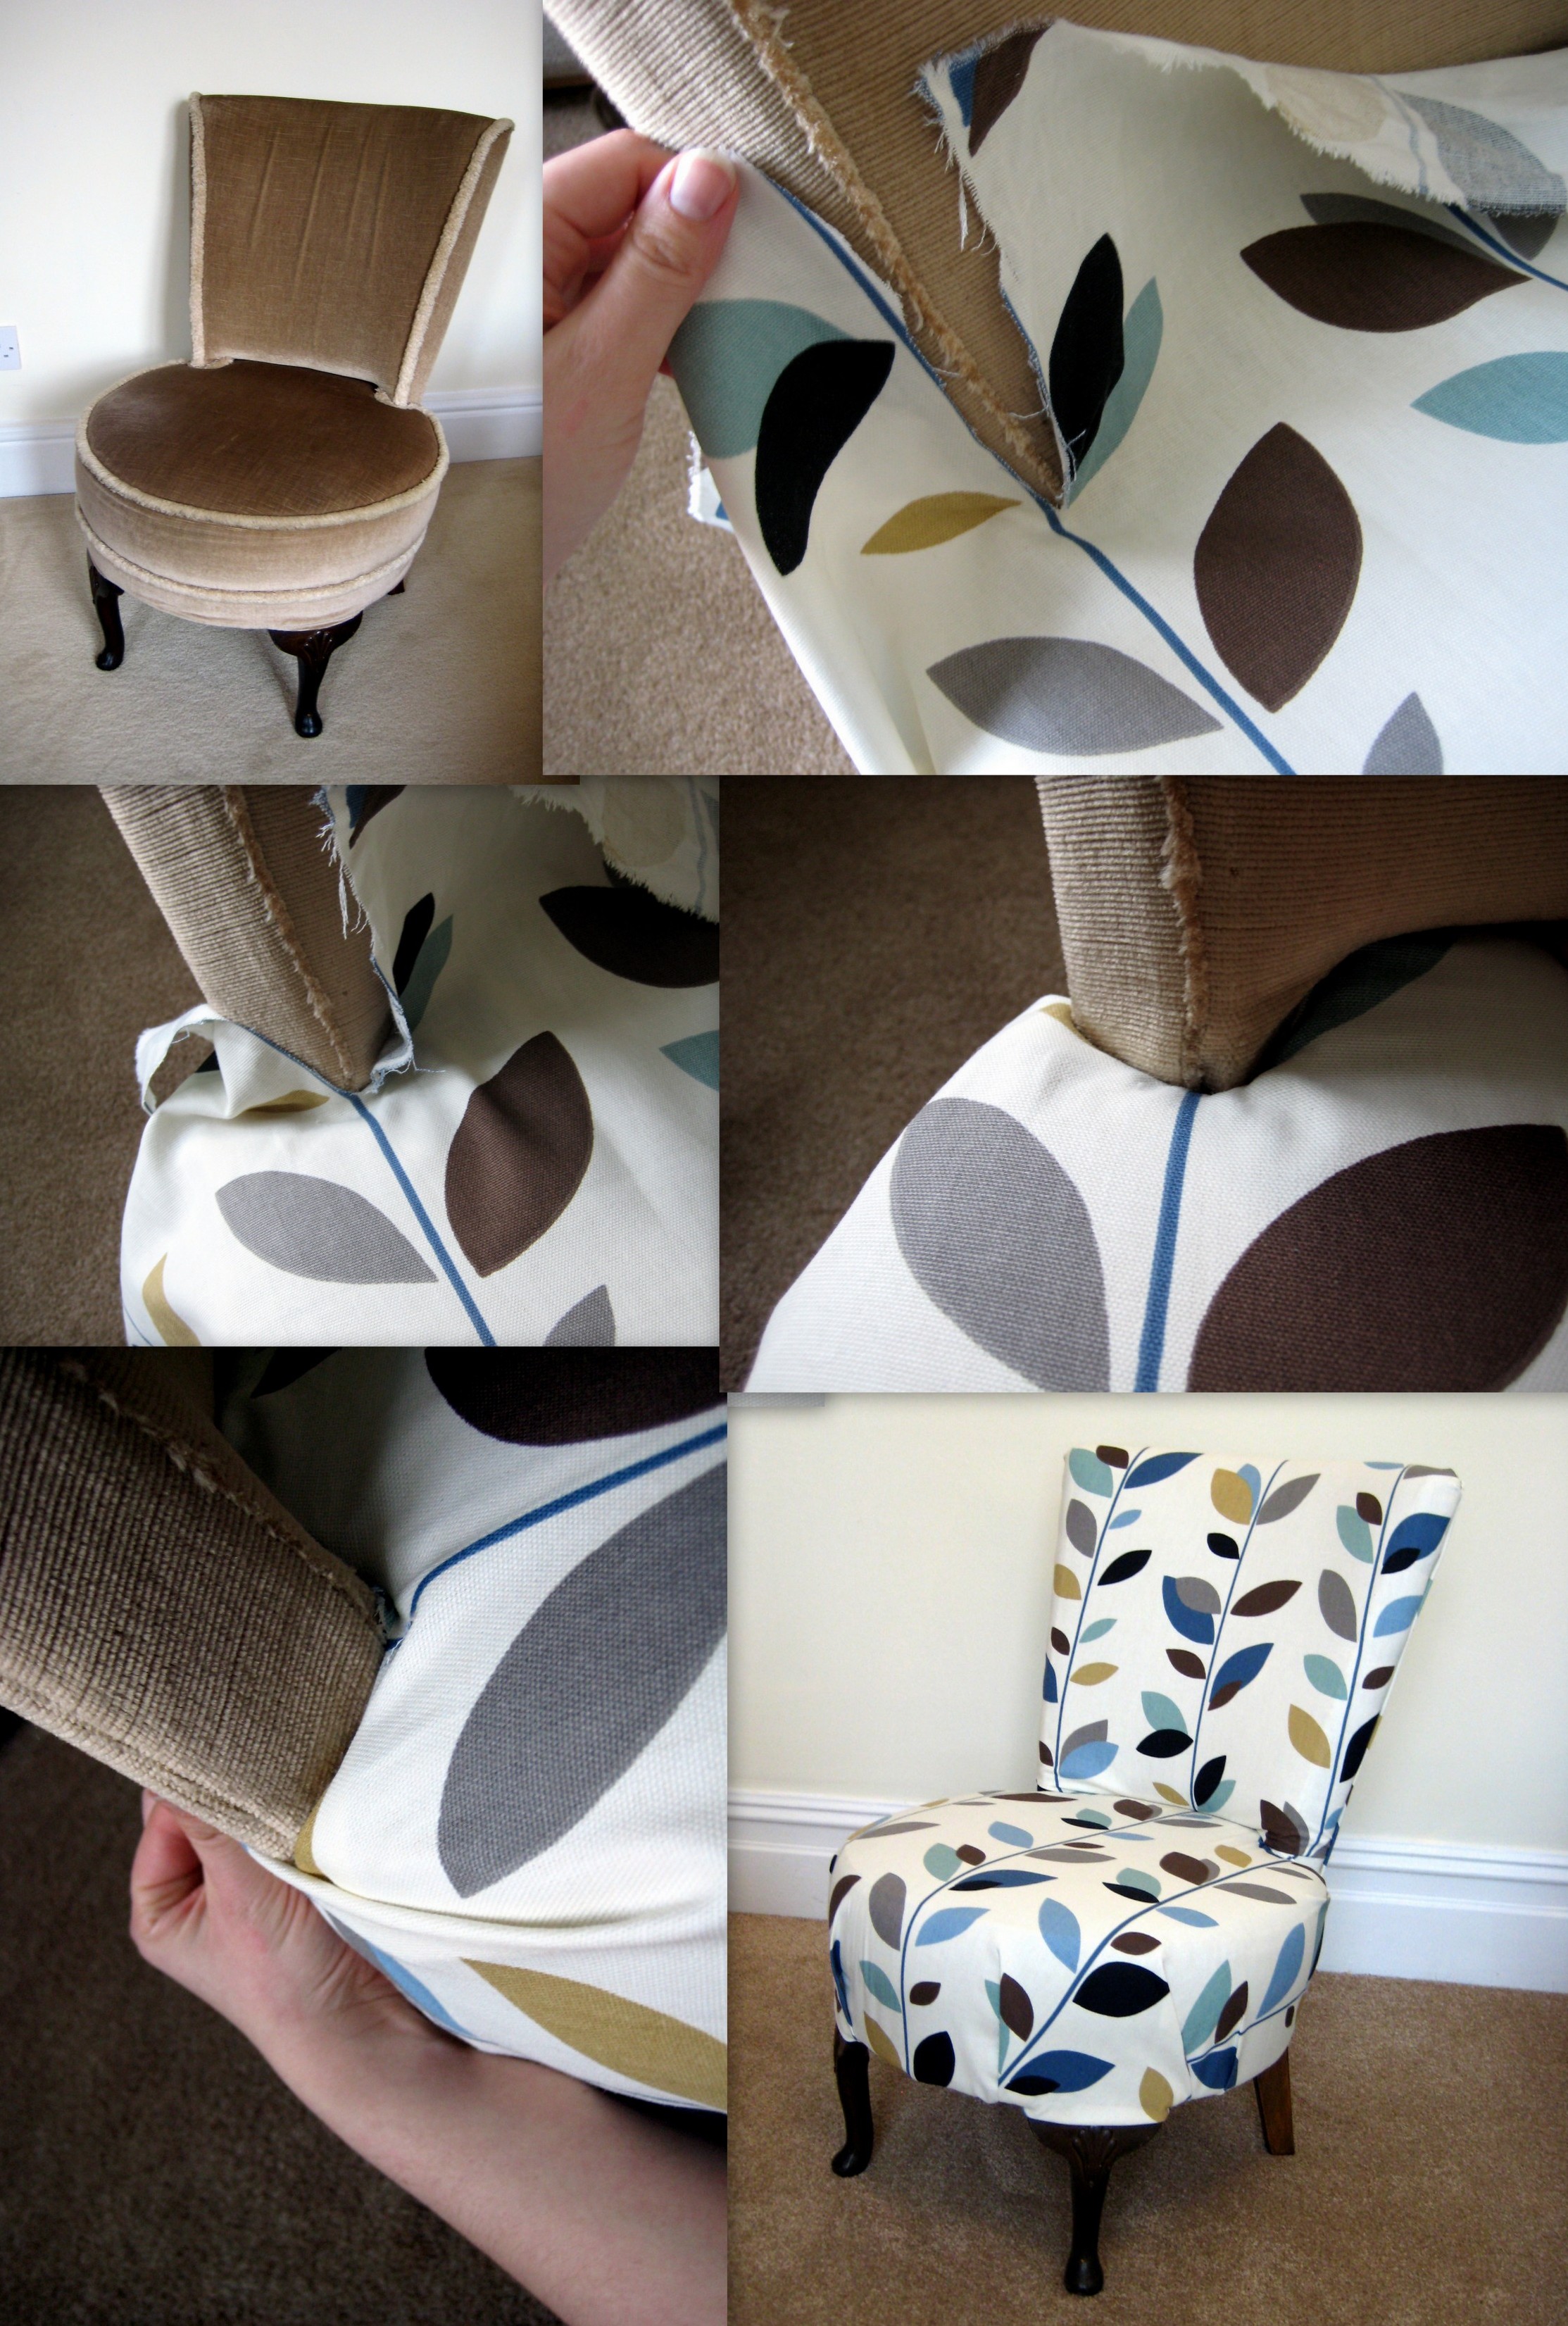
Nearly there – just the back to go!
By this point the chair was looking pretty good from the front, but the back, well, hmm. Here I have trimmed away excess fabric and sewn up the hole I cut to get inside the chair (sort of – no one will see this once finished)! I decided to lay the back piece of fabric on and staple to the top edge on the inside. See my less somewhat crazy stapling in the picture! Then flipped the fabric back over and stapled at the bottom (underneath). Finally I trimmed off excess fabric and folded the sides under so that all the side staples from covering the front were covered.
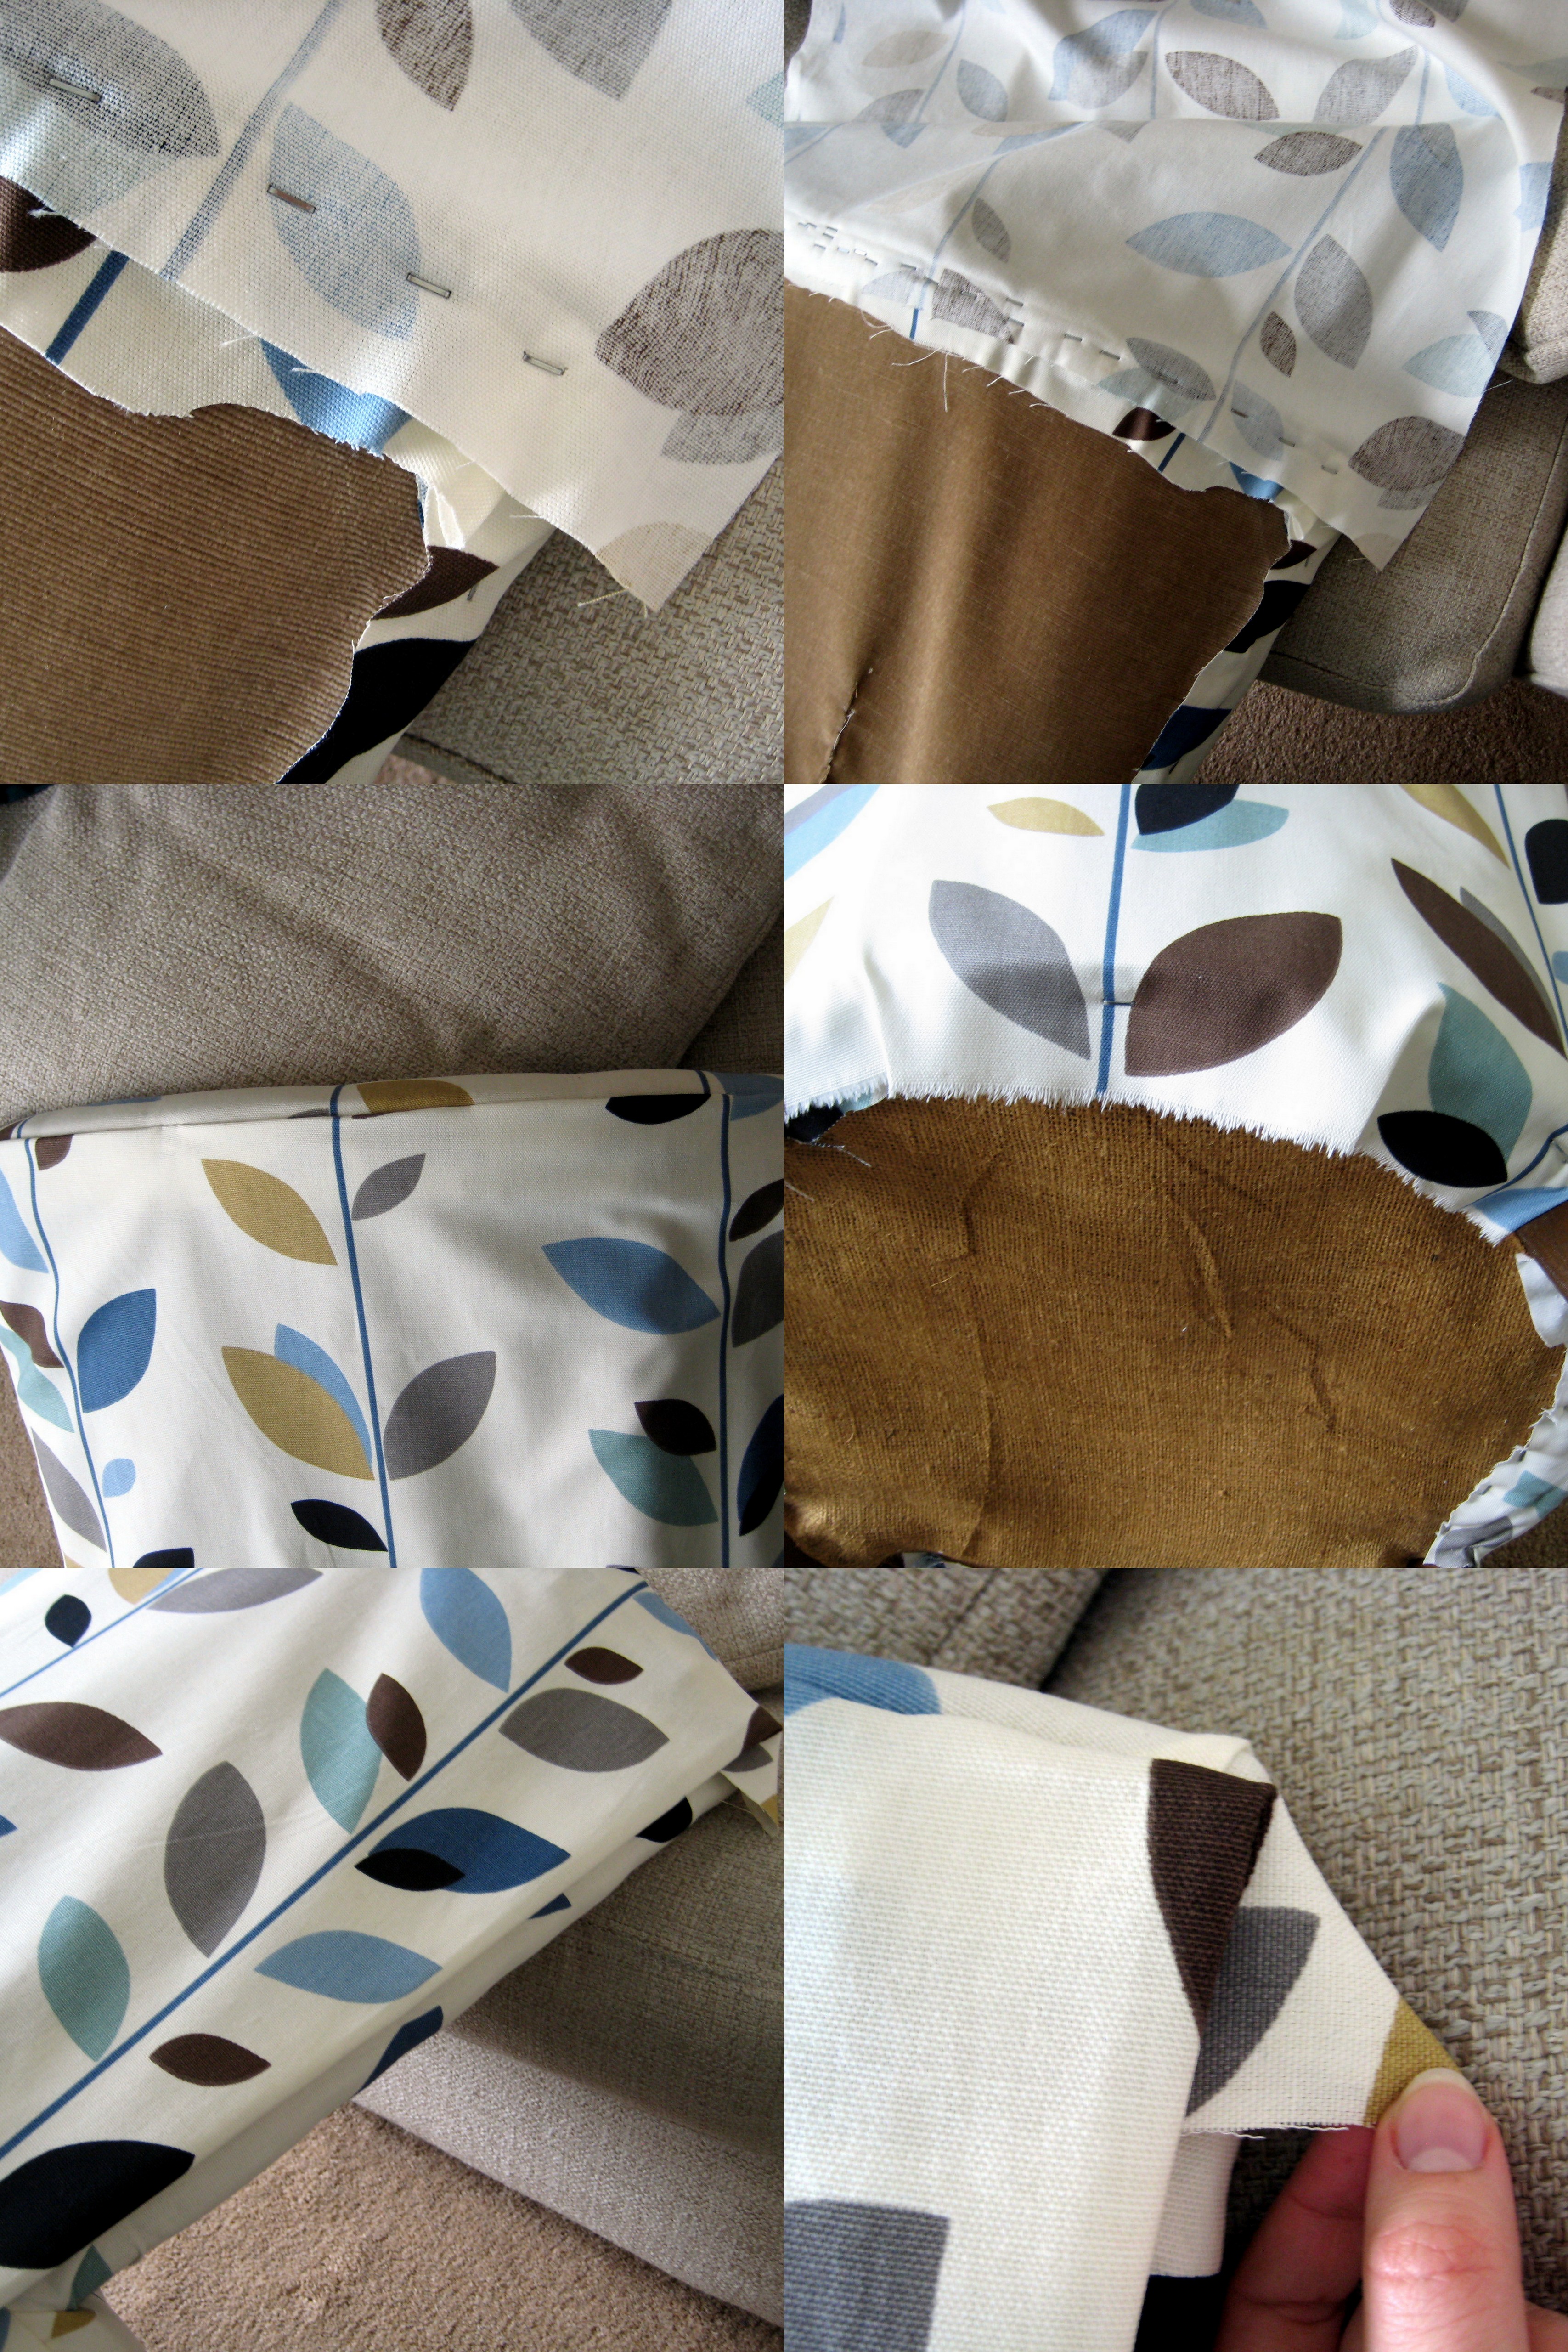
1. Stapling the back on the reverse, 3. Flipping the fabric back over, 4. Staples on the bottom, 5. Folding the edges under, 6. Trimming the corners of excess fabric
At this point I admitted defeat and got out my needle and thread. I used a simple running stitch just under the folded edge and on to the chair sides to secure the side edges. Since they won’t particularly be under much strain I’m pretty sure this will be sufficiently strong!

Chair re-upholstery

Re-covered chair
So, this probably wasn’t the most correct way of doing this job but I’m pretty happy with the result (and the fact that all I had to buy was the staple gun and the fabric remnant). There’s even some fabric left over. Any suggestions anyone?


Looks fabulous, would the left over material make cushions for the room?
Yes they will! I may have to use a different fabric for the back so I can make a few. :)
You may have already thought of it but if you have enough material left over for accent pillows you could use them to help pull it together with whatever room the chair moves to.
Yes, I think I can make a few. They will go in the guest room too! :)
Wow, the chair looks great! I love that fabric! I agree with the others, cushion covers would work really well in that fabric.
Thanks Rachel! It took a lot of digging in the remnant bins to find it. :)
Wow Esther, it looks amazing!! What a fabulous transformation. Clever you!!
Thanks! I was relieved it turned out ok!
Wow this looks fantastic!
Thank you!
Such an unbelievable improvement! The fabric you used is wonderful and the end product will make you happy for a long time, I think!
Thanks Kerry! Yes I hope it will! But if not I guess I can always re-cover it again now I know how!