
Customisable Crochet Basket

I’ve been looking for a basket of specific dimensions for a while without any luck. Then I saw a circular version of this idea and realised I could make my own!
This uses a technique similar to thrumming, where you crochet over another thread to add bulk to a fabric. If you have ever crocheted over your ends to avoid weaving in, this works the same way.
In this case I used rope instead of another yarn, which is a lot bulkier but great for adding stiffness and making each row deeper. This project had the added bonus of using up a single skein I had left in my stash!
The resulting basket is rectangular with rounded corners.

Finished article
You will need:
- Length of rope (mine was 38m in length and 6mm diameter, for a 22x42x17cm basket)
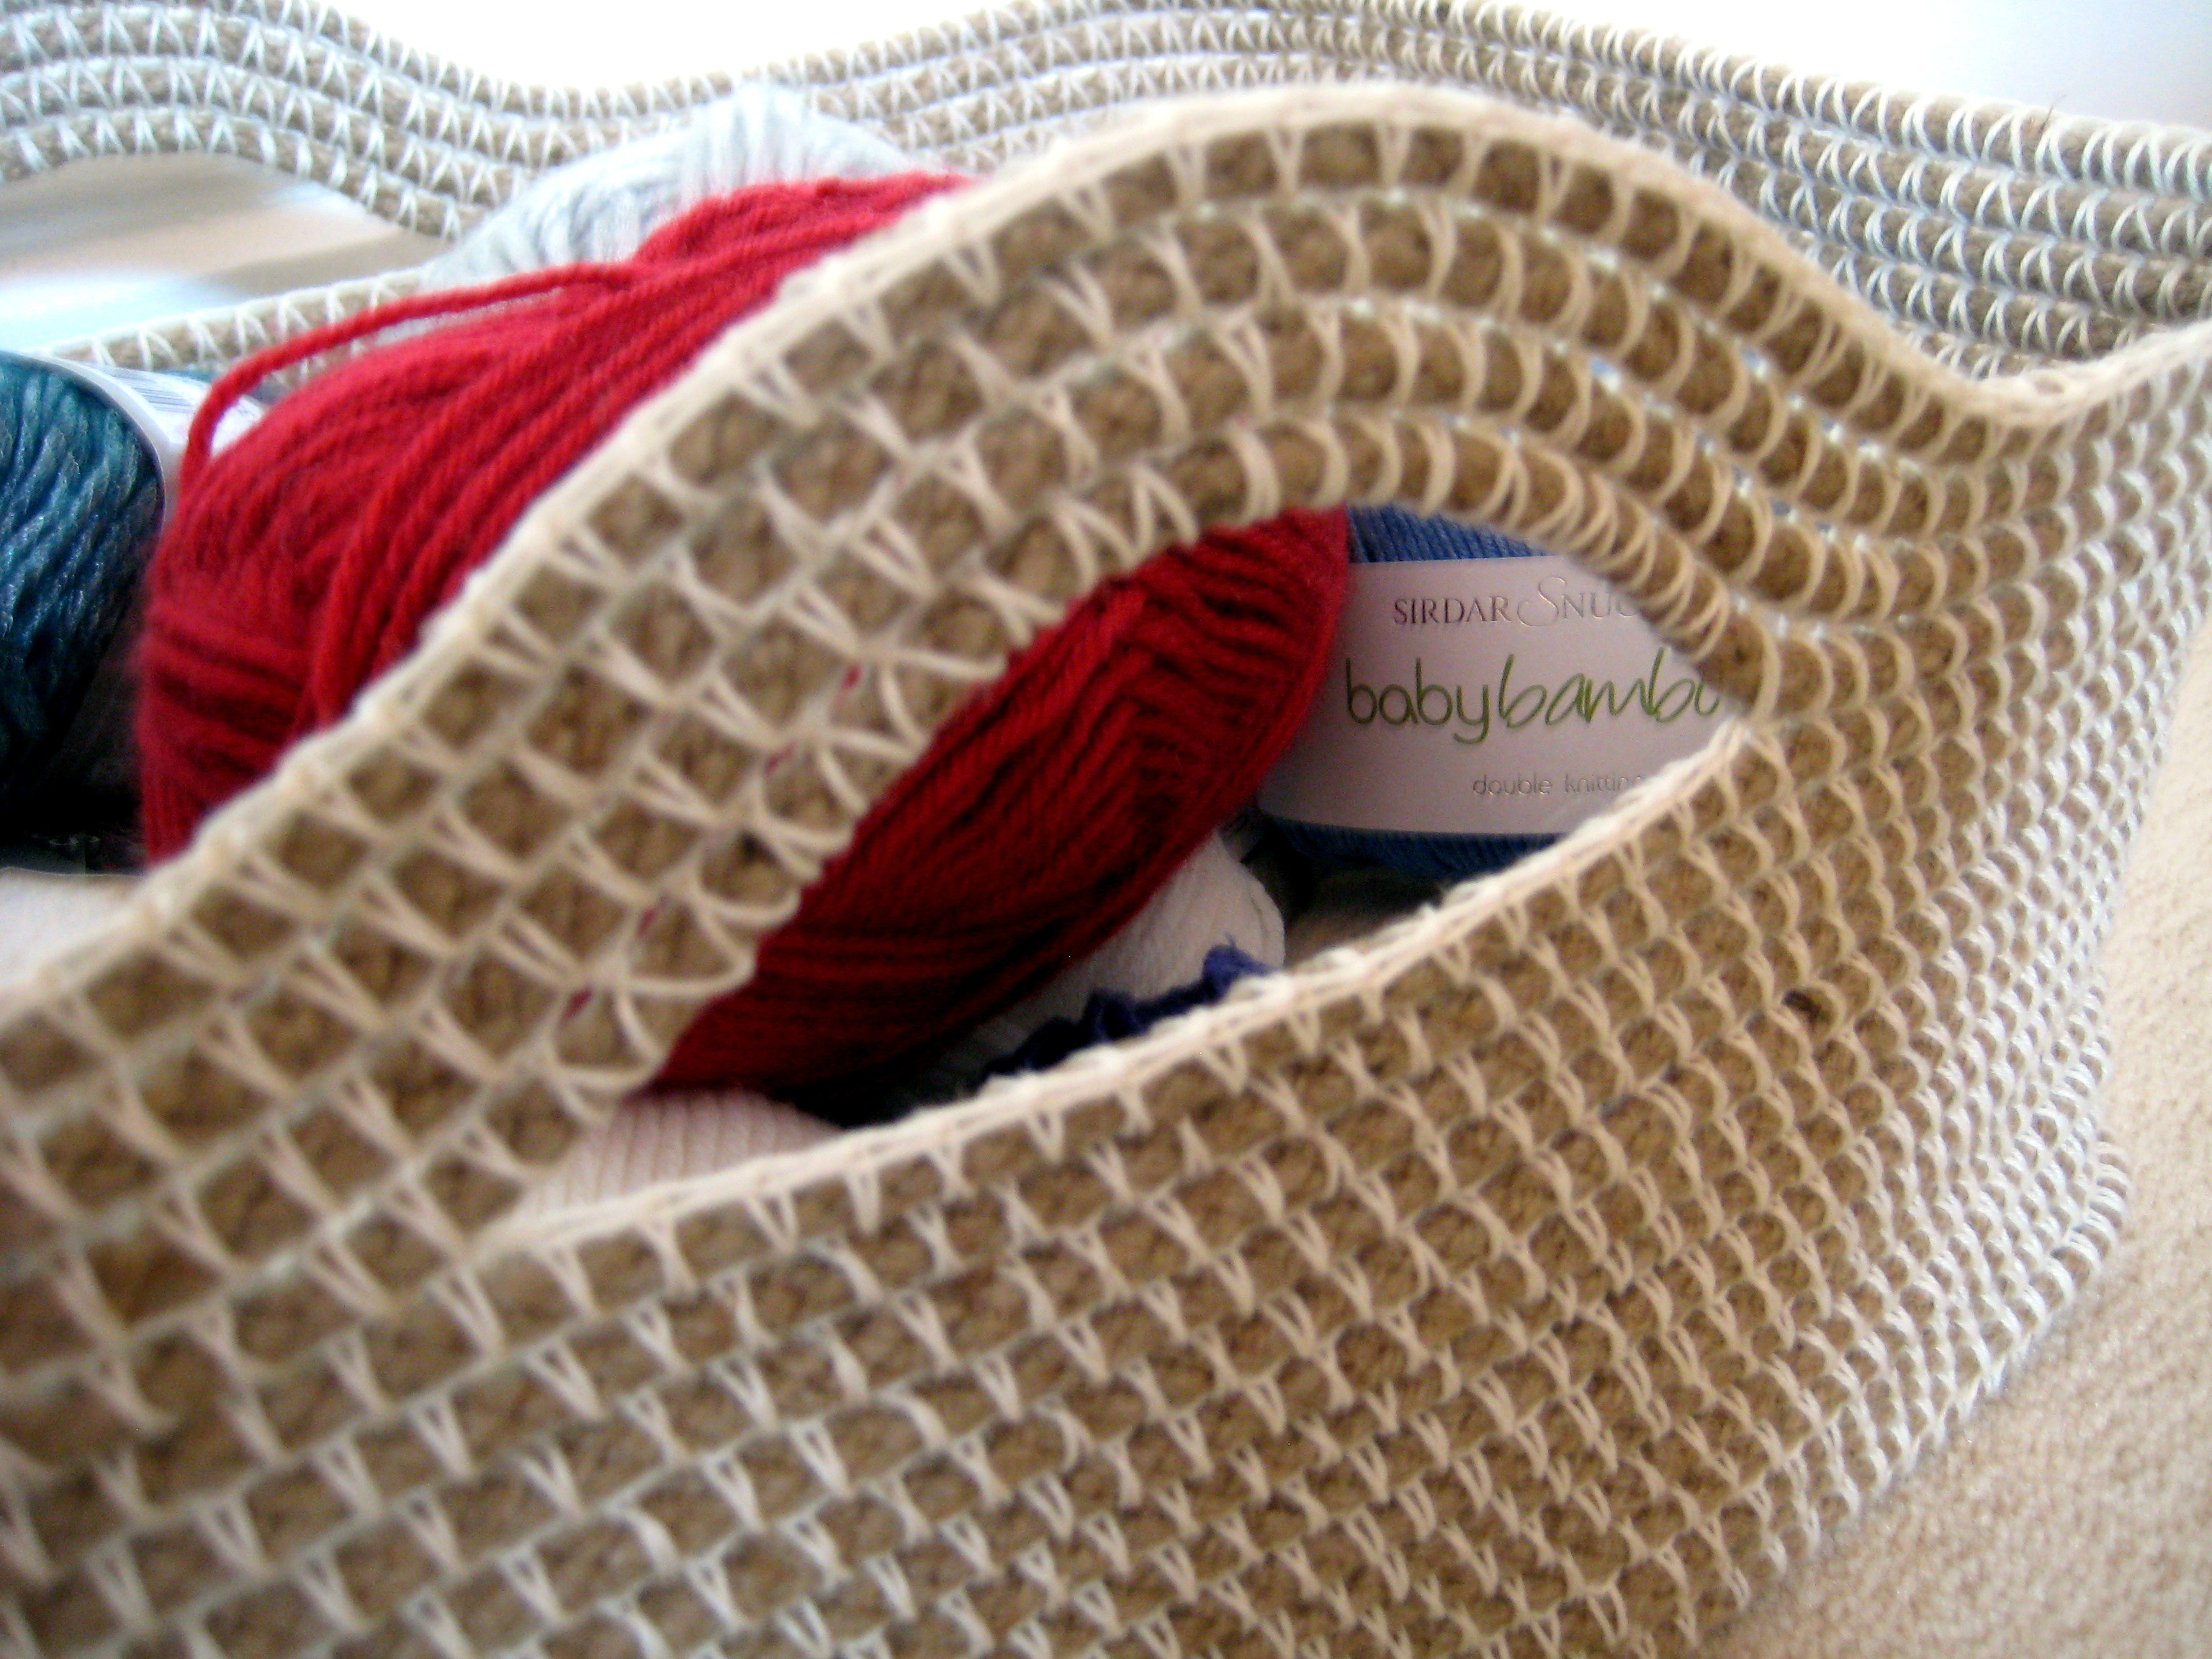
- Stash yarn (I used 310m of Patons 100% cotton 4ply in a cream colourway)
- Size 5.00mm crochet hook (use a metal hook if possible as the work is quite stiff), or larger if your rope is thicker.
Pattern:
Foundation row: Decide what size base you need. Mine was 22 by 42 cm. The difference between the two dimensions (in my case 20cm) is how long a chain you need to make to begin. This was 30 or so chains for me.
Ch 30 (or number required for you desired dimensions) +2, turn
Lay the rope alongside the chain to work with an overlap of a few cm.
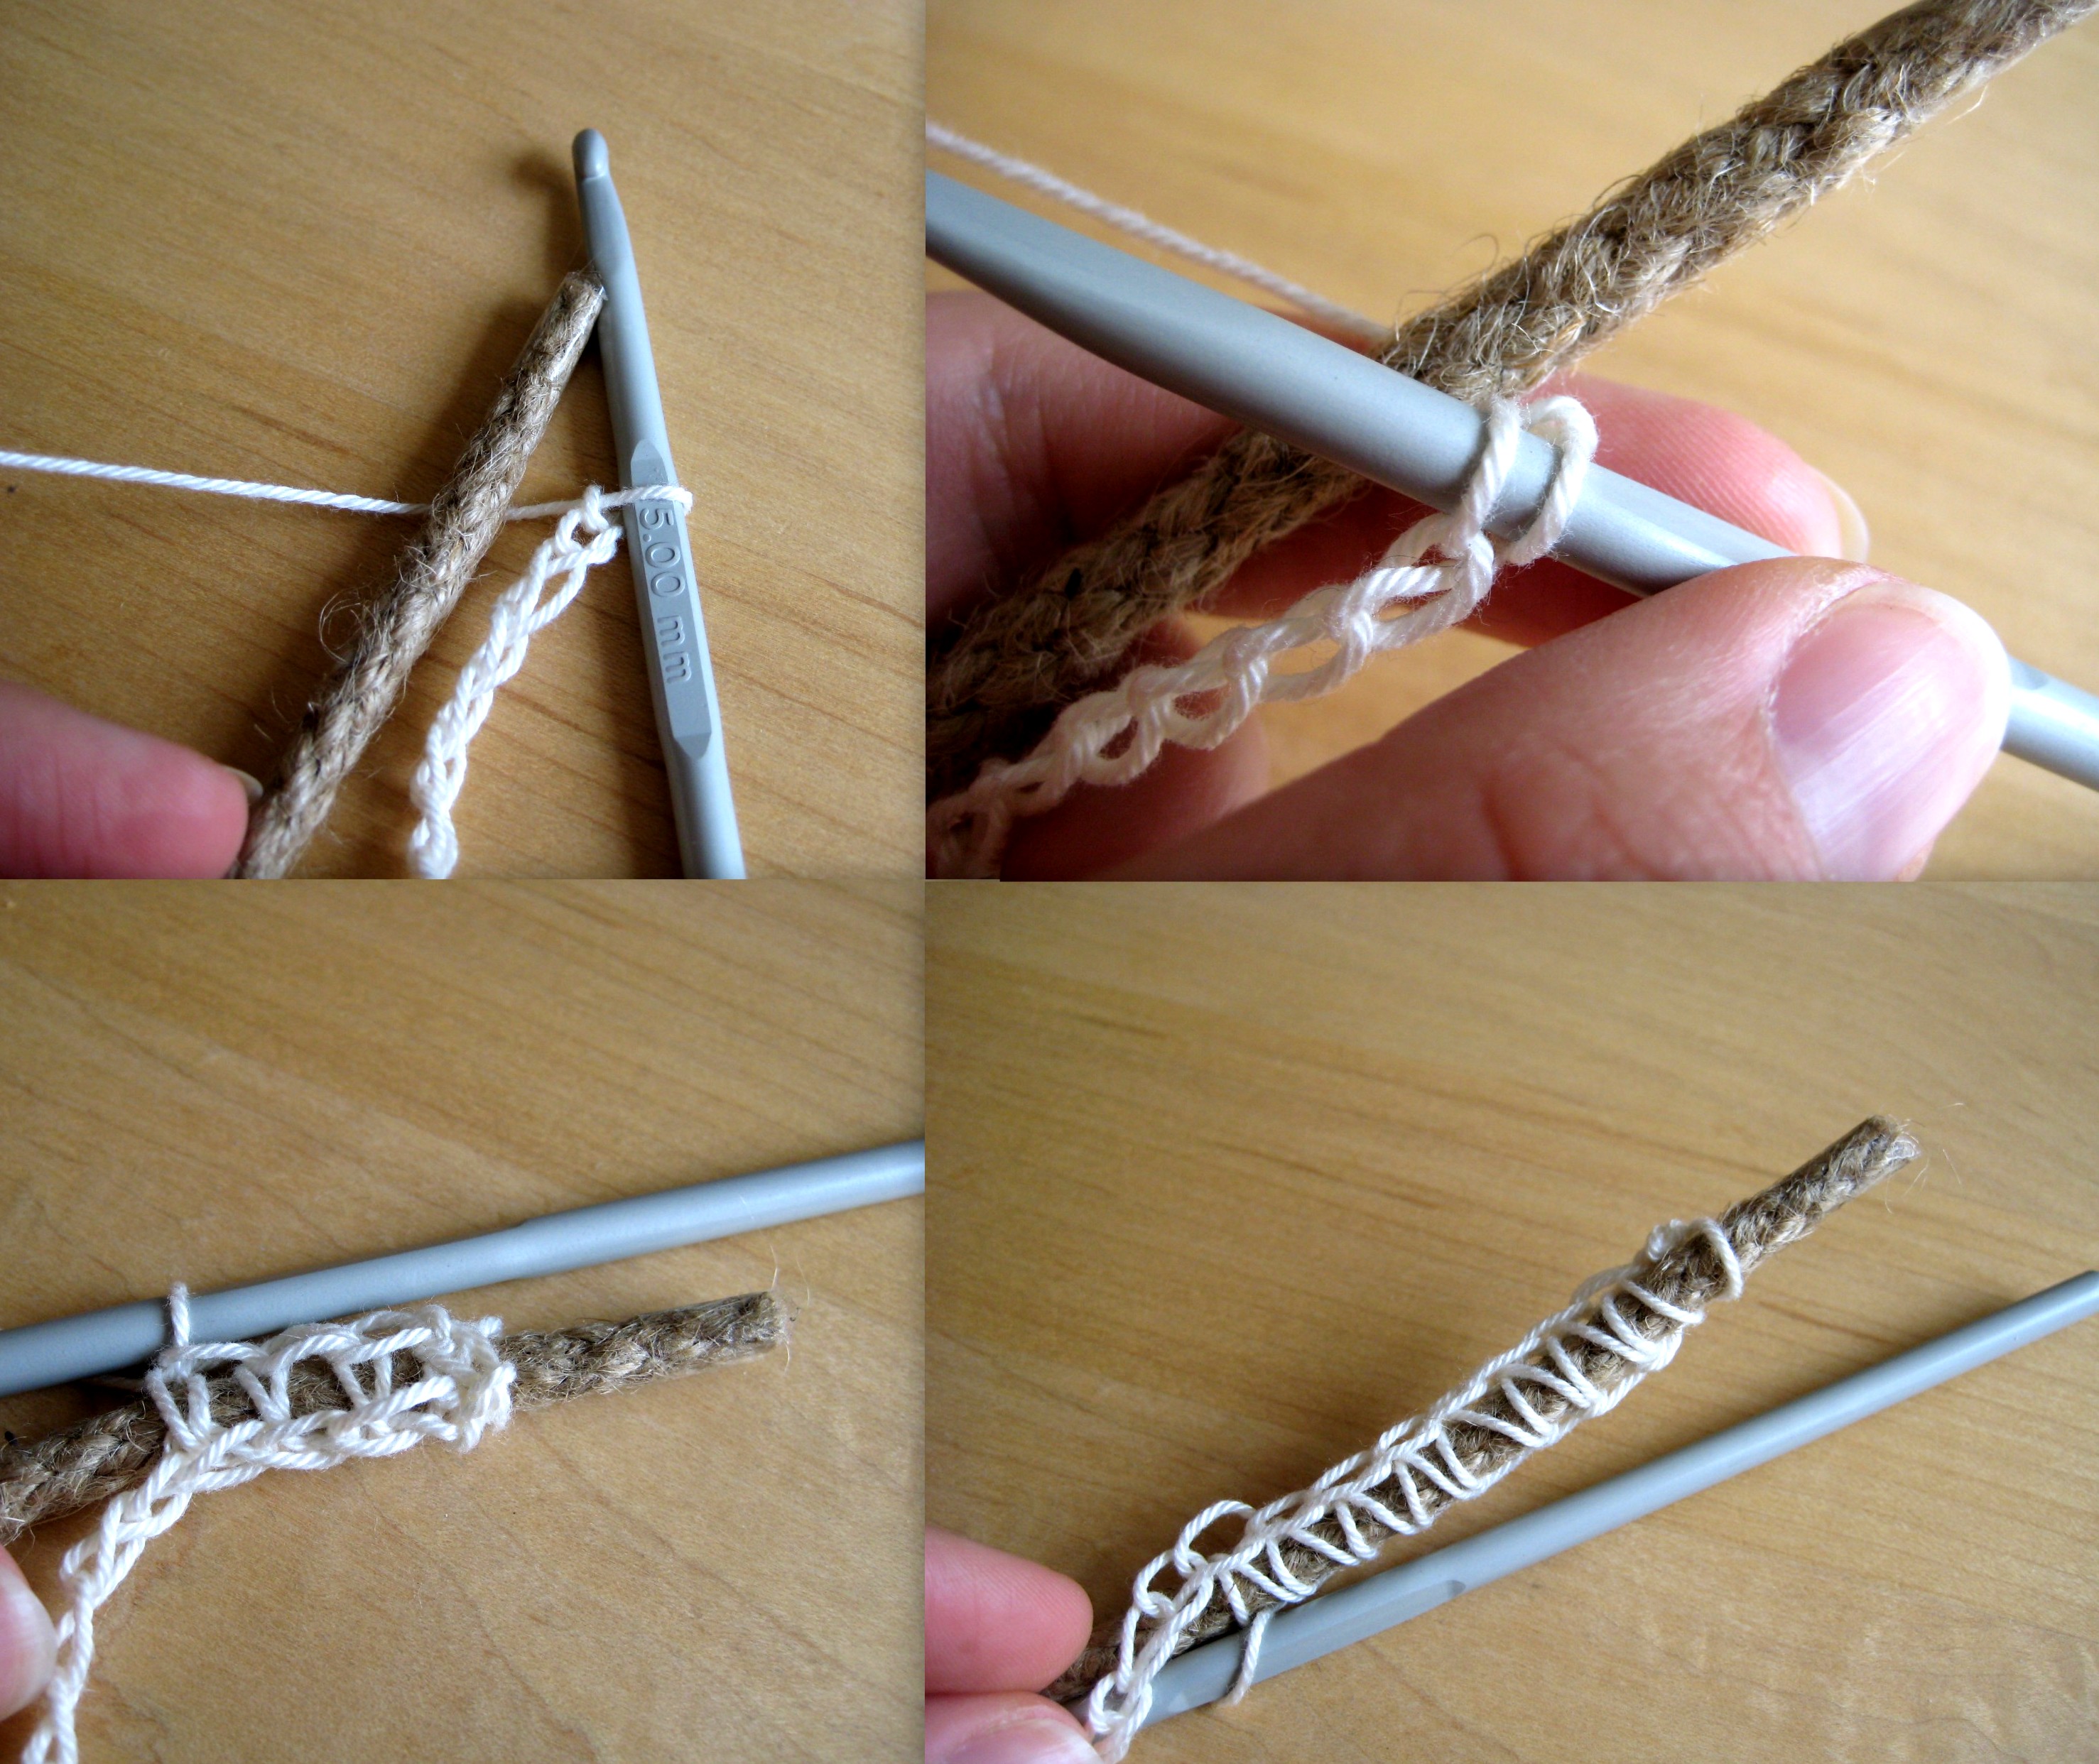
How to start round 1
Round 1: sc (working over the rope) in 3rd ch from hook. Complete a few more sc and then wriggle the rope forwards to line the end up with the beginning of the row (i.e. get rid of the overlap). Sc to the final ch, 5 more sc in final ch (turning the rope around the “corner” and rotating work), sc to end.
[NB: I sc in the back loop of my chain so that once I have turned the corner it is easier to complete the sc. You can see this in the photo’s, but it is not necessary to do the same, you can sc in your chain as usual if you prefer.]
Subsequent rounds: 3sc into each corner st and sc in all the other sts. Continue until the work is your desired base dimensions.

1&2: Turning the corner on round 1, 3: beginning round 2, 4: part way through round 3.
Transition to working the sides: Once the base is large enough, stop putting 3sc in each corner st, just do 1sc in each st around. For the first round of this you will need to make sure you lie the rope vertically on top of the row below, which can be a little fiddly.
Handles: These are optional. When the sides are high enough, and after completing a round, place st markers where you desire your handles to be. Now when you reach a marker, leave the next set of sts unworked (I left 15sts to make mine), and instead crochet over the rope more sts than you have left unworked (I did 20 sts over the rope). Continue to sc in the sts after the marker as before.

Starting the handle

Finishing handle
Securing the end(s): I did a modified sc st at the end of my rope (and when I needed to join a new length part way through):
Insert hook in next st, draw up a loop, yarn over, draw through one loop, insert hook in same st, draw up a loop, yarn over, draw through 2 loops.

Secured end
Finish with an sc in the next st, but not over the rope. Trim the rope if needed, and weave in all ends.
Handle

It fits!


Love this!!
Thanks!
love it and just what i need thanks for sharing
No problem!
Hi there, this looks like a fab project and am raring to have a go myself. However being a novice to crochet, my little noggin can not fathom how to make the double sided chain for the first 30 cms, please would you help me out? Many thanks Michelle
Hi Michelle! The initial chain is just a regular chain! When I started my sc’s I worked into the back ridge of my chain, rather than the usual way of under the front loop(s). This is just because I found it a little easier once I doubled back the rope as the stitches are a little easier to spot.
If you have never crocheted in the back ridge before and want to give it a try I suggest doing a sample swatch without rope to practise first! There is a better picture of how to do this on another of my posts:
If you can’t get your head round it, don’t worry, you can just crochet into your chain as usual and then work into the back loops once you have turned the corner. Hope that helps!
Love this- will be trying this very soon! Thanks!
You’re welcome!
Love this a lot! I’m adding it to my “definitely must try” list!
Great! I have a list like that too. So many projects, so little time! :)
Pingback: Blog feature: Make My Day Creative | the Little Koo blog
Pingback: Working on gifts! | Night'sWatchBlog
this is so clever! I can’t wait to give it a try! thank you so much for sharing :)
Thank you! Hope you like yours. :)
That is BRILLIANT ! Just the answer for my new IKEA Expedit shelf I put in my craft room!
Glad you like it! Very jealous that you have a craft room though… ;)
Greetings from Denmark! Just saw your basket on Pinterest and had to check it out. What a beautiful basket and what a neat idea. I simply just love it and hope to make time for making one (…at least one) in the near future.
Thank you so much for sharing :-)
Really pleased you like it Malene! :)
Hi, I have tried to make this three times. I have even increased the number of stitches in the corners and it won’t sit flat. It curves and sometimes the rope sits on top of each other. I’m thinking of increasing the size of the hook, do you think that would help? Thanks for the great tutorial!
Hi Laurita! Sorry to here you are having difficulty with this one. It sounds like you may be crocheting quite tightly, if so a larger hook size may help. I matched mine to the diameter of my rope (approximately). So if you are using a 6mm wide rope try a 6mm hook or bigger. This one is a little tricky as you do need to shape it as you go, i.e. make sure you hold the rope where you want it to lie as you crochet. It does take a little longer to work up as a result, but I hope it is worth it in the end! Hope this helps. :)
do you have a video of this pattern
Not yet, sorry! :)
Thank you for posting this, I love it. I am going to try my hand at it if i can find the supplies at a reasonable cost, quality and quantity. I will make them for christmas presents with that being said,can i ask where you got your rope i have been searching for it. thank you in advance.
You’re welcome Heidi! I got my rope from b and q (a hardware store). It is jute sash window cord. If you are making a few I suggest you try and buy a smooth rope to save your hands from getting rubbed by a scratchy rope! Hope that helps:)
What a fantastic idea! I wanted a nice-looking basket to put blankets and afghans in so that my living room isn’t strewn with them, but wicker baskets and such are incredibly expensive. I hope I can find some reasonably priced rope now so I can make my own basket!
Good idea! I hadn’t thought of making one for that purpose. :)
Hi, I love this basket, however, after crocheting for many years, I can’t
understand how you get a rectangular basket out of an oval shaped
bottom? I’m going to keep going though and see how it turns out.
Ok, on closer inspection, I see your corners. I’m sorry I misread the instructions and thought the 3 sc went into only each end of the length of chain. I really like the rectangular shape, so I think I will start over. Makes sense now. Thanks.
Deb
Hi Deb! Yes, I put 3sc in my “corners”. I will admit though that they do have a slight curve to them! The sharpness of your corners will vary with the stiffness of your rope. If you have any problems, let me know!
I love,love,love this basket. I’ve started the basket and i am more than half way through and relies I am not going to have enough cord. Is ther any way to add more cord to continue? Thanks so muck
Hi Kathy! Glad you like this project. I ran out of rope too! I joined a new one right after I finished the old one. If you read my instructions for finishing the project you will see the stitch I did to secure the ends. Alternatively, you could try adding a different but similar diameter cord for a textured effect. Or use some doubled up thicker yarn (Aran or worsted weight, or thicker) instead of rope, for a softer top to the basket? Hope that helps. :)
I L-O-V-E this basket! Thank you for sharing :-)
Thanks! :)
Fantastic Idea!!! Now, to find some rope and try some for my daughters room!
Thanks! Lucky daughter! :)
I think this is A Outstanding project… Thanks a Bunch Esther I can’t wait to try this. It looks so beautiful….
Thanks Lynda!
I’m going to try this using tarn (T-shirt yarn), instead of rope. I haven’t been happy with crocheting with the tarn alone, but I bet this will work. Thanks!
Good idea! I expect the basket will be a little less stiff, but using tarn will make it much easier on your hands – you could try using two strands at once if your tarn is cut thinly. I’d love to hear how this turns out! :)
This is so beautiful! I too have been looking for a specific size basket, and have had NO luck. It needs to be 29 x 12″, and 14″ high. Do you think your pattern will work for a basket so long? I want to use it to store our table cloths, runners and napkins. Do you have any suggestions for the type and weight of the rope? Thanks so much for any advice, and for sharing this clever pattern!
Hi Shelley! You could certainly give this a go! You may find that the basket is not stiff enough on your base and long sides. You could stiffen the base by adding an insert of thin ply cut to size, it sounds like it would not be seen if your basket is constantly full. Also you can try using a stiffer (thicker – up to 20mm diameter) rope and a larger hook – but be aware this will be heavy going on your hands, and probably more expensive too. I would suggest trying a smaller version first so you can see what you think before you scale it up. :)
Love this basket! I’ve had it pinned for quite some time. I’ve made crocheted baskets in the past and they tend to get slumped with use. I’m wondering how yours has held up
I do have to reshape it every so often. Stiffer rope would make a stiffer basket- but be harder work to make! Also, the larger you make it the less stiff it will be. If you are making a large basket lining the base with thin ply cut to size would help!
Hello there. When I saw your basket, I loved it enough to want to learn crochet. I’ve got the sc down pat but the second I try to introduce the rope, it goes all baggy and doesn’t sit tight around the rope. Any suggestions what I’m doing wrong? Awesome project by the way. Thanks.
Hi Nadine! Really glad this project inspired you to learn! :) It sounds like when you are drawing up the loop (to make two loops on the hook) that you may be drawing it through too far. Try and hold it tightly and close to the rope, making as small and tight a loop as possible. This project does require quite tight tension and a bit of perseverance! If you are still struggling, you could try practising by crocheting over some yarn instead of rope and then move on to rope once you are more comfortable with the technique. Well done on getting this far!
Love this basket, I’ve been working on mine and it looks good. It’s not the most sturdy basket though. I’m only going to store yarn in it, like you have. Do you think a little spray starch might help to firm it up a little bit. thank you,
Thanks Ingrid! To increase the stiffness use a non stretchy yarn like mercerised cotton or acrylic and crochet tightly (I know, not much fun on the hands I’m afraid). You can stiffen the base by adding a thin piece of plywood cut to size which will help it keep it’s shape. The larger you make the basket the less stiff it will be. I haven’t tried spray starch myself so I’m not sure, but if you try it please let me know how you get on!
I have tried and TRIED this project (which I am DYING to be able to do) and I CAN NOT stitch around the rope. I have contacted people who crochet and they make it sound so easy but I can’t do it! I’d LOVE to see a video to go along with this! :)
Hi Kassya! Sorry to hear you are having trouble with this project. Unfortunately I can’t make videos – it sounds like you prefer to learn by seeing it rather than just reading what to do so I’m sorry if that is a little frustrating! I presume you are struggling with starting the project so I’ll run through that in a bit more detail and hope it helps. After you make your chain, lay it next to the rope as I show above in the “starting round 1” picture. The yarn is under the rope. Insert hook through 3rd ch as normal, then over the rope. Yarn over hook. Pull yarn through the chain. You should now have two loops on hook with the rope held by the yarn to the chain – you need to hold it all tightly! Yarn over hook and pull through both loops to complete the sc. The yarn should still be under the rope. Now work the next st the same, inserting hook through the next ch, and over the rope. Hope that helps but do let me know where you are struggling if not!
Hi. I love the project, and am especially excited to use things I already have, to make something I need. I was having a similar problem as Kassya today. I followed you instructions to the letter, but my yarn ended up over the rope so that it isn’t caught in anything but the very first stitch. I experimented a little, and managed to get stitches to envelope the yarn with one change to your directions, as I understand them. After the first sc, my yarn ends up on top of the rope, so I put the hook through the chain, then UNDER the rope, catch the yarn, pull through the chain, hook OVER the rope, catch the yarn, pull through both loops, repeat.
Hi Julie, thanks for commenting! You are totally correct. This is what happens when I work things through in my head and not in real life. Sorry for the confusion! I will have to follow Kassya’s suggestion and get some video equipment to try and avoid this in the future…
You are so talented! Love this basket.
Thank you! :)
The basket is amazing! I Love it! You are amazing! And so kind to share your talent!
Thank you Lori! I’m really pleased you like it. :)
Pingback: Colorful Yarn + Rope = Stress Relief! | A Tangled Life
Hi!
I just love this basket and have to make my own!
My problem is that I can´t find a rope long enough, is it possible to splice? Don´t know if it´s the right word but I hope you understand. :)
Thanks for sharing!
Hi Mari! Yes you can splice them. In fact I did that on this example. I used 3 lengths! Just secure the rope end in the same way I describe how to finish. Then secure the new end using the same stitch. I found leaving a little overlap and then working the new rope forward a little so that there was a close join between them worked ok. Hope that helps!
Thank you!
What kind of rope did you use?
Hi Lisa! I used a jute sash window cord, form my local DIY chain. It’s stiff but quite smooth. :)
Reblogged this on Seer's Rites and commented:
Must try this!
Do you have a printable pattern available for this?
I haven’t done one for this since this is a customisable pattern i.e. Not meant to be prescriptive. But I’ll bear it in mind! :)
Absolutely fabulous! Thanks for sharing.
Thanks! :)
Do you have this in a .pdf doc so I can print it
I love this basket and it’s simplicity. I do wonder though, why my basket seems more oval in shape than rectangular. Any thoughts?
Hi Bethany! I’m glad you like this. The basket will not come out with perfect corners. The more flexible the rope the sharper your corners will be. For example think about trying to fold a thick rope into a sharp corner. So it could be because your rope is quite thick. The other suggestion I would make is that this project does need quite a lot of shaping whilst you are making it. You need to be very firm as you crochet round the rope holding it in the correct shape. Hard work but hopefully worth it! Hope that helps.
Hi there love this idea but wondering how sturdy it would be as I would love to attempt this technique for a Moses basket! Think it would look stunning!
Hi Nikki! Thanks, I’m glad you like this! Unfortunately I can not recommend this for a Moses basket. I do not think it would be stiff enough! I am using mine for yarn, and think this would be fine for toys and items of similar weight.
My basket seems to be more oval than rectangular. I have completed the rows with 5 scs, and one row where I put 1 sc in each stitch. Why does mine look more like a row boat than a rectangle? I love this idea and would really like to make more, but do not want to continue until I get this first one right. Please help! Shirley
Hi Shirley! Please see my reply to Bethany above. Also, I’m not sure how far you are in to the basket but the first few rounds do look quite oval. See my picture above where I’m part way through round 3. Hope that helps!
Where did you buy the rope from?
Hi Jodi! It’s a jute window sash cord from my local DIY store.
I saw this awhile back, so glad I found it one more time. First of all thanks for sharing. When I look at your project, I look at it as tho it is a one of a kind. Everyone can have a one of a kind basket, something no one else can make. There is no right and no wrong. lol
Thanks again
Thanks Lynda! Yes I agree. It’s nice to have something unique! :)
Reblogged this on It'll Be Reet and commented:
As my ability to take photos is Kaput. This lovely blog shows perfectly the string and yarn technique of crochet basketry as a bonus it has also guided me in making rectangular boxes. Fantastic!
Thanks Moke! Glad I could help. :)
I too am looking so forward to crocheting this beautiful basket–but if I fail, I may just send my supplies to you ;) I crochet left-handed (taught myself from right-handed instructions) so you could never finish what I start–lol!
Do you know of a certain website to purchase the supplies?
Thank you in advance for your reply!
Thank you for sharing it!
Haha well I’m sure you can manage it! The rope came from my local DIY store- if you live in the uk you may be able to order online from b and q. Hope that helps!
Reblogged this on Busy Working Momma of 2 and commented:
I love crochet. Great Crochet And Crafts blog to follow.
Reblogged this on Mother Jackson's and commented:
I don’t know about you but I can never, ever, have enough baskets in my house! :)
I agree! Thanks for the re-blog. :)
:)
Quick question, when working the corners, do you work the 3sc into the middle sc of the previous 3? or on either side?
Hi Kelsey! Into the middle sc of the 3. :)
It is exactly what I was looking for! Now onward to destash!
Great! I hope you enjoy making it :)
Thank you for a lovely pattern! I started my basket this week. I wanted the rope to be a little softer as I am making this basket into a laundry basket, so I chose a Cotten/poly braided cloth line/sash cord-6mm. My plan is to make basket about twice the width and length, but as I have gone past row six my base is starting to curl. I saw the post earlier about curl being caused by stitching to tight and possibly using a larger needle. I guess I will rip back to where the curl started and try the larger needle and to relax my stitchs more…I’ll let you know if this works!
Thanks Timi! I hope you are getting on ok with this. The idea is simple but the technique requires a bit of getting used to. I think the main thing is being a bit rough with your work – if it curls one way, try crocheting tighter and manipulating it ti curl the other way, then hopefully that will even it out! Finding the right rope is also important because if it is stiff and rough it will hurt your hands and if it is too soft then it will not be so stiff and harder to “set” the sides nice and straight. I hope you get on ok!
What a fantastic tutorial … I see a myriad of these in my future ‘junk room’ watch out!!! So pleased I’ve discovered your site x
Oh thank you! :) I hope you enjoy making this.
Hi I would like to start by saying how extremely creative and generous you are this rectangle basket is just perfect.
I tried doing this but im stuck with the transition of the sides. Could u explain how to vertically place rope on previous row and crochet. Ive tried and dont get it.
Also my corners curl in. Any advise woulf be great
Many thx and keep up this grt work ps is there a video tut?
Hi Maggie! I’m really pleased you like my site. Sorry you are having a few problems with the basket. This is a simple idea but a little tricky in the execution because you have to be pretty determined to get that rope in the right place! The first thing is to make sure you are crocheting very tightly. This is what holds the rope in place. The second thing is to be firm with placing the rope in the right place – and remember it takes a couple of rounds of the first vertical rows to see the sides growing up. This doesn’t have a perfect transition! I hope that helps.