I have had some feedback that my Gingham Scarf Pattern was a bit confusing in places, so I’ve written this extra tutorial to try and help.
The technique uses two strands crocheted together. Every time you get to the next colour square along one of the threads is changed.
In my pattern I differentiated between the two threads calling them “acrossways” and “lengthways”. In this photo tutorial you will see that the “acrossways” colours are white and black and the lengthways strands are red, blue and purple. See how the squares with white in run widthways across the work and the squares with blue in run down the length.

Back view of sample patch
The result in this case is a pattern of squares (left to right starting at the bottom): white with red, white with blue, white with purple, then the next row is black with red, black with blue, and black with purple. The pattern is then repeated.
How to make the demo swatch:
I took lots of photos this time!

Beginning the swatch
Start with a chain (in this case I chained 10, meant to chain 9, whoops) in the first acrossways colour (white). Change the short end for the first lengthways colour (red). Chain 2, dc, dc’.
dc’ is just a regular dc but when only two loops remain on the hook, drop the lengthways thread (in this case red) and pick up the next one (in this case blue), and then complete the stitch.
Complete two more dc and then another dc’, this time swapping the blue for the purple yarn.
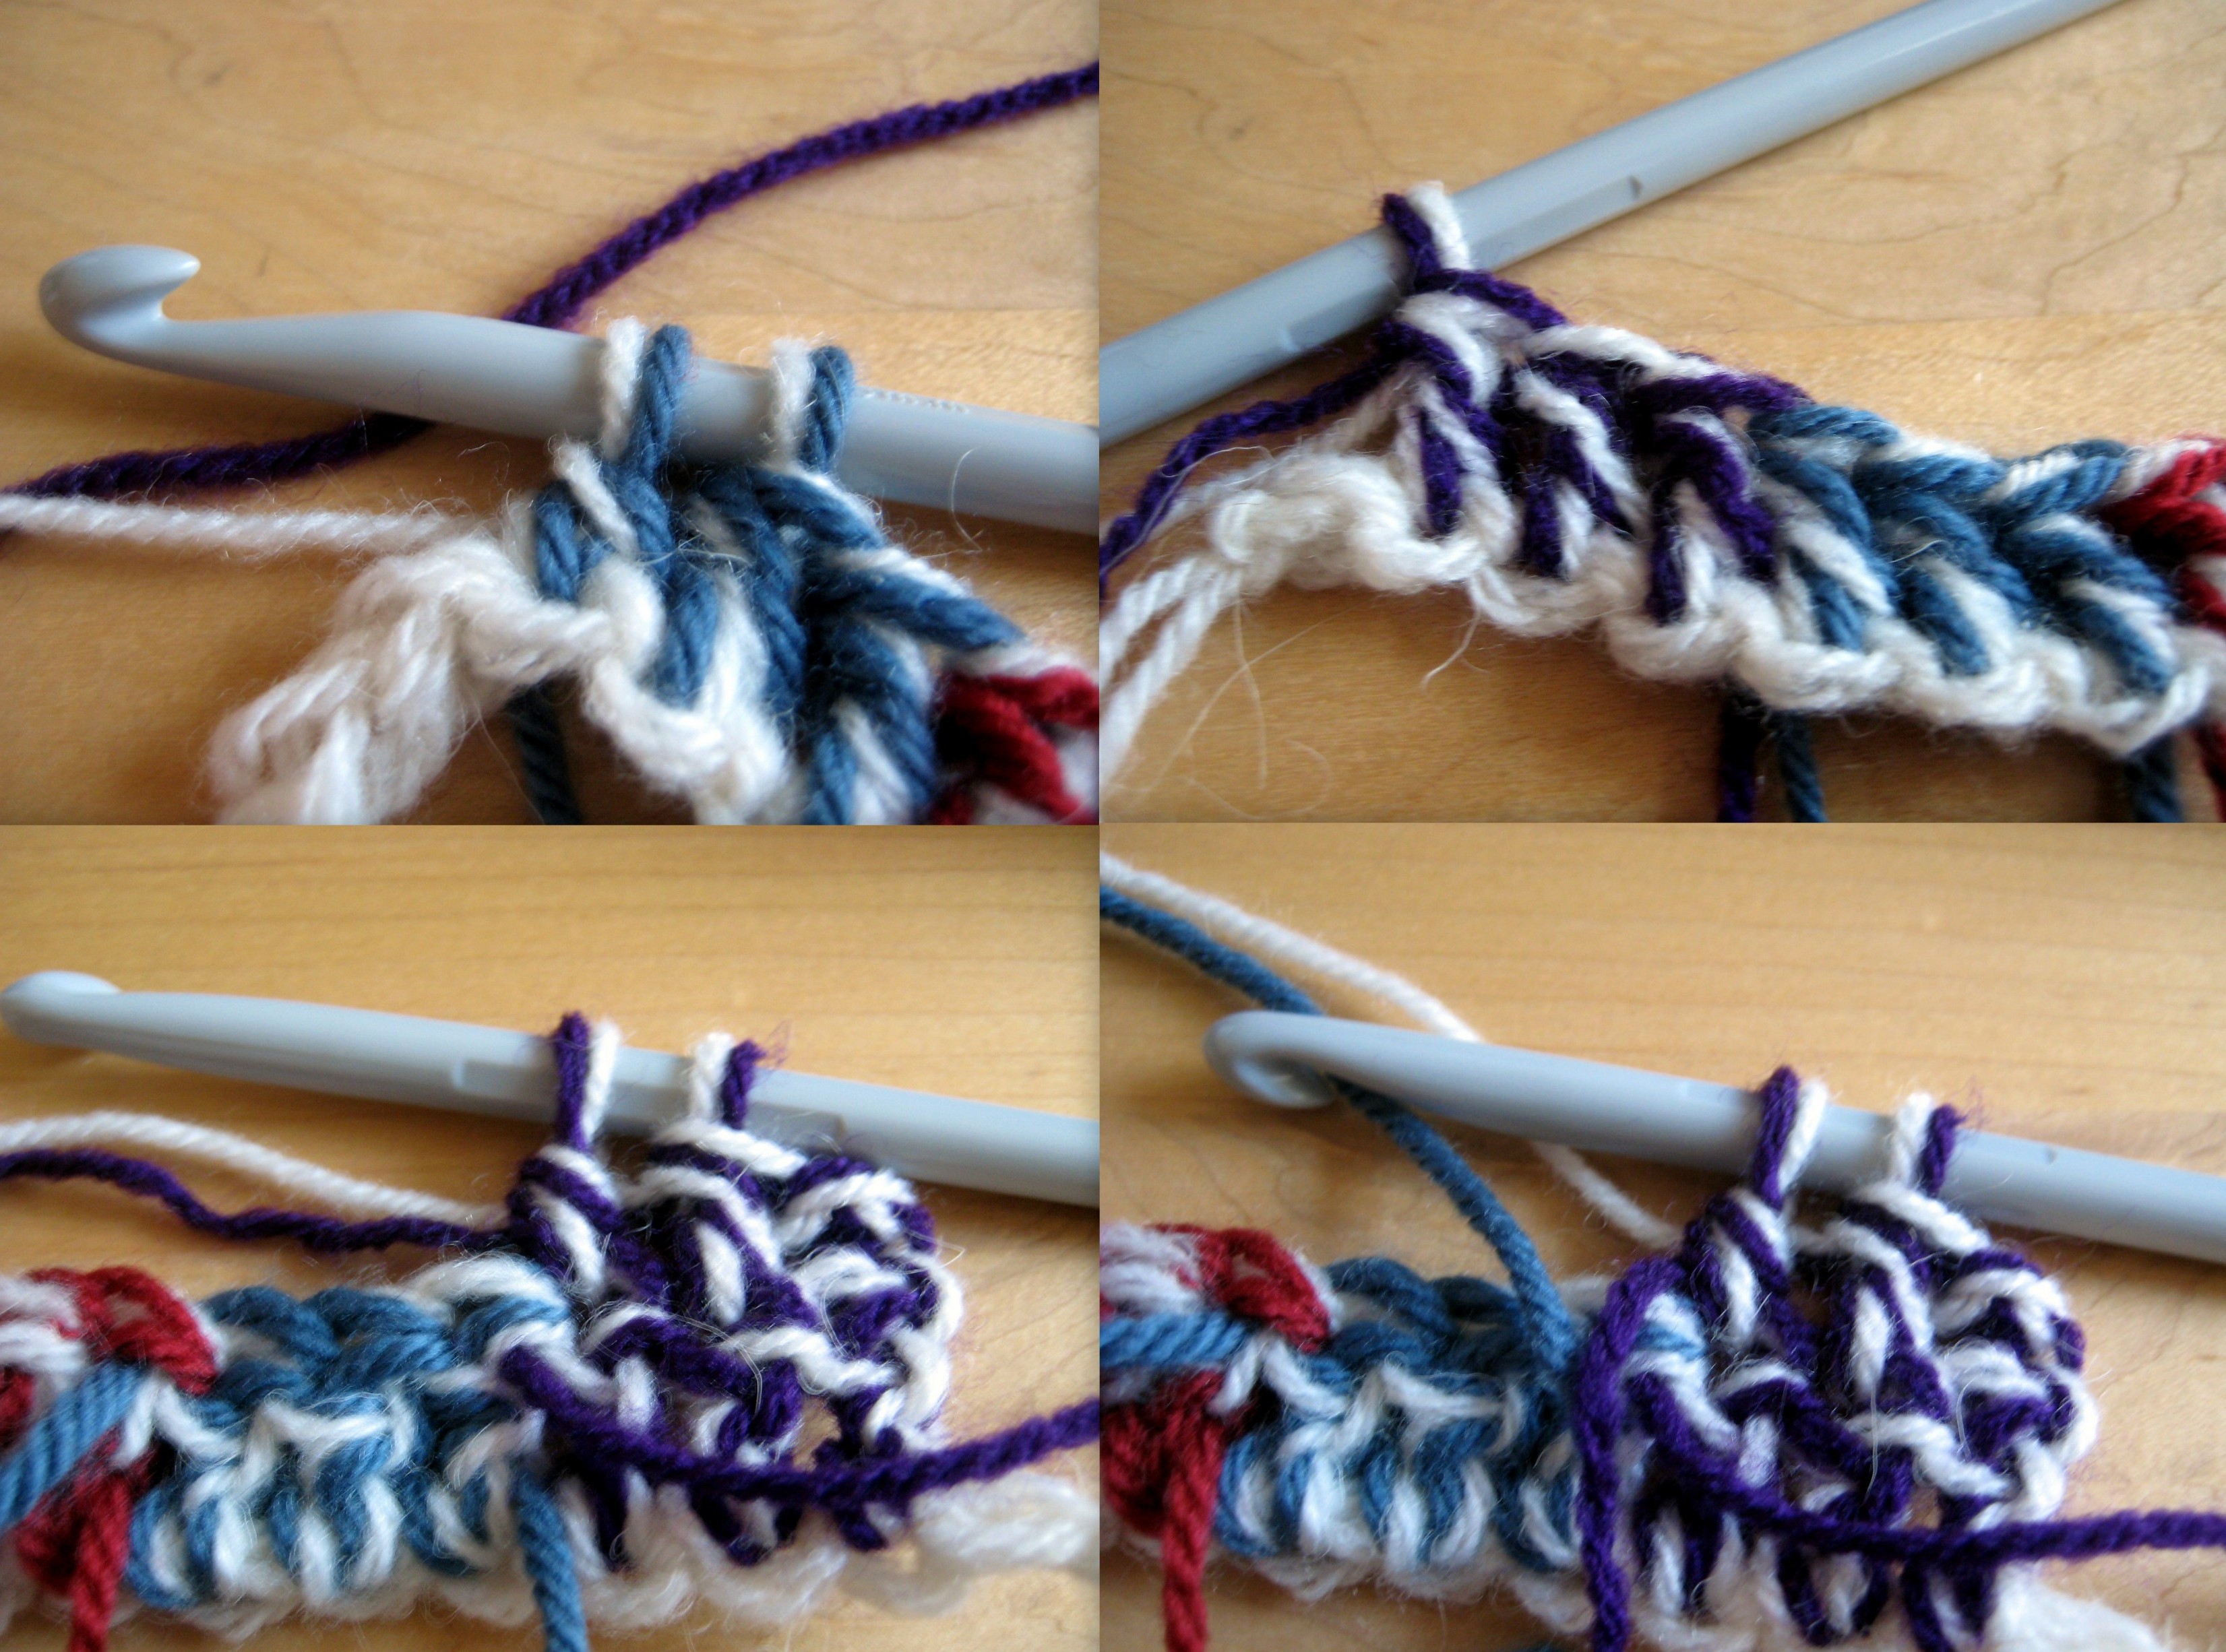
Finishing the first “square”
Complete the stitch and make 3 dc, chain 2 (counts as dc), turn, dc and then dc’ again, this time swapping the purple back for blue.
Finishing the 2nd row
Complete the dc’, 2 dc and dc’ (swapping blue for red). 2dc, then dc’, but now it is time for the next acrossways colour. Swap the white strand for black but keep hold of the red. Cut the white leaving a tail for weaving in.

Swapping in the next “acrossways” colour
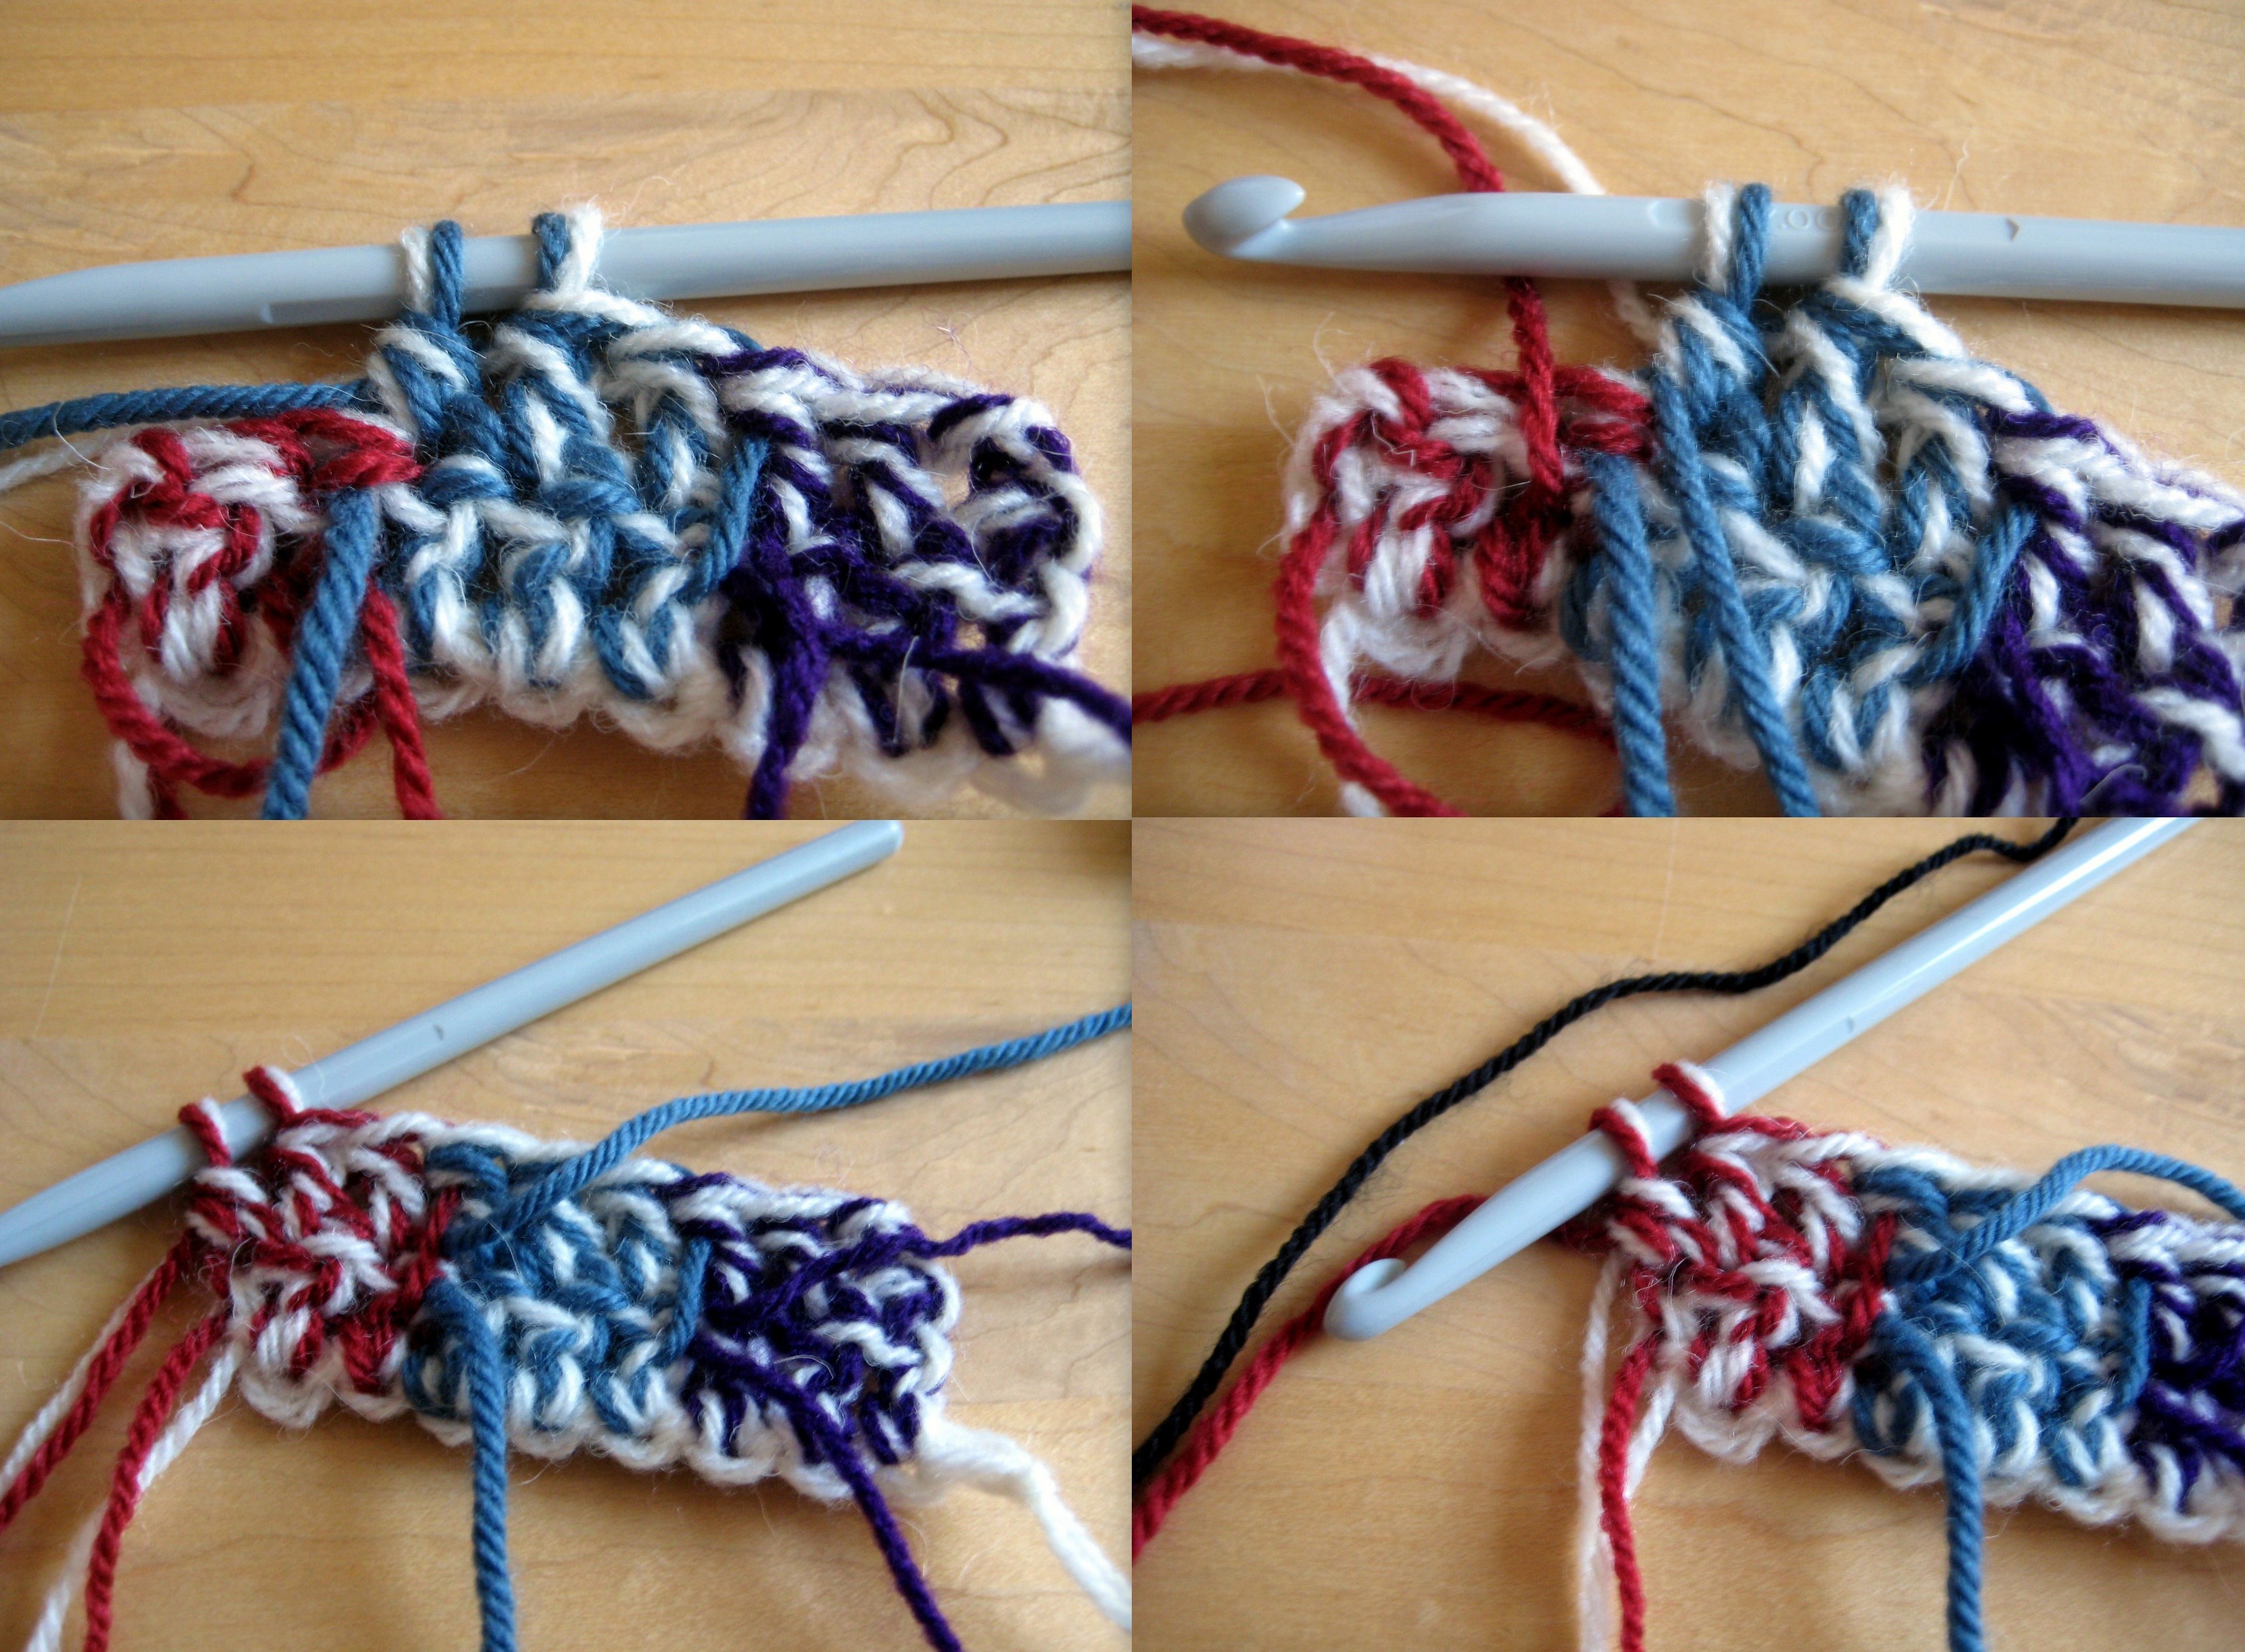
Complete the dc’, chain 2 and turn. Now continue working in pattern as before changing the lengthways colours as you go.

Finishing the swatch
After 2 rows, change the black acrossways strand to white. Complete 4 more rows to make 8 rows total, but it looks like 4 rows of squares.
Hope this helps! As you can see using several colours for the scarf is a great way of using up leftover yarn.
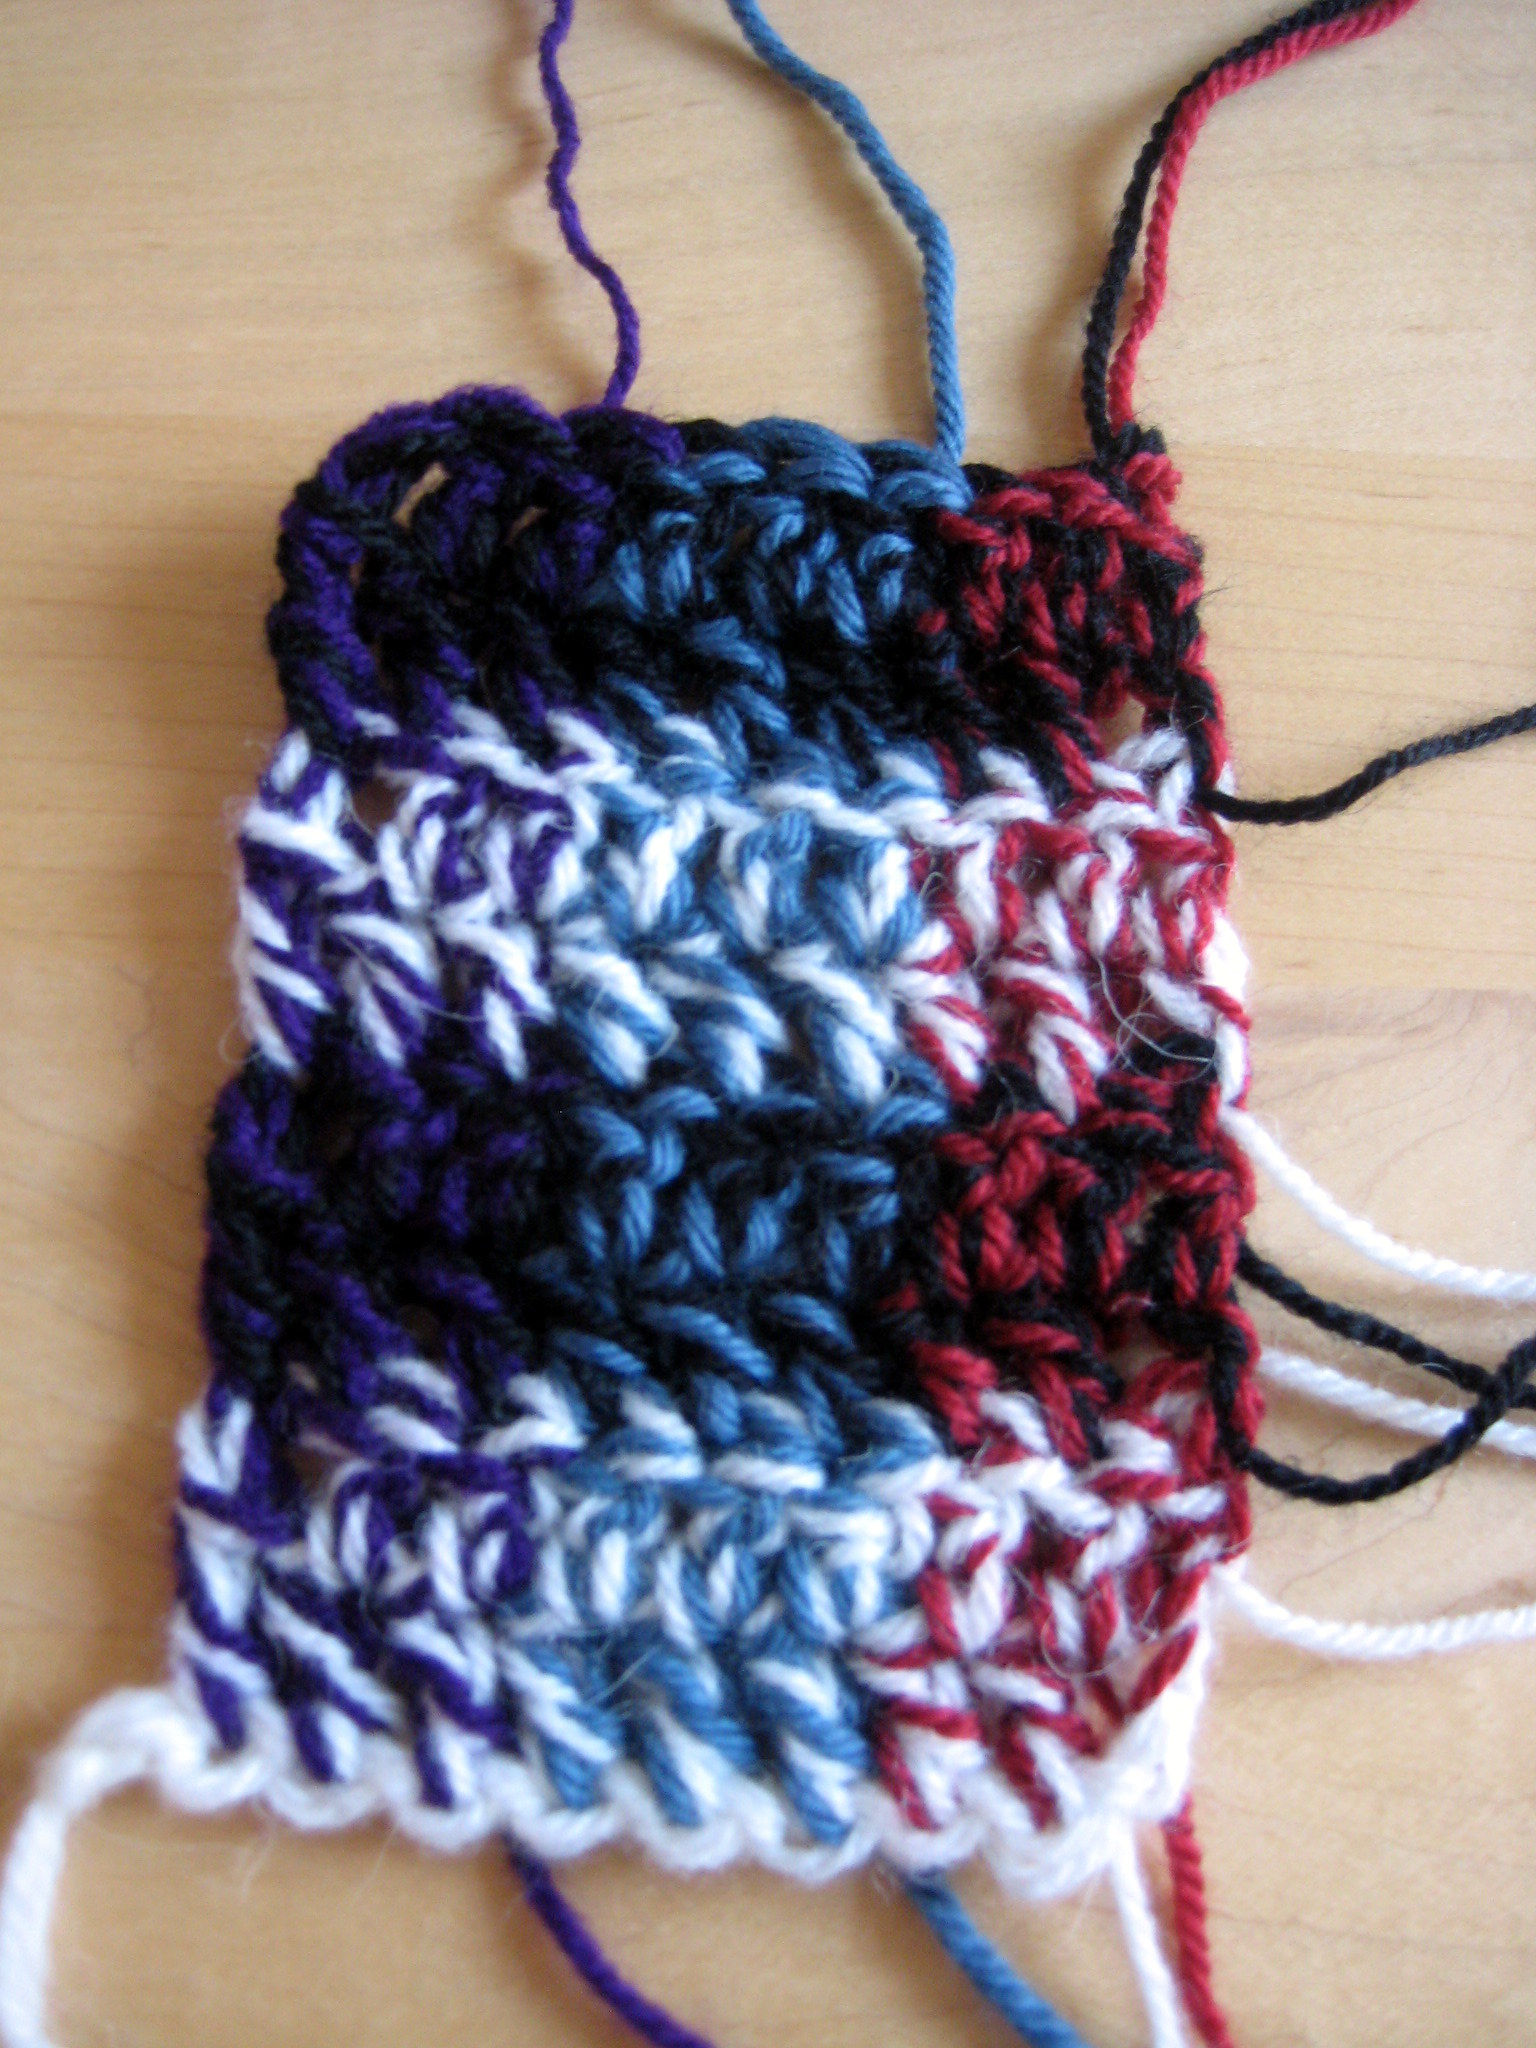
Front side of finished swatch


This is great! Thanks for sharing!
You’re welcome! :)