Increasing and decreasing in pattern can sound tricky, but with a few tips you can save a lot of wasted time.
I have previously spent a lot of time trying to work out how to increase (or decrease) a stitch pattern and then wondered why the result isn’t quite right. The main reason is I haven’t spent enough time looking at the stitch diagram, and I haven’t swatched to see how the stitch pattern works up in real life. These both sound like boring steps but both are way less stressful then frogging big sections of projects having waded straight in!
 Looking at the stitch diagram:
When you look at a stitch diagram you will see that there is usually a natural line to follow showing where it is easiest to decrease or increase. (Note – it is usually much easier to look at the diagram or chart than the sample, as you can see more clearly which stitches are made in each row).

How to increase and decrease in crochet stitch patterns – series by Make My Day Creative
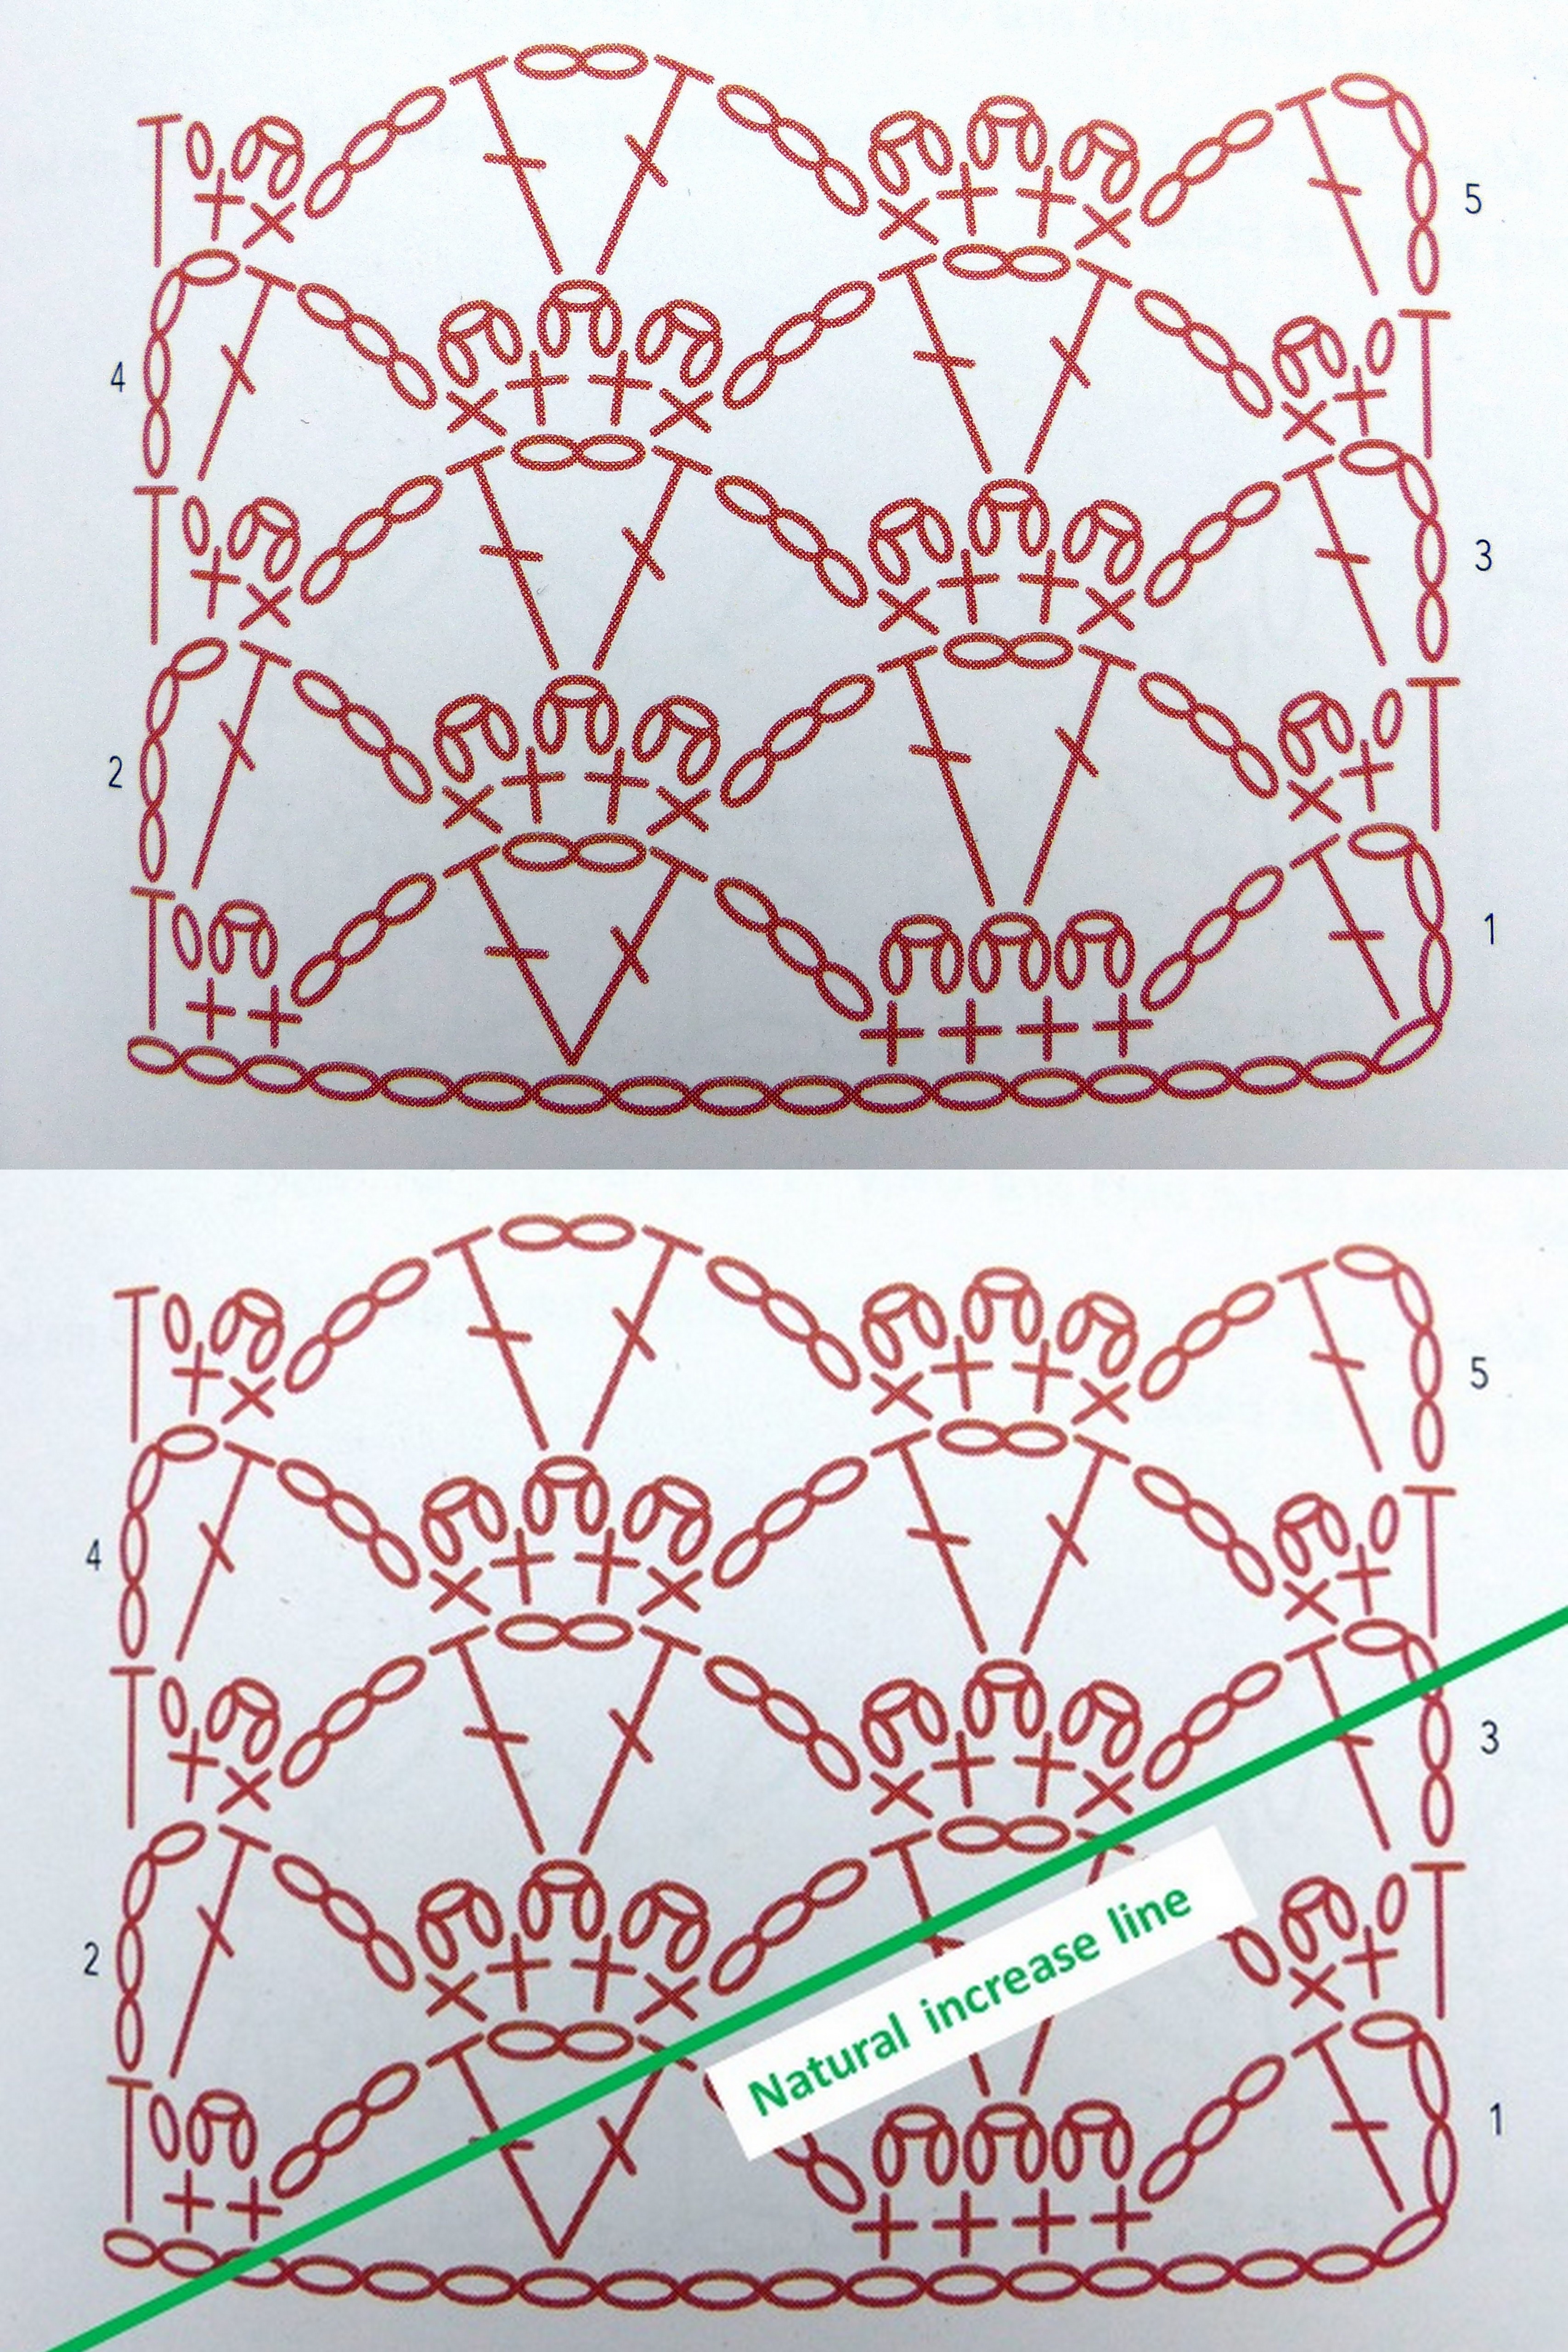
Here is the stitch diagram I chose for my Summer Sprigs Lace Shawl (the book is 200 Crochet Stitches by Sarah Hazell). You can see the natural line for the decrease, which I followed in my pattern. Everything below the (solid and dotted) line is included, with stitches crossing the line modified.
Try and spot the natural increase line in the same pattern. Can you spot it?
How to increase and decrease in crochet stitch patterns – series by Make My Day Creative
It’s actually the same line – just lowered. You would include the stitches above the line and modify those crossing it to get your diagram.
Once you have found the line along which to decrease or increase, make your own diagram, replacing certain stitches at the decrease places to make it work.
Making a swatch:
You could just dive in once you have your chart. So why swatch?
Well firstly, the diagram you have just drawn may not work quite right. You may need a 4ch rather than the 3ch you have drawn. Or an hdc may be better than a dc.
Secondly, the decrease or increase angle may be critical to your project. For example, if you are adding shaping the waistline of a seamed sweater, you will want only a slight change in angle along your edge – not a sharp one. Alternatively, if you are making a triangular shawl and your angle is too steep you could end up with one which is more like an equilateral triangle than a right angled shape, which may not be what you’re after. Once you have made a swatch, you can measure this angle (I tend to judge it by eye, but if in doubt, a protractor is your friend). Bear in mind that if you are using a strong blocking technique, this may change the angle also, so try blocking your swatch too, if you are concerned about this.

Summer Sprigs decrease edge – How to increase and decrease in crochet stitch patterns – series by Make My Day Creative
If you are not happy with the decrease or increase angle there are two options. Firstly, try modifying your stitch diagram and making a new swatch. Secondly, it may be that you have not chosen a suitable stitch pattern for your project – if the pattern is not easily modified to fit your idea, you may be better selecting a different stitch pattern and saving your original choice for another project.
Turning a corner (particularly for edges):
A quick aside on this one for those who make blankets and shawls. I’m sure many of you will have already come across the “mirror trick” – where you use a mirror at a 45° angle to reflect a stitch pattern around a corner. This is a great tip. However, if you find yourself mirrorless, try using a stitch pattern with a natural increase line on a 45° angle. Turning a corner is basically two edges with 45° increases meeting each other.
I’m planning a bonus post for the next on this series – looking in a bit more detail at triangular shawls and how to construct them with various stitch pattern increase/decrease angles – due to a reader request! If you have an area you’d like me to cover then please let me know in the comments. :) (See previous How to Design Crochet Patterns posts here)
Upcoming topics:
Triangular Shawl Bonus
Yarn Weight & Hook Size
Yarn Fibre Composition
Yarn Colour and Texture


Pingback: How to Design Crochet Patterns: Triangular Shawl Bonus | Make My Day Creative