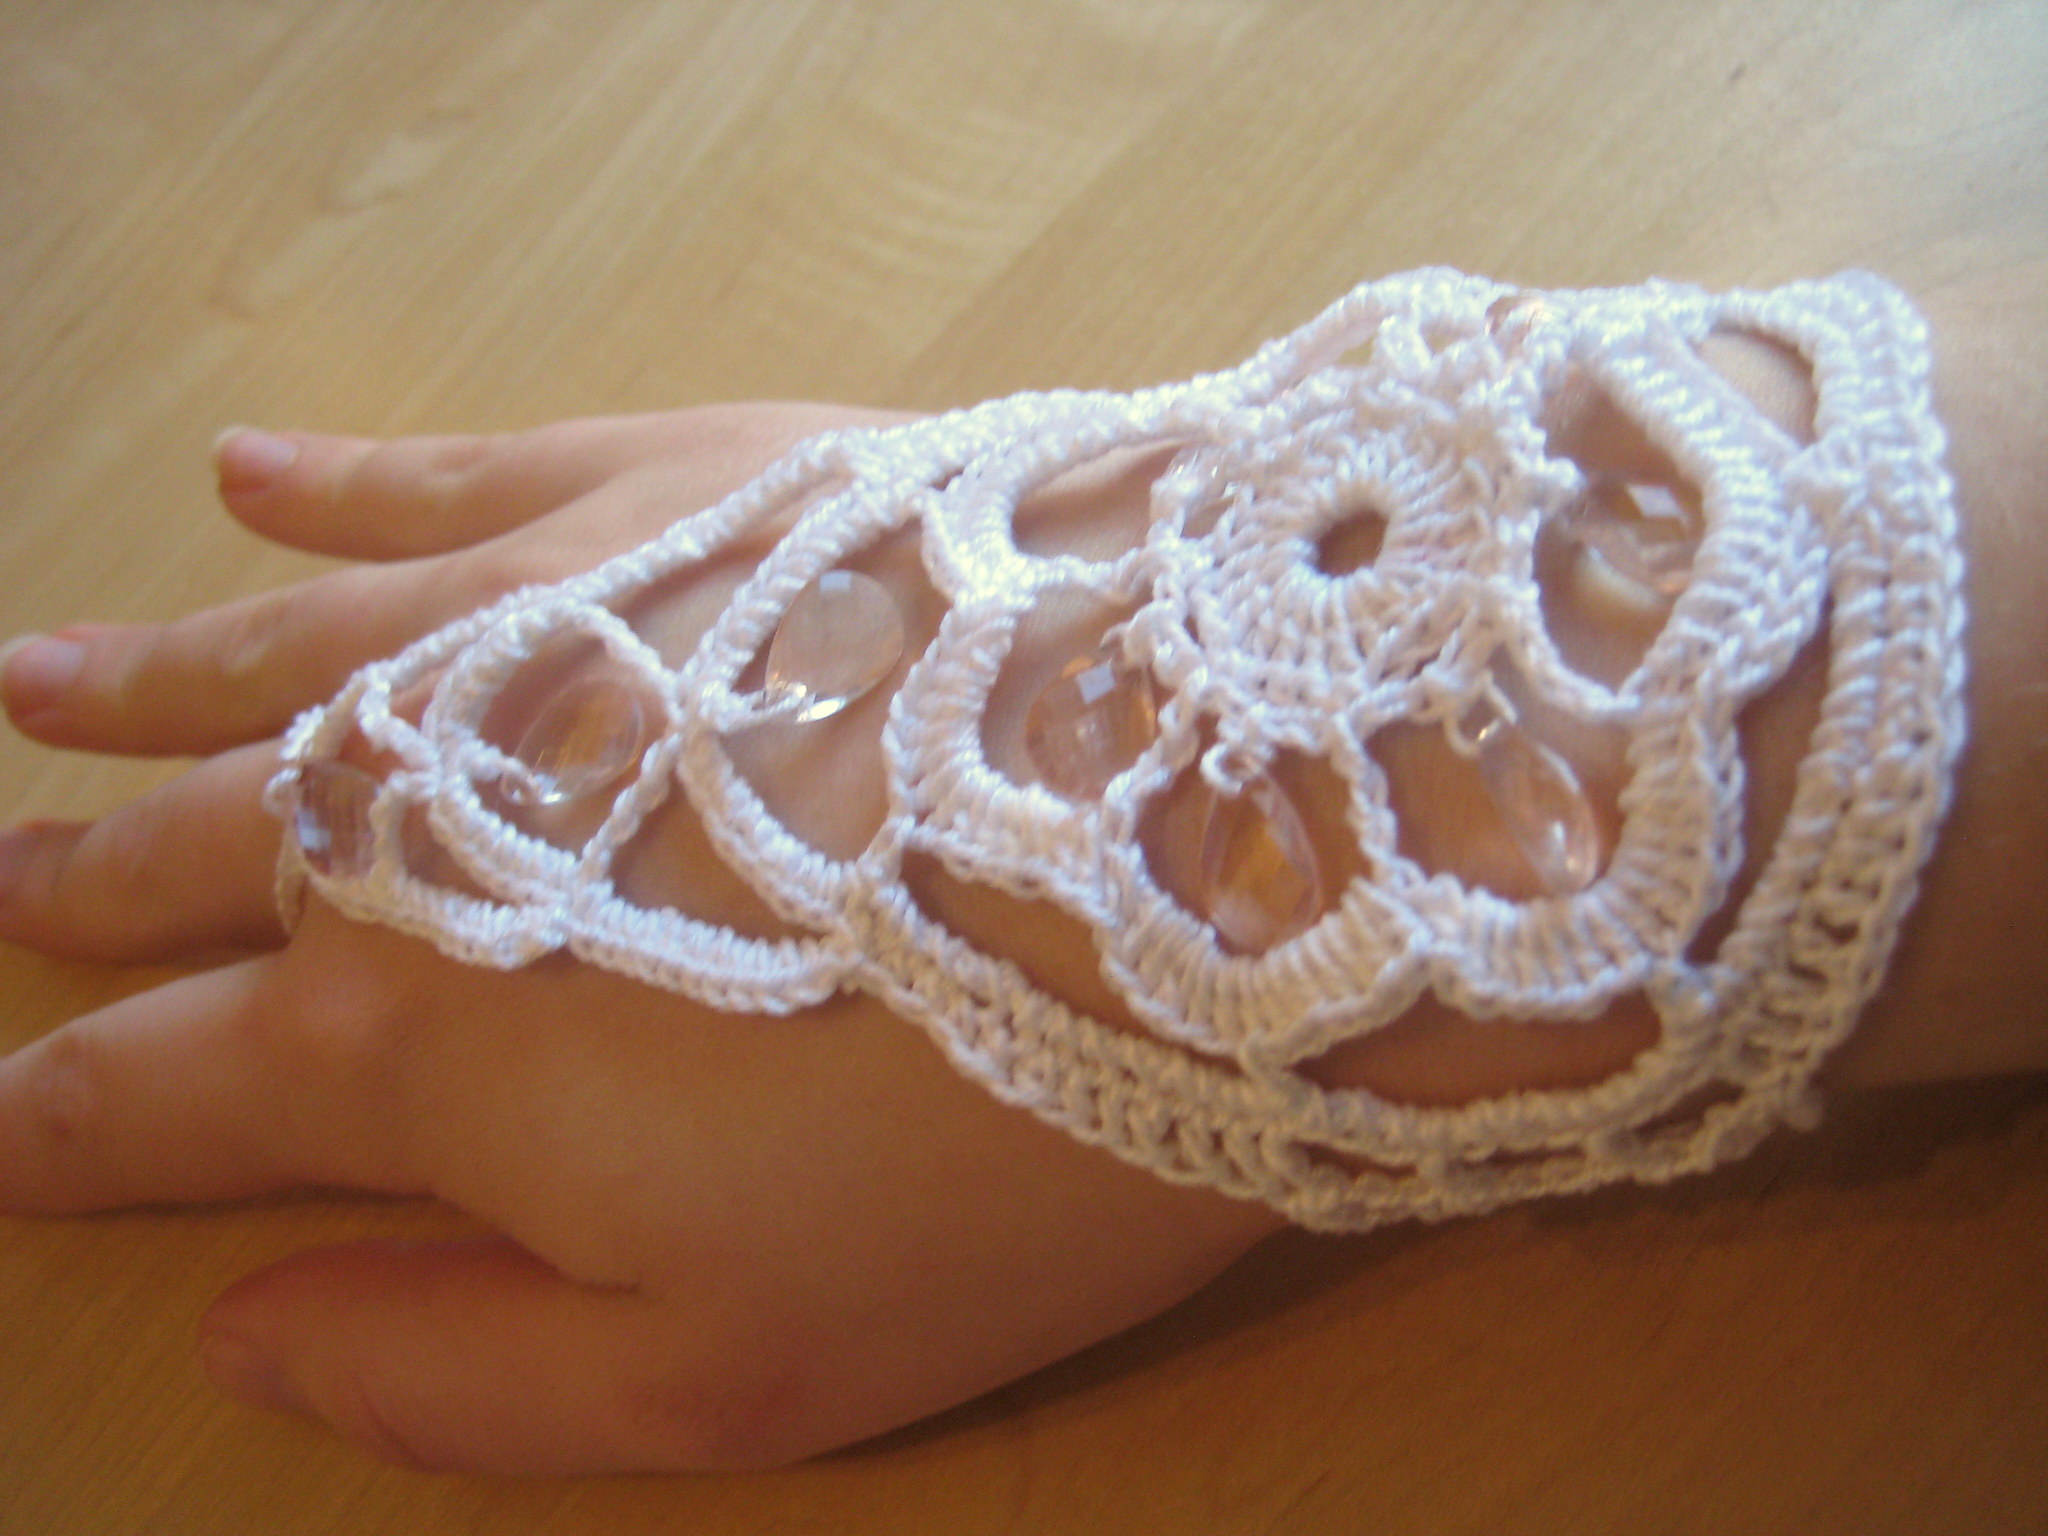
I don’t know about you, but I really love Indian henna art. I’ve never had it done because of how long it lasts. The other day it just occurred to me that I could crochet a bracelet with a similar effect – and this way it is non-permanent and I can put it back on whenever I like!

Beaded bracelet- inspired by Indian henna art
I saved the pink beads from a cluster ring which broke- I think they work well with the white thread but I may save this one for more sunny weather. The colours are quite summery and I don’t want to cover it up with a pair of gloves!
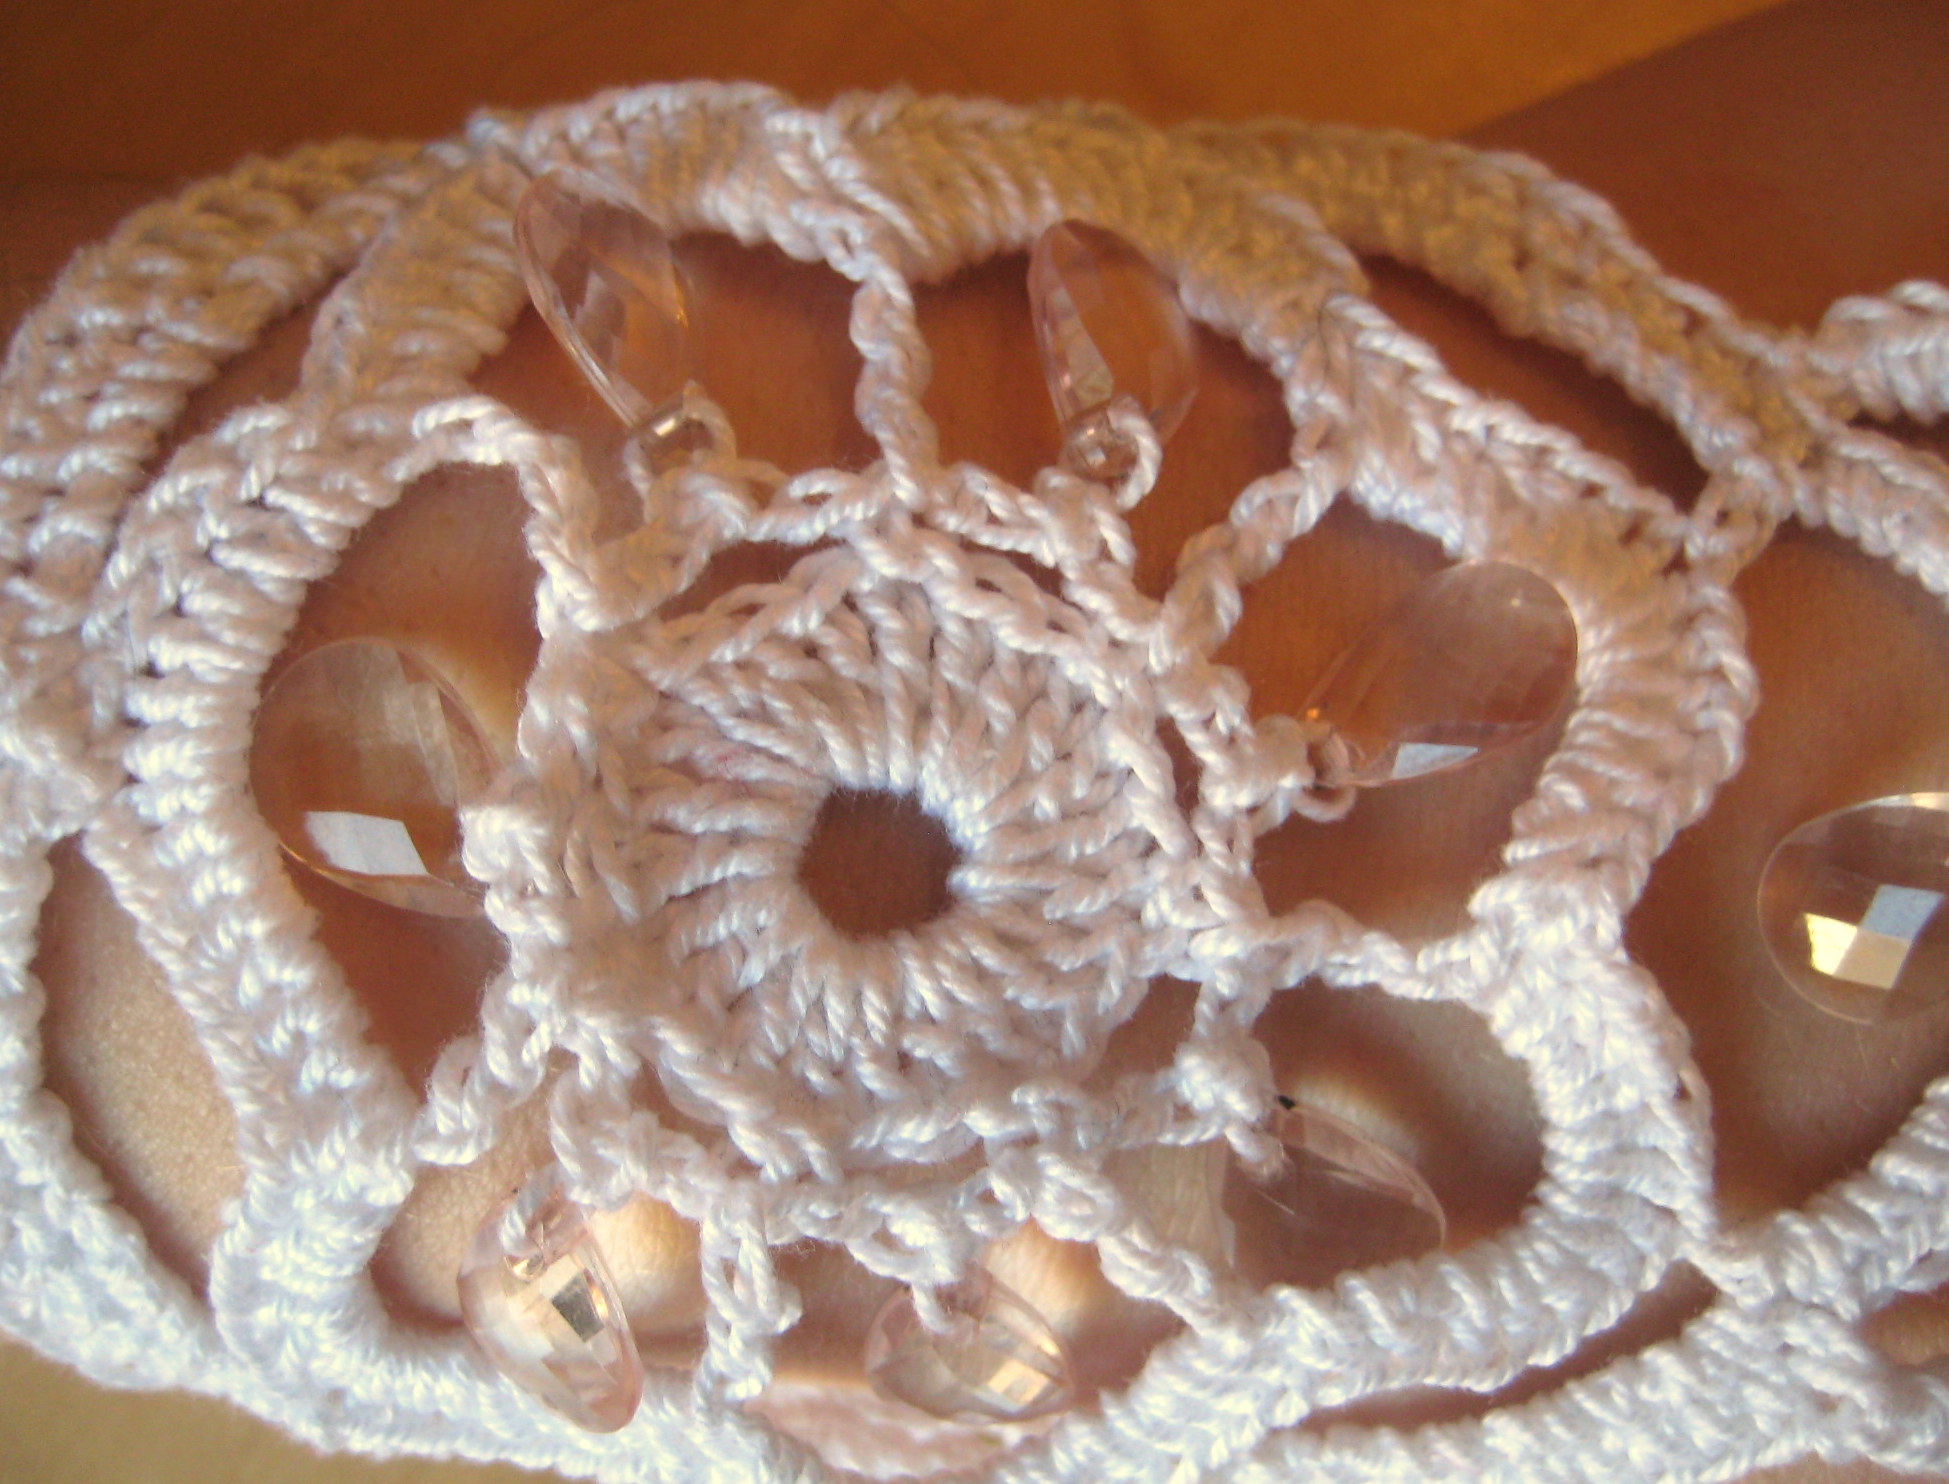
Motif detail – with beads!
Scroll down for pdf patterns! (US and UK notation)
Pattern
You will need crochet thread (I used Pixie crochet cotton 20, which would usually be used with a 1.5mm hook), a size 2mm hook, 3 buttons (10mm diameter) and 10 beads. My beads were teardrop shaped and 13mm long by 9mm wide. Smaller beads would work, but I do not recommend larger beads (unless you want the beads to overlap the thread.
The bracelet is made in 3 stages: main motif, finishing the finger section, bracelet sides.
Special st: double treble crochet: dtrc
Yarn over hook 3 times. Insert hook into st, draw up a loop (5 loops on hook). *Yarn over, draw through 2 loops, repeat from *3 more times.

Flat view of bracelet
Start by threading all 10 beads onto the thread.
Chain 7, join with a sl-st.
Round 1: ch2, 21dc, join with a sl-st (21 sts)
Round 2: ch1, sc in same st, * ch2, slide up a bead, ch1, sl-st in 2nd chain fromhook, ch2, sk 2 sts, sc in next st, repeat from * around finishing with a slst in 1st sc (7 beads used – 1 in the middle of each chain sp around)
Round 3 makes a chain around each bead.
Round 3: ch4 (counts as 1 trc), *ch10,tc in next sc, repeat from * around, on the last chain join into the top of the 4ch made at the start with a sl-st (7 chain spaces)
Round 4: ch 2, *14 hdc in ch-sp, repeat from * in each ch-sp around, ch 10, join with a sl-st.
The work now looks like a 7 petal flower when laid flat, with a bead in each petal. The next round is anchored at the point of each petal:
Round 5: 7sl-st (to move to the centre of the petal) ch1 (counts as sc), * ch10, sk 13 sts, sc, repeat from * twice^ (3 chain sps made), ch8, slide up a bead, ch1, sl-st in 1st sc, ch 8, sk 13 sts, sc, repeat from* to ^ 3 more times joining with a sl-st to the first sc made this round. (7 ch sps, bead in 4th space along)
Round 6: ch1, * 12 sc in ch sp, repeat from * twice, 11sc in ch-sp before bead, 11 sc after, *12sc in next ch-sp, repeat from * to end, join with a sl-st.
Round 7: ch1, 4sc, 4hdc, 4dc, *ch4, sk 3 sts, dc, repeat from* twice, 4dc, 4hdc, 4sc, sc2tog, ch7, sk 8 sts, dtrc (in last sc in ch sp before the bead), ch 5, slide up a bead, ch1, sl-st in 2nd ch from hook, ch5, dtrc in next st (1st sc after bead in round 5), ch7, skip 8 sts, sc2tog, 4sc. 4hdc. 4dc, *ch4, sk 3 sts, dc, repeat from * twice, 4dc, 4hdc, 4sc, sl st to join. Fasten off and weave in ends.
You will have one bead remaining on the thread. Finish the part of the bracelet which runs up to the fingers first.
Join to the first sc2tog st.
Row 8: ch1, 11sc in 1st ch sp, 7sc before the bead, 7sc after, 11sc in last ch sp, join to sc2tog st in previous round with a sl-st. Fasten off.
Turn the work over and join to the sc directly above the dtrc of round 7.
Row 9: ch6, sk 6 sts, dtrc, ch5, slide up the last bead, ch 1, sl-st into 2nd ch from hook, ch5, dtrc, ch6, sk 6, sl-st, ch1, turn.
Row 10: 9sc into chsp, 7sc before bead, 7sc after, 9 sc into last ch s, slst and fasten off.
Finger loop: Join to the 1st sc before the bead and chain 26 (or desired length for your finger loop). Sl-st into next st and fasten off. Weave in all ends.
Bracelet sides:
The bracelet sides are joined at the anchor points of the groups of 3 chain sps made in round 7.
Join at the last dc before the first ch-sp.
Row A: *ch6, sk 4 ch, sc in next st, repeat from *twice, turn (3 ch sps)
Row B: ch 7, sl st into first ch sp, ch 6, sl-st in next ch sp, repeat from *, ch 2, trc into st where row A was joined.
Row C: *ch6, sl st in next ch sp, repeat from *twice, turn (3 ch sps)
Row D: ch 7, sl st into first ch sp, ch 6, sl-st in next ch sp, repeat from *, ch 2, trc into trc st from row B.
Continue to repeat row C and D, and finish with a row C when the first side is desired length (I did 3 row C’s total).
Repeat on the other side, but following the last row C finish as follows:
Row E: ch5, sl st in first ch sp, ch 4, sl st in next ch sp, repeat form *, ch 2, dc in trc of row B below. Ch2 and turn.
Row F: 2hdc in ch sp, 4hdc in next two ch sps, 3 hdc in last ch sp, ch 2, turn (14 sts)
Row G: hdc in each st to end, ch 2, turn (14 sts)
Continue working Row G until the button placket is sufficiently wide. (Mine took 3 row E’s.)
Fasten off and weave in ends. Block as desired.
Sew 3 buttons onto the placket – I did mine on the reverse so they don’t show, but if yours are interesting buttons sew them on the outside.

Button detail

Fastens on the reverse to hide the buttons
Please let me know how you find this pattern- I haven’t written anything this complex before and it is untested!
Now I can’t wait till summer to wear this!


Beautiful job.
Will look beautiful for a wedding.
Thanks for sharing the pattern.
What a great idea! And you’re welcome. :)
been desperately looking for a pattern that replicates henna design and voila I found one here !! thanks for this.
You’re welcome! Hope you like it. :)
Pingback: Bracelet Patterns | Make My Day Creative