Plaid Cowl – A super easy free crochet pattern from Make My Day Creative
 I’m glad to be back in blog land after a few weeks away on holiday – more on this later!
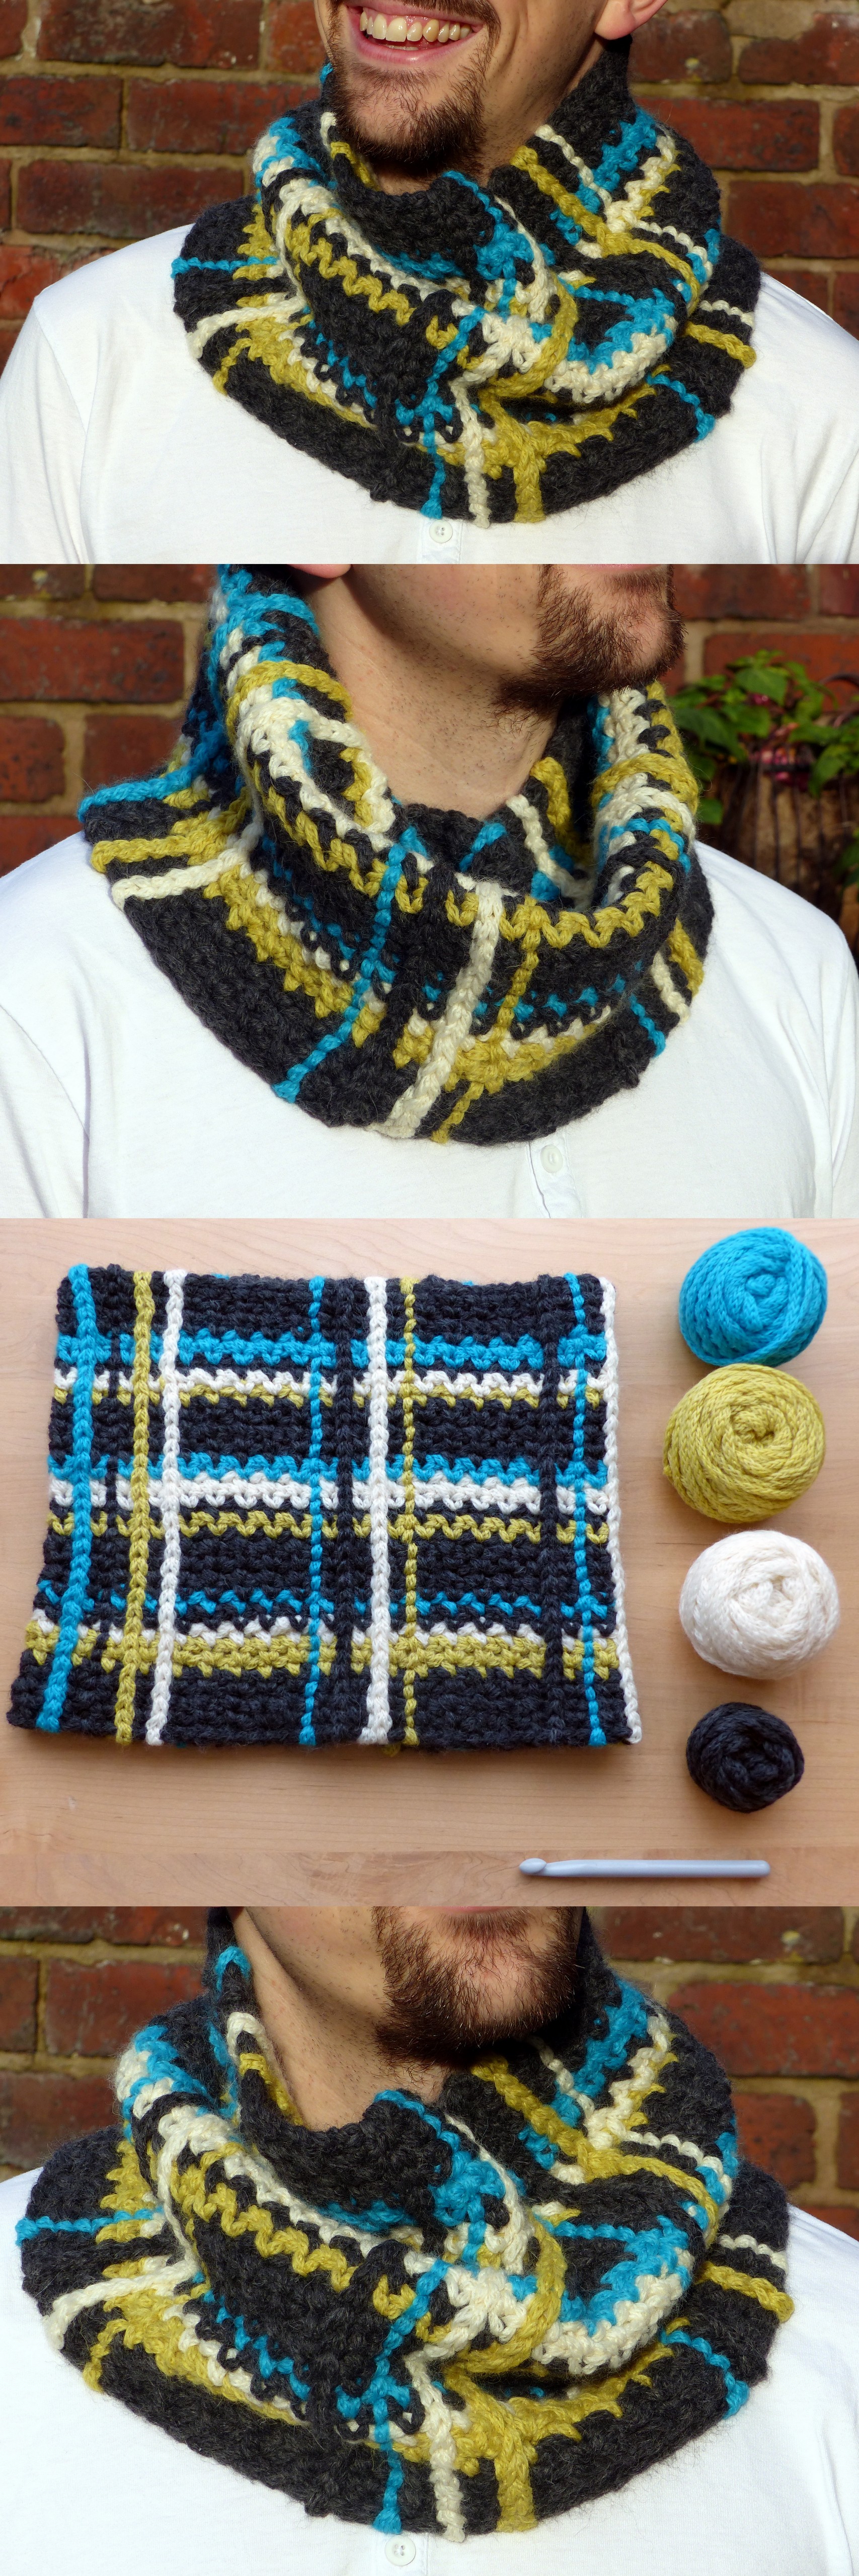
I’ve seen a few plaid or tartan effect blankets done using this technique and I really like the effect. This is a great way to try it out and make a great guy gift at the same time. This one is for my brother for Christmas (shhhh!) though I think my husband did a great modelling job for me :)
The cowl is designed to be oversized and chunky but you can easily adapt the pattern to suit your preferred style and yarn. I really liked my yarn choice because it’s made from a chainette construction and super soft. The cowl can be worn draped or folded in half so it stands up from the neck.
Scroll down for pdf patterns! (US and UK notation)
Materials:
10mm crochet hook
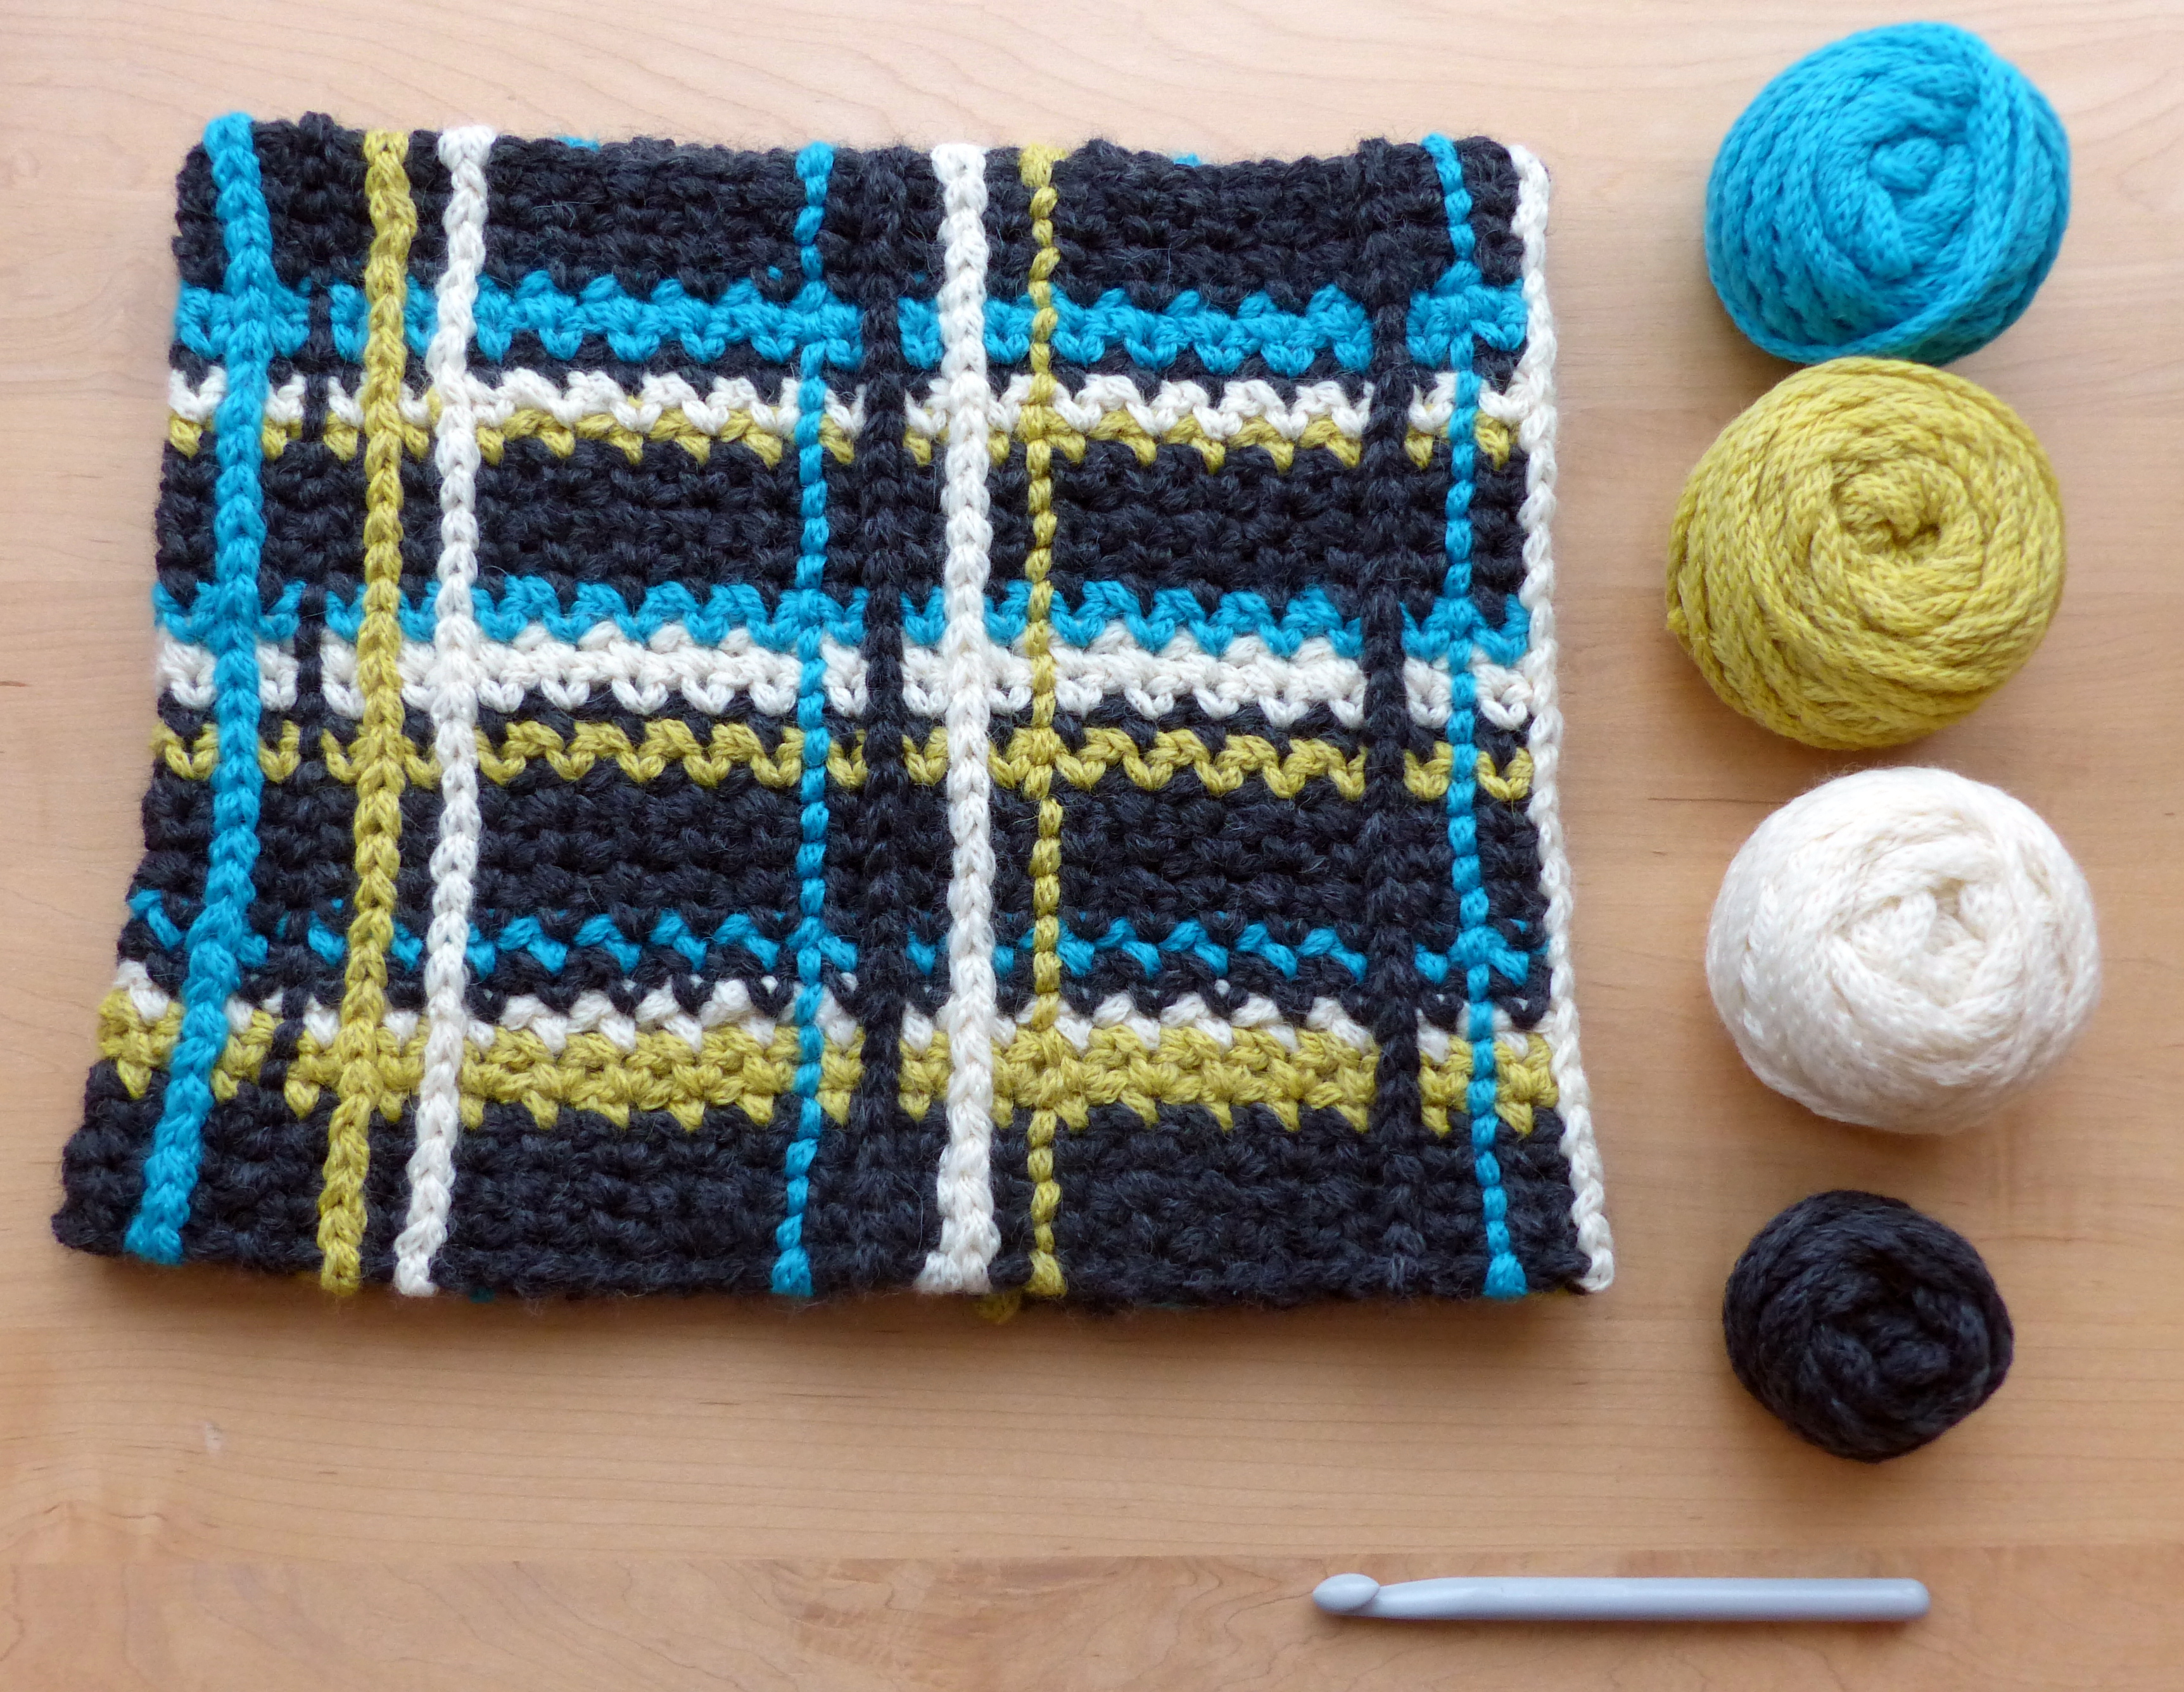
Super chunky yarn (I used Debbie Bliss Paloma – 65m per 50g skein):
125m grey (charcoal)
40m of each chartreuse (lime), cream (buttermilk), blue (jade)
Design:
Plaid Cowl – A super easy free crochet pattern from Make My Day Creative
The cowl is made in the round by first crocheting a horizontally striped base and then surface crocheting vertical stripes over the top.
Here’s how I worked out my cowl foundation length:
The vertical stripes are worked in surface crochet through ch1 spaces made in the horizontally-crocheted base.
I used 4 colours – a main colour and 3 accents (blue, cream and chartreuse). I decided to work my vertical surface crochet lines in 4 stripes and then leave 4 chain spaces for the horizontal stripes to show through, which meant I needed 8 chain spaces for each pattern repeat. For 5 pattern repeats, I needed 40 chain spaces. The chain spaces are every other stitch (i.e. ch1, sc, repeat) so that means I needed a foundation of 80 chains.
If you are modifying the pattern then please make sure that your foundation chain is the right length to fit over your head before you start!
Pattern:
Begin with the main colour. Chain 80 and join with a sl-st to work in the round, making sure it isn’t twisted.
R1: ch2 (counts as sc, ch1), *skip next ch, sc, ch1, repeat from * around and join with a sl-st into 1st ch-sp (40sc and 40 ch-sps – 80 sts)
R2: ch2 (counts as sc, ch1), *skip next ch-sp, sc into next sc, ch1, repeat from * around and join with a sl-st into 1st ch-sp (40sc and 40 ch-sps – 80 sts)
Repeat R2 for 2 more rounds, then join your preferred colour (chartreuse in example). Work 2 rounds (or your preferred amount for the stripe pattern you prefer). Continue to work rounds changing colour as you desire. Here is the stripe pattern used in the example:
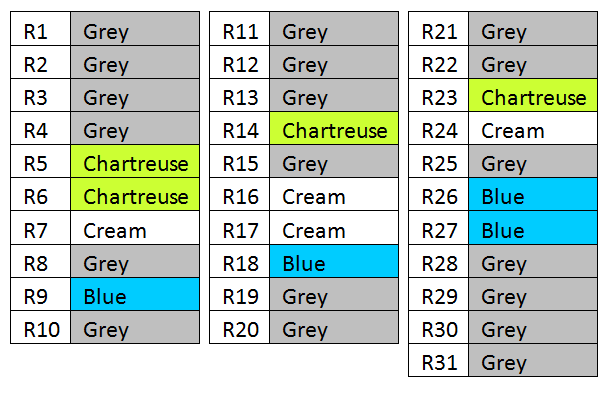
As you can see, I deliberately varied my stripes for visual interest but you can use whatever pattern you like! Just keep making rounds until your cowl is the size you want.
Fasten off and weave in ends before starting the vertical stripes. Crocheting over the weaved in ends will secure them even more.
To add the surface crochet, insert the hook into one of the chain spaces between the chain and R1, and using whichever colour you want to begin with, draw up a loop. You will need to hold the working yarn behind the work. Insert hook into the chain space directly above and draw up a second loop, and draw this loop through the first loop on the hook to complete the sl-st. Continue on until you reach the top of the work, and make a final sl-st over the final chain so that you have crocheted over the edge itself. You will see pairs of loops on the front side and on the back will be single loops (often called the “ridge” when making a chain). I added texture to my cowl by working some single stipes (i.e. stopping at this point) and some double stripes made as follows:
Flip the work inside out so that you are looking at the “ridge” side. Keep the hook in the loop, and hold the working yarn behind the work. Surface crochet up the same chain spaces just worked into directly to one side of the ridge, so that there are 3 loops showing over each ch-sp. The back will look the same as the front.
Fasten off at the top of the work and move on to the adjacent ch-sp using your preferred colour. Work 4 adjacent stripes, varying either single stripes, double stripes, or single stripes on the reverse. You will end up with a double sided cowl with a reversible pattern which is different on one side to the other.
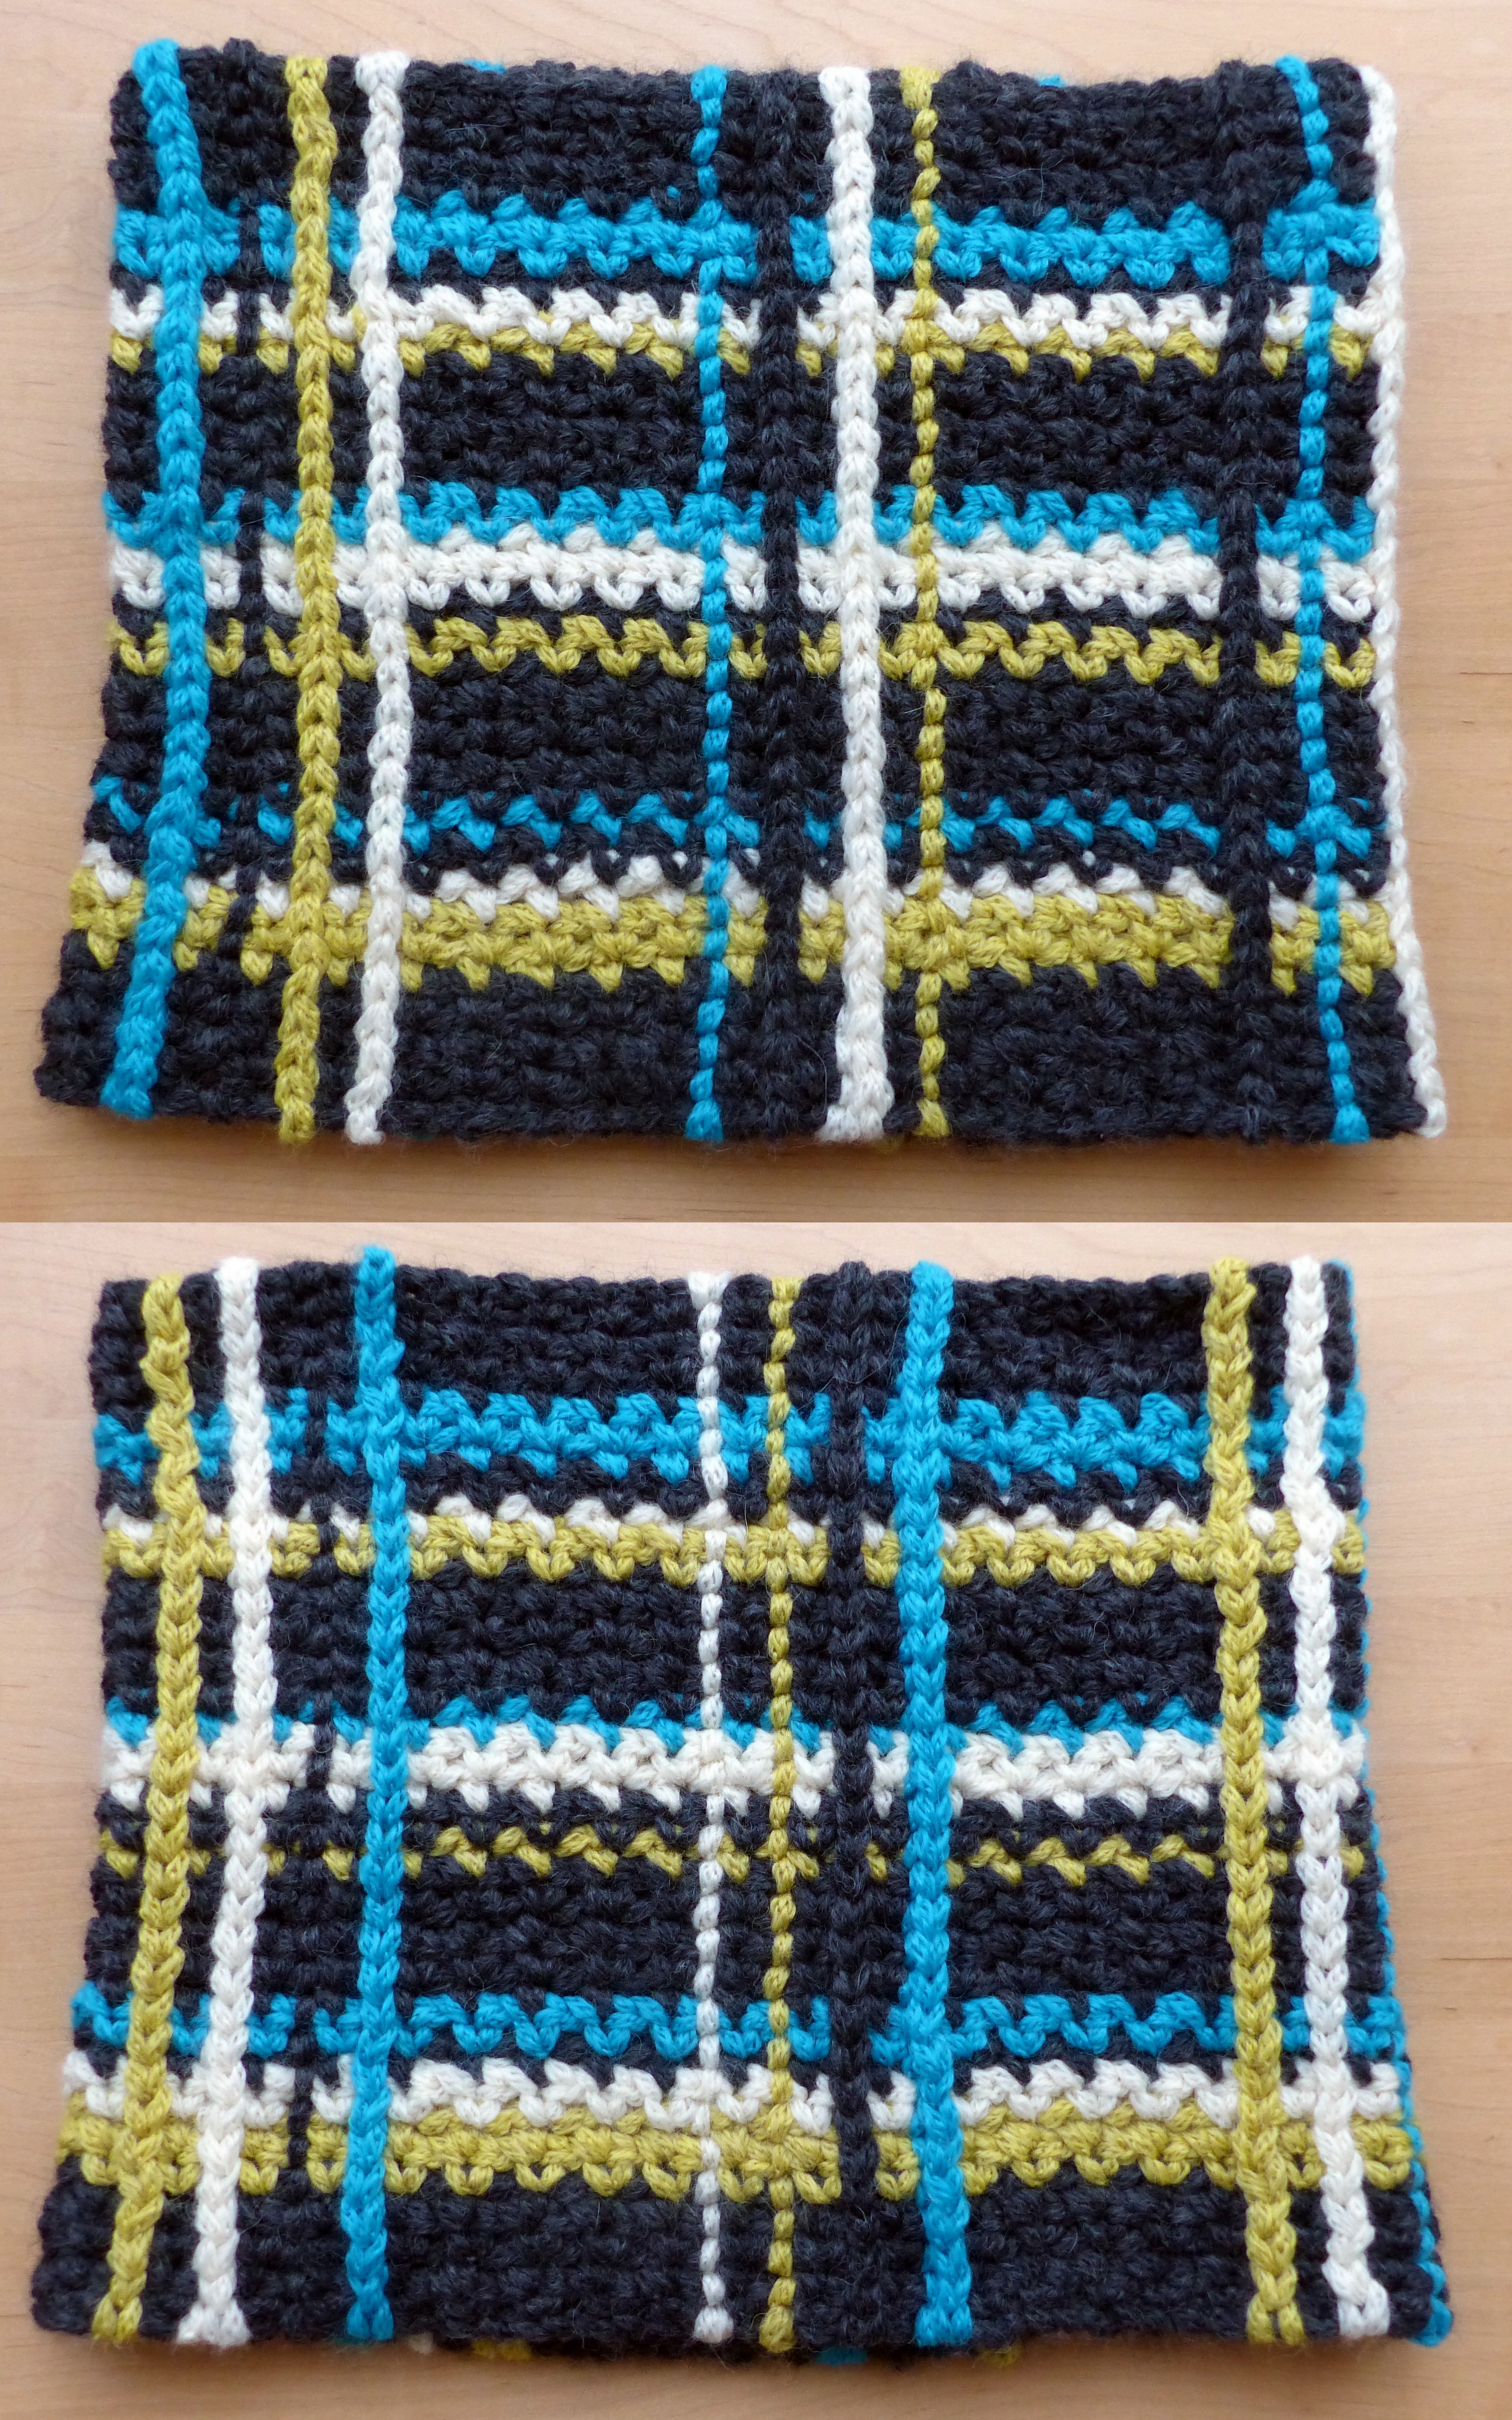
“Front” and “Reverse” of Plaid Cowl – A super easy free crochet pattern from Make My Day Creative
Skip 4 adjacent ch-spaces and repeat the process to make the next 4 stripes. Continue until all your vertical stripes are made.
Fasten off and weave in ends. Snuggle up in your chunky new cowl :)


I Love it
Thanks! :)
Pingback: Christmas Crochet | Make My Day Creative
Pingback: Bubble Wrap Crochet Cowl | Make My Day Creative