
Doily flap on leather clutch bag :)

I have been working up to this project for a while. Arguably since I was 15 and my parents bought me this awesome leather jacket. I have literally loved it to bits!

Detached lining and scuffed edges = time for a re-fashion!
It has been soaked in the rain, thrown about, scuffed up, had acid dropped on it (chemistry class), lost its lining in most places and still I have worn it. Last year, the zip finally gave up, and so did I.
The thing is some of the leather is actually still in pretty good shape. And not wanting to part with it, I decided a re-fashion was in order. It was still a little sad to cut into the leather, but I really was never going to wear it again.
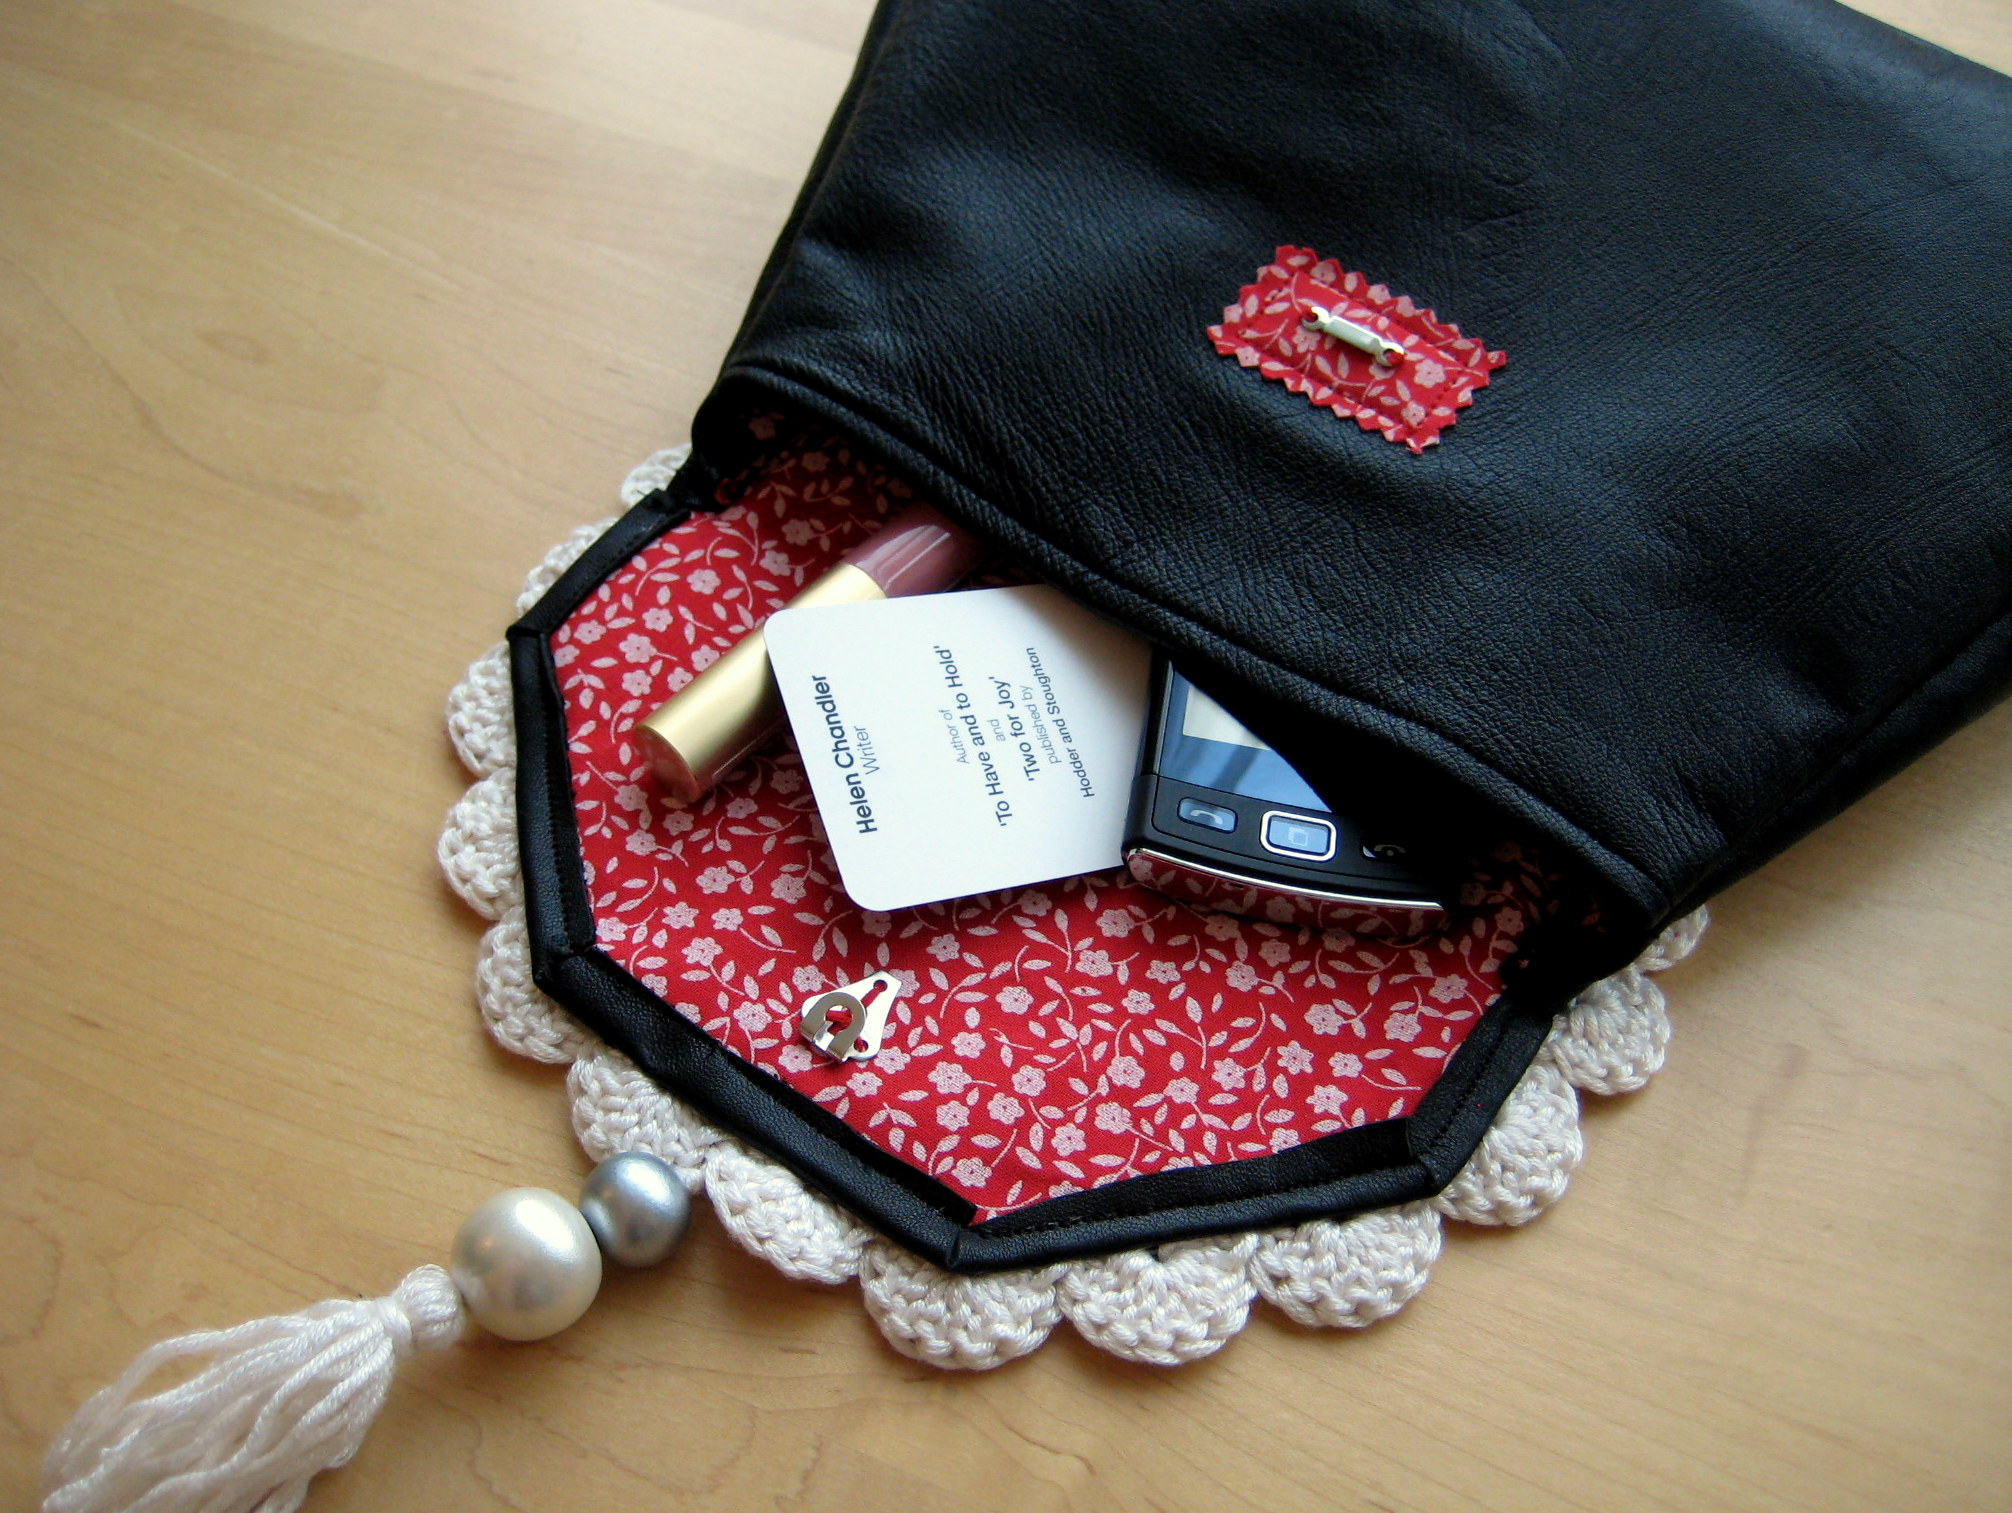
Fun red lining in leather and doily clutch bag
I’ve seen a few pretty bags using doilies as flaps. I know leather plus doily is a bit unexpected, but I quite like that. The leather kind of takes the doily from granny chic to rock chic. For my doily pattern, see my post from last week.
Materials:
- 1 doily, 17cm in diameter (or adjust the size of the pattern to match your doily)
- Leather or preferred outer fabric (about 0.5m square)
- Lining fabric – I used a pretty fat quarter I had in my stash
- Interfacing (this adds stiffness so I recommend it)
- Fastening (I used a hook and bar but you can use whatever you like)
- Beads and tassel (I made my own using the same yarn from making the doily)
- Pinking shears & leather needle for your sewing machine
Method
1. Cut out the pattern
First download the pattern pieces (scroll down for the pdf pattern) and make sure they are to scale (or scale them to suit your doily size). Cut them out including the 1 cm seam allowance. You may need more if you are working in a fabric which frays – leather is nice to work with in that it doesn’t fray, and I was constricted by the pieces I had salvaged from my jacket so I cut the seams allowance pretty close!
2. Cut the leather (or outer fabric) pieces
Do not pin to leather as it makes holes! I taped my pattern on using washi tape (it was what I had lying around). Alternatively make sure your pins are in the seam allowance)
3. Iron the interfacing onto the reverse of the lining fabric.
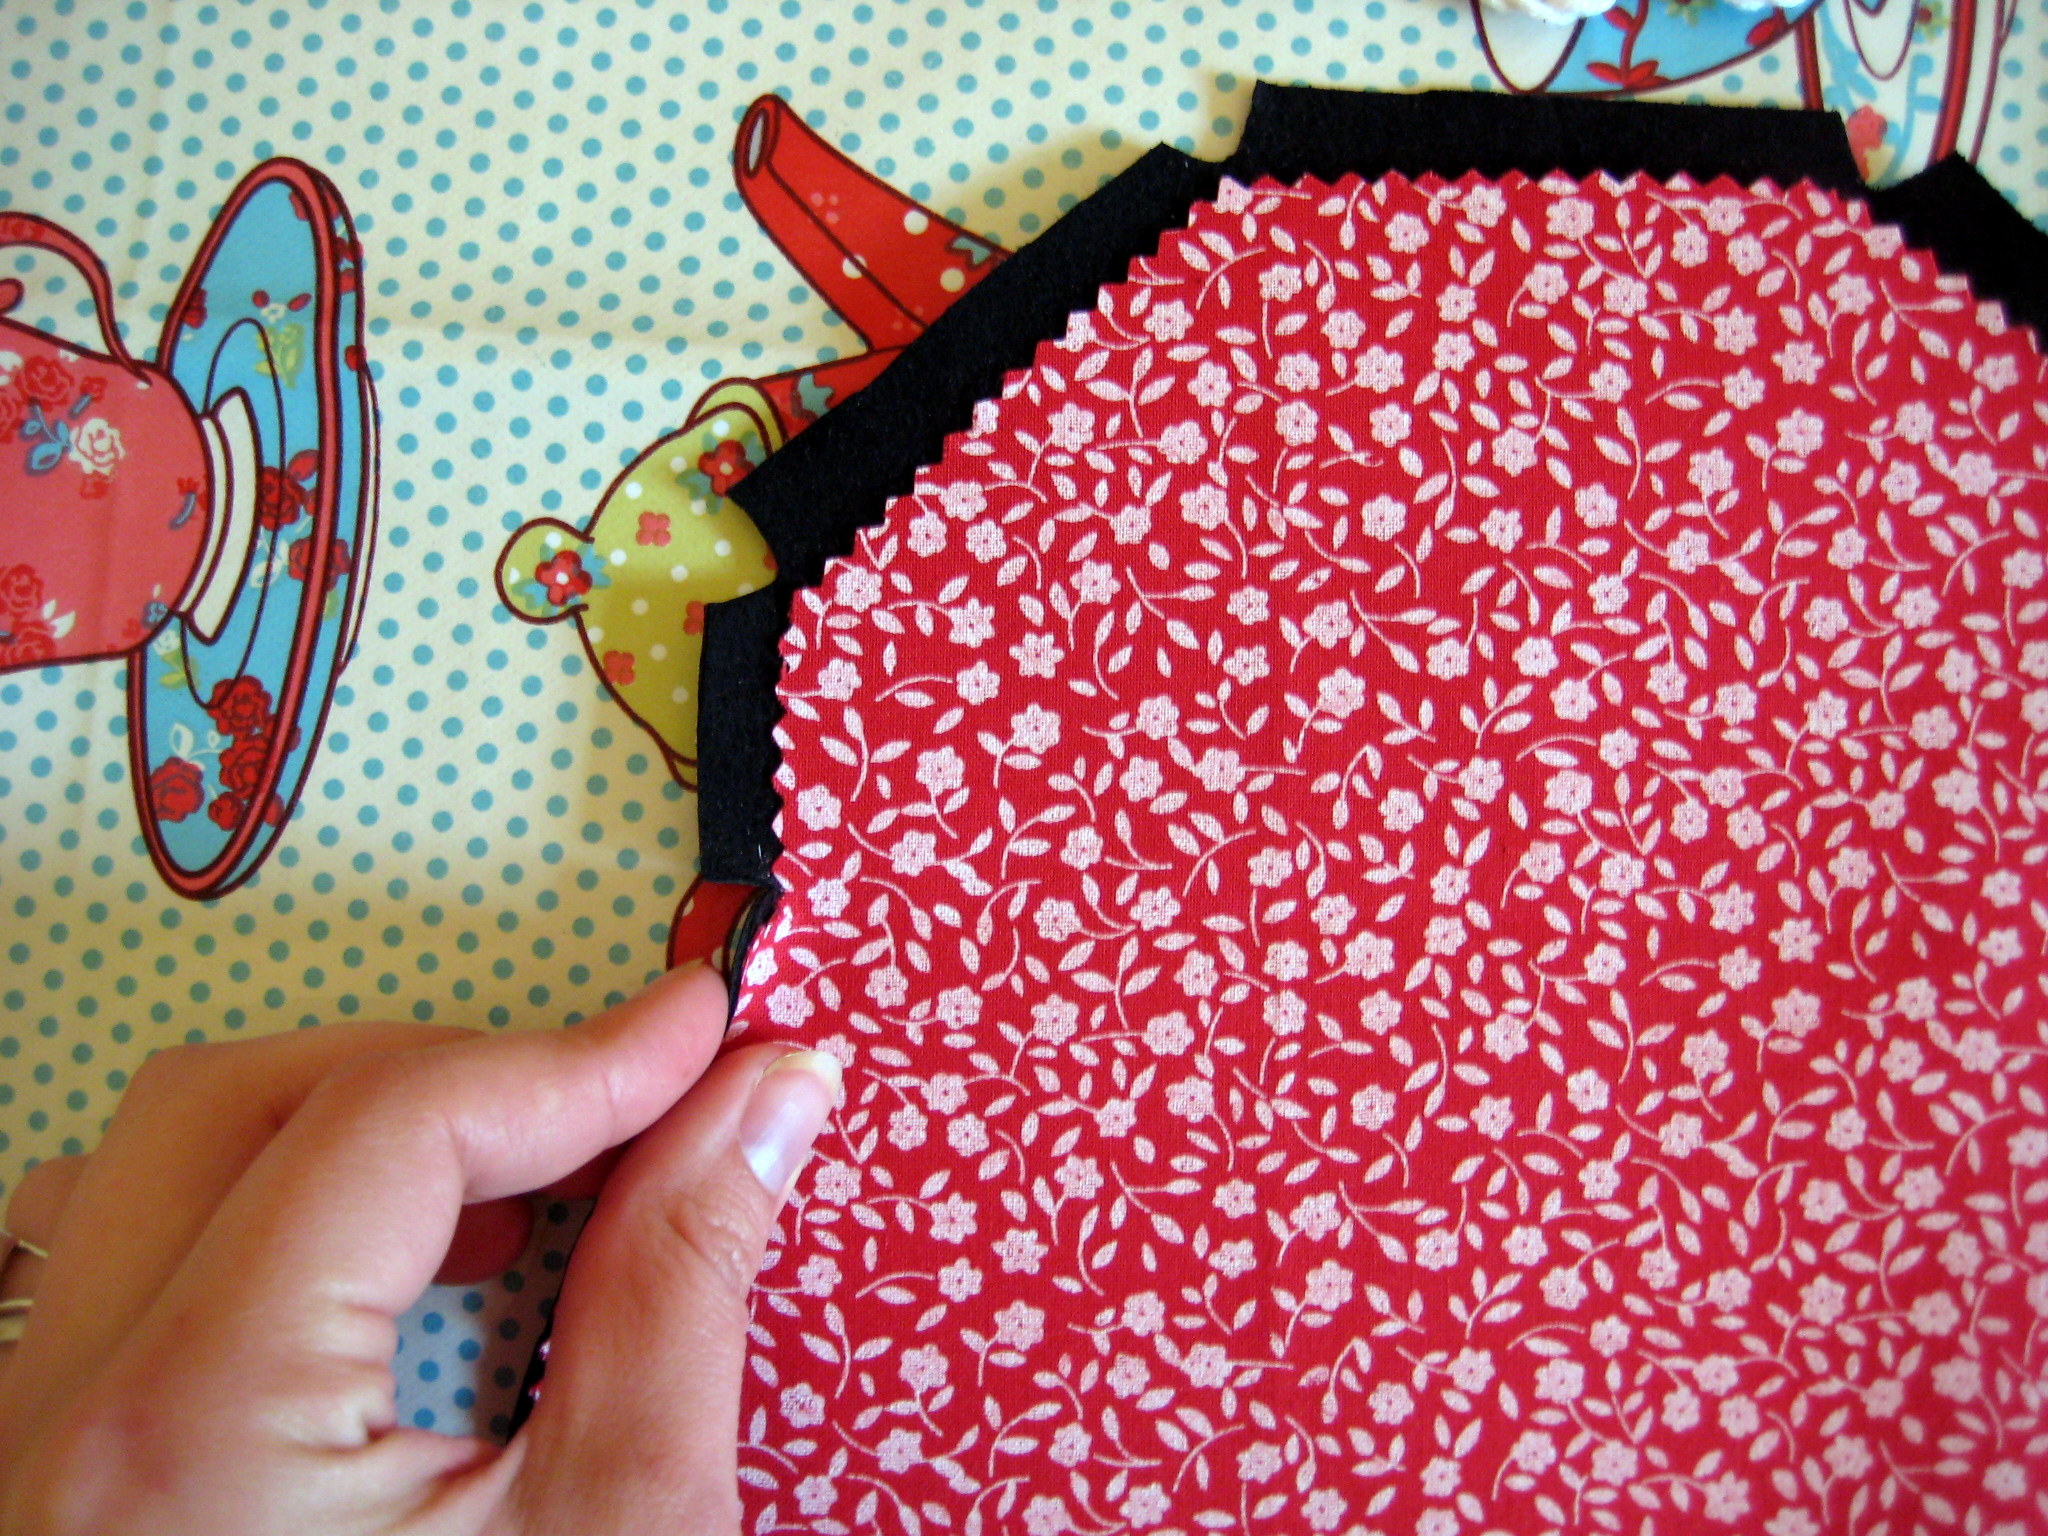
4. Cut out the lining pieces
Use the same pattern pieces as before and pinking shears. Then trim off 1cm from the top of the front piece, and around the top of the flap. The leather will be folded over here to make nice edges, so this reduces bulk.

The cut out pieces for the bag
5. Lay out the pieces as shown. Snip wedges from the leather around the corner flaps.
Trim the corners.
6. Fold over the flap edges and sew. Do the same with the front piece
7. You may want to hand sew a fastening to the flap lining at this point.
8. With right sides facing, pin the sides to the back and sew together.
9. With right sides facing, pin the sides to the front and sew together.
You should now have an inside out bag with no base!
10. Pin the base to the back, front and sides and sew into place.
11. Trim the corners of the seam allowance if you want nice pointy corners when you turn it the right way out.
12. Turn it the right way out and sew on the other side of the fastening. I sewed my bar onto a piece of lining fabric which was backed with interfacing, then stitched this onto the front piece, making sure it was lined up with the hook on the flap.
13. Sew on your doily! You will need to do this by hand. Make sure the doily is centred nice and symmetrically around the flap. I used black thread so it wouldn’t show against the leather.
14. If you like, add a beaded tassel to the flap. I made mine with the same yarn as the doily and some painted wooden beads. I stitched it into the doily using the yarn.
Trim off any loose threads, and you’re done!

Free tutorial to make this leather and crochet clutch bag


Jacket was beautiful but served the purpose. Glad it finished and turned into beautiful clutch you made.
Great work and idea as well as inspiration given through your post.
Thank you
Thank you! Yes, I am still grieving for it. However, it is time for a new one and nice to have a free leather bag! :)
Pingback: Passion Flower Doily | Make My Day Creative
looks great! and an awesome recycling project too :-)
Thanks! :)
I think it is great that you have found a way for your beloved jacket to live on. Morphing it into a bag was a wonderful idea.
Thank you! Yes, I couldn’t bear to part with it. :)
Great idea!! I do have my ex’s old leather jacket in the closet that I could use for this project. EXCELLENT!!
One way of making sure you get to keep it! :) hope yours turns out well!
Pingback: Merry Christmas! And Best of 2014 | Make My Day Creative