
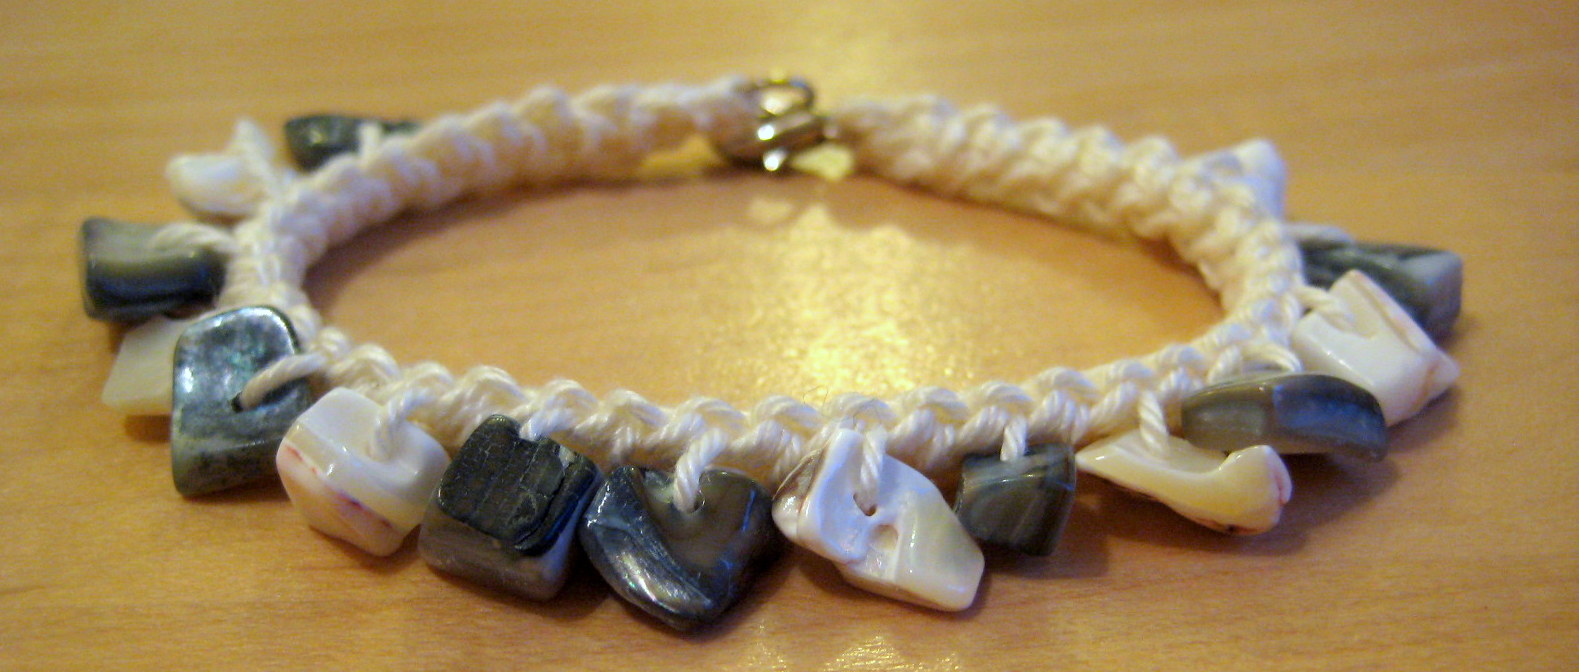
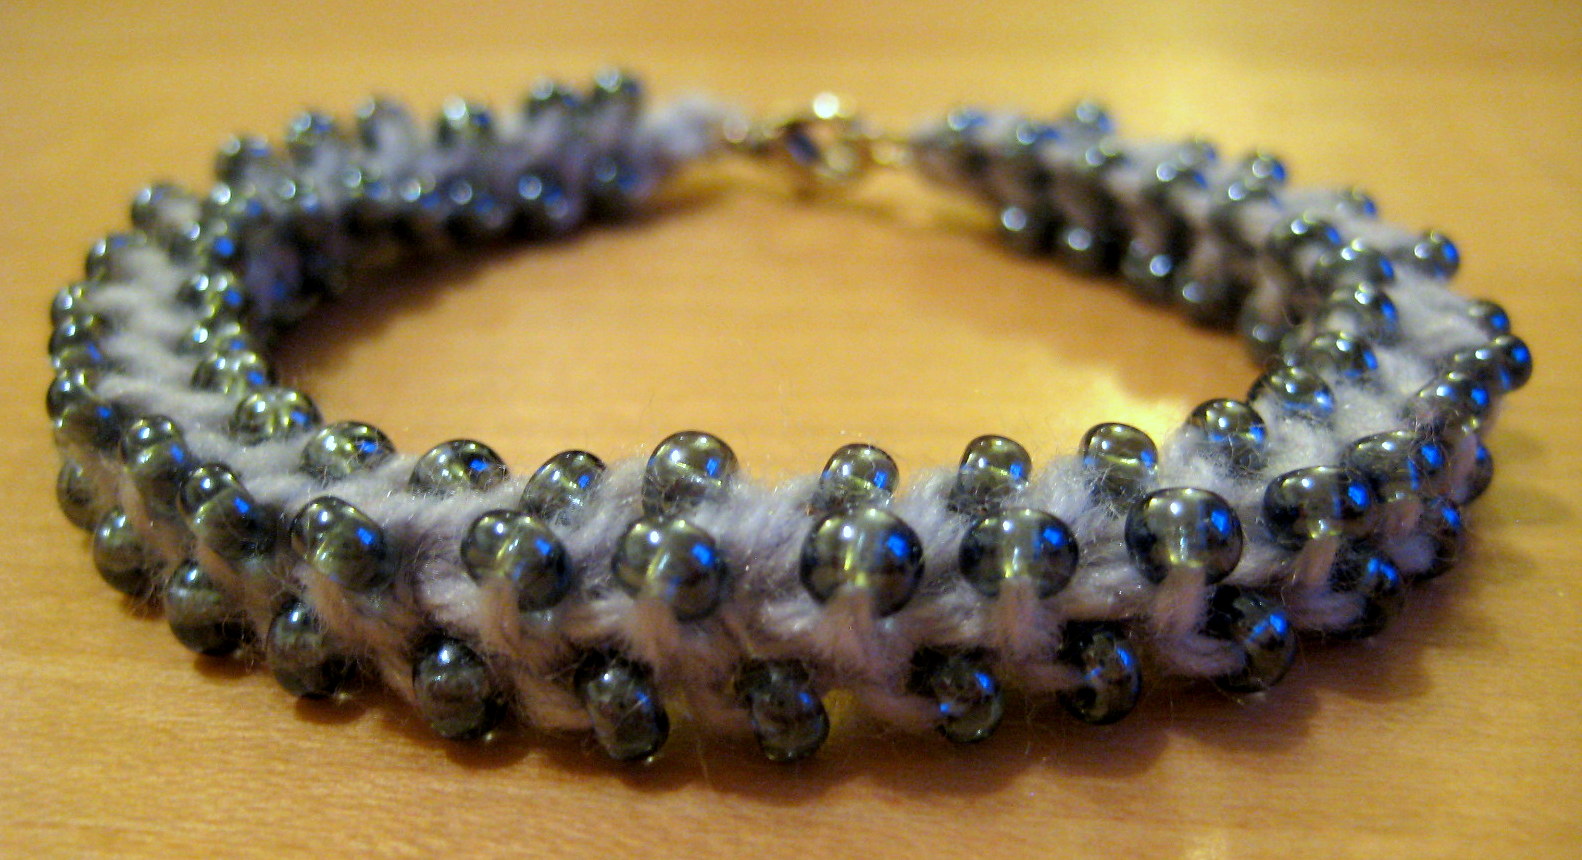
Bracelets made with lobster stitch cord
I recently came across lobster stitch cord in the free ebook Priscilla’s Crochet. I hadn’t heard of it before, so I thought I’d give it a try since it is always good to learn a new stitch, and cords can come in pretty useful for bag handles etc.
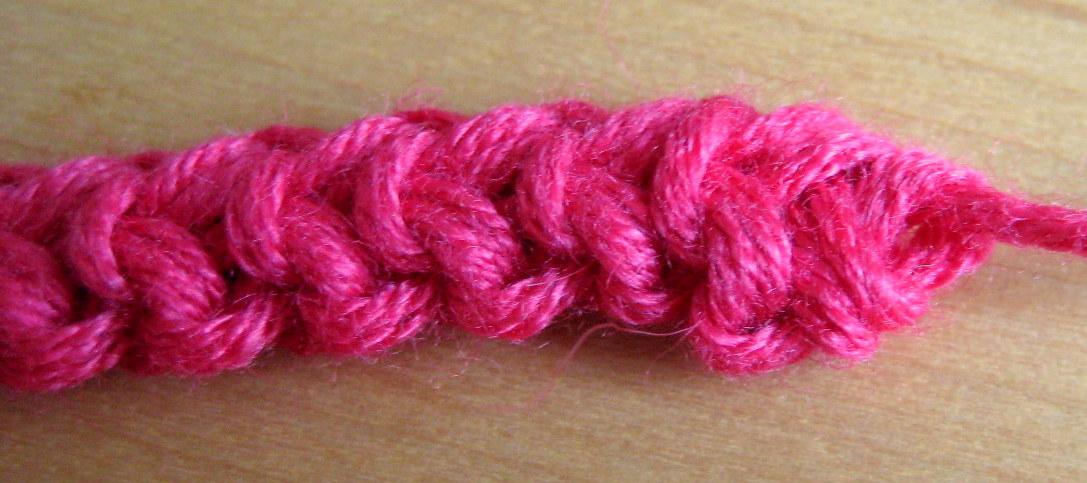
Lobster stitch cord
I must admit that the directions were a little confusing and when I searched online, it took me a while to find a good explanation, and that was on a forum, so I thought I’d post a tutorial here since it is actually very easy with a few pictures.

Plain lobster st with central mother-of-pearl button
Once I’d figured out how to do it I realised this cord could be useful for jewellery making because there are a couple of places you can add beads to for different looks. All these bracelets were made using lobster stitch with beads added at various points of the stitch. Scroll down for the instructions!
How to make lobster stitch cord:
To begin, chain two and the sc in the 2nd chain from the hook.
After 1st sc
Look carefully at the work; the completed stitch points down the hook towards your hand. Pivot the work around so that it points the other way, keeping the yarn behind the work.

Pivoting the work. Keep your eye on the loop indicated!
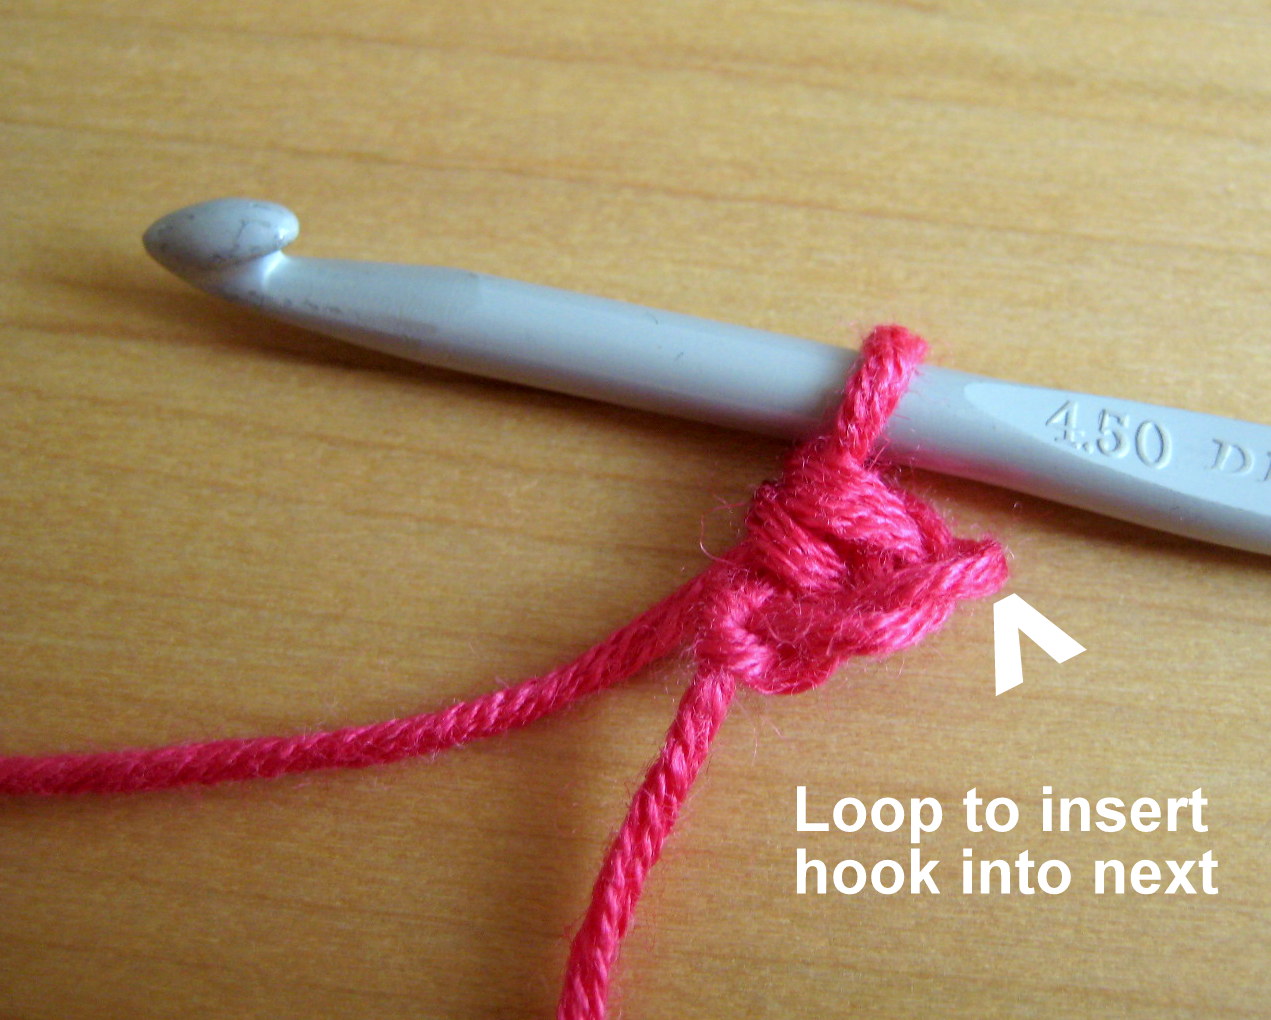
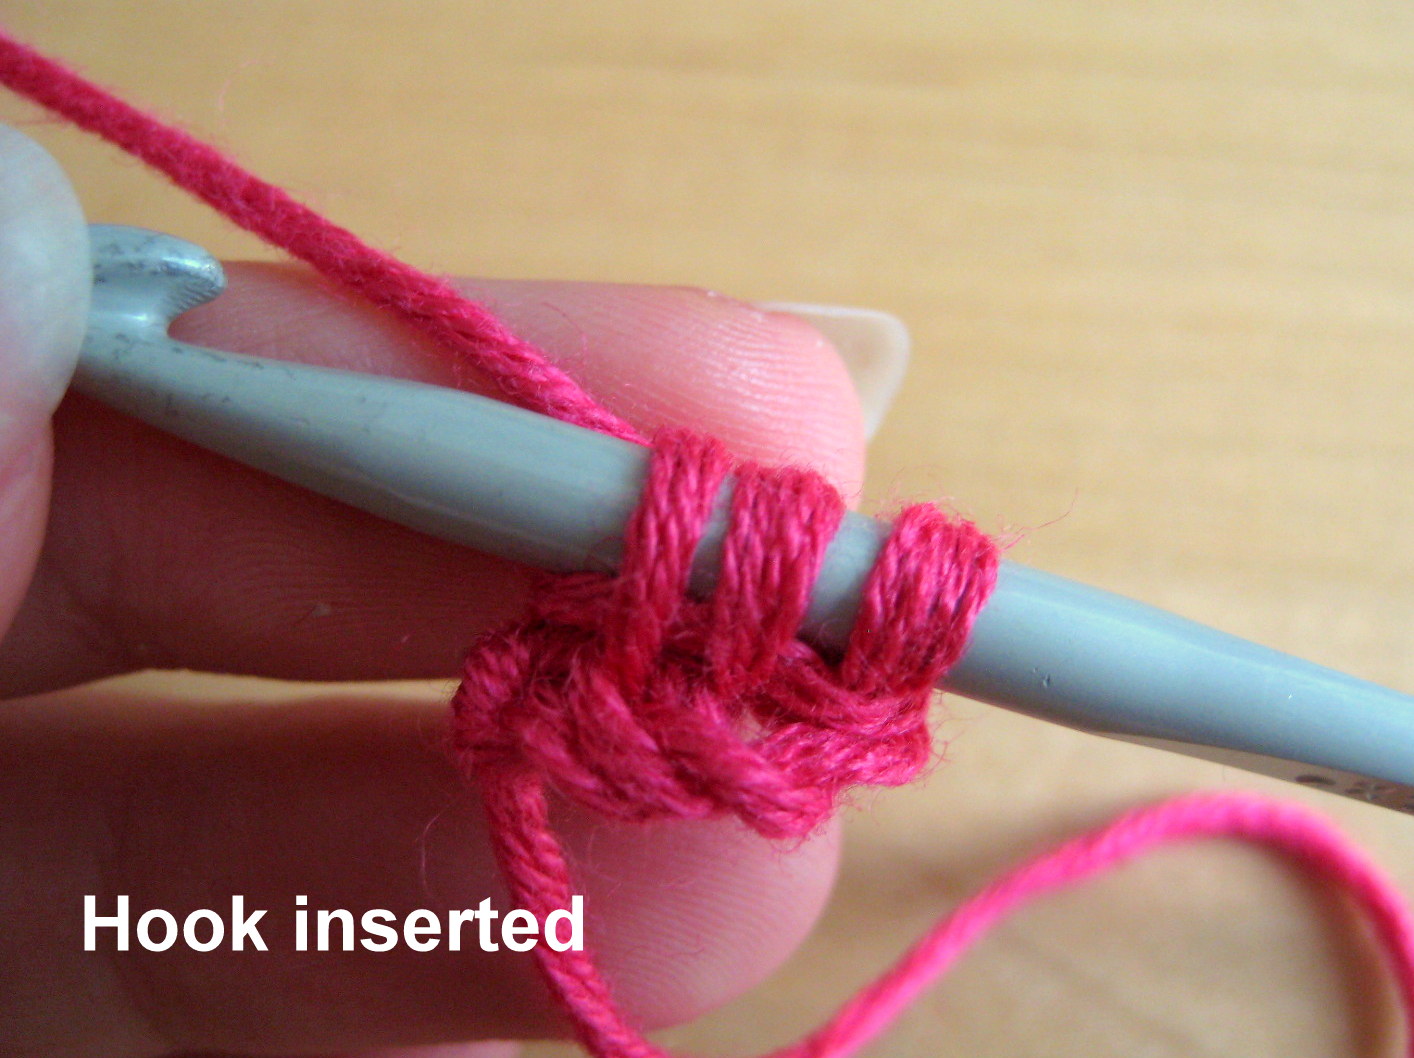
There will be a single loop which the st you just made comes through. Insert your hook here and make a sc.
Hook inserted in loop
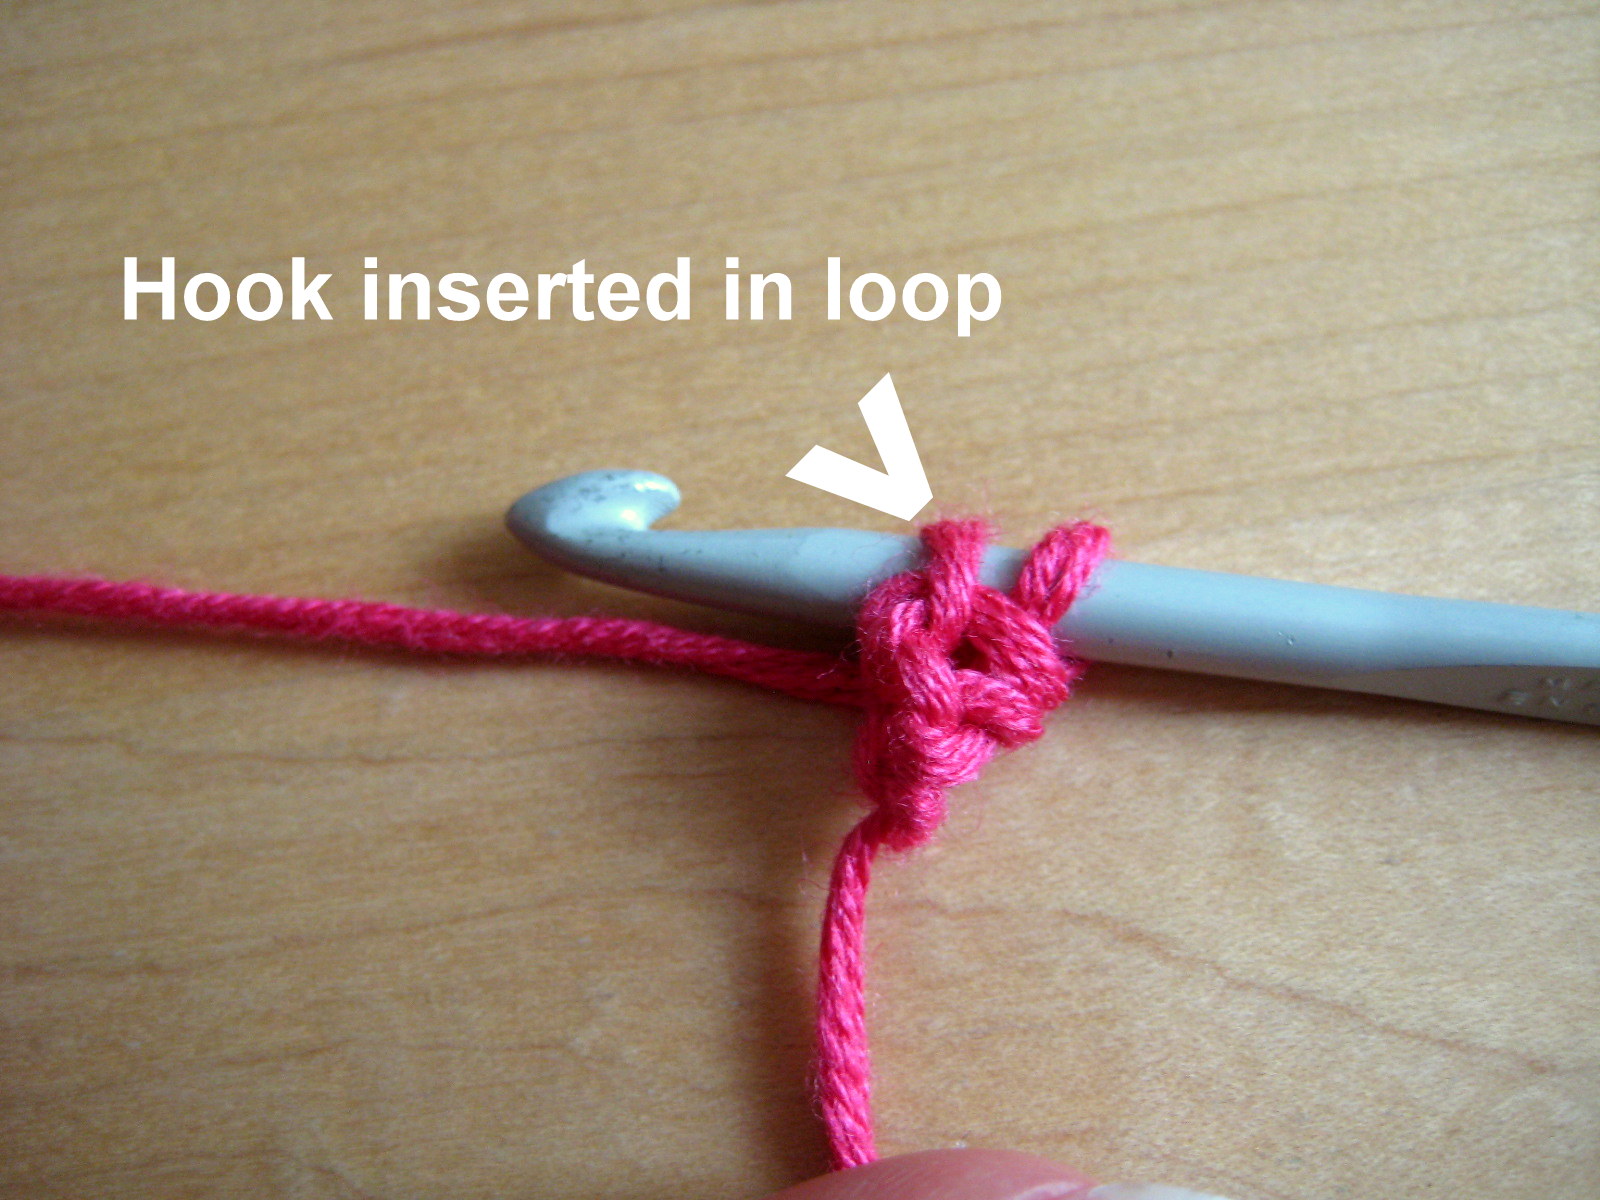
Sc completed. Next 2 loops indicated.
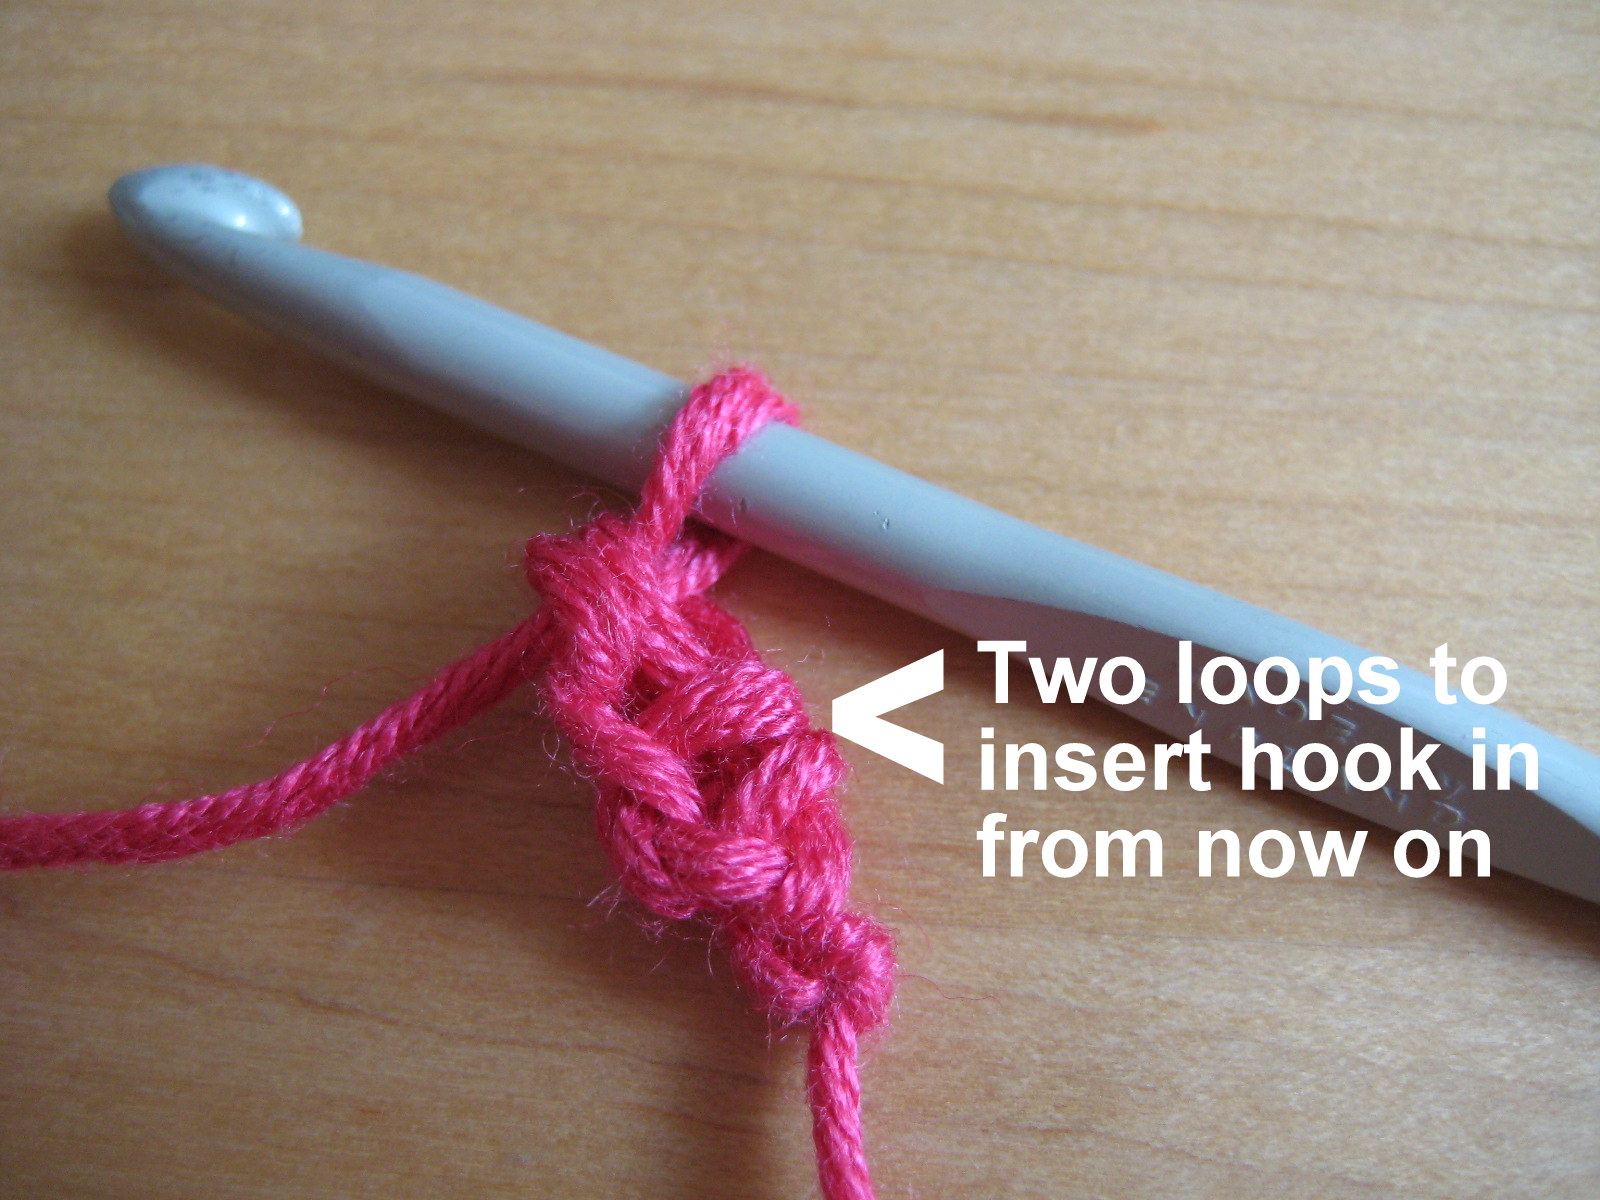
*Now pivot the piece again as you did before. This time there are two loops which the last st comes out of. Insert your hook through both loops and complete a sc.

Pivot the work
Hook inserted under both loops

Sc completed, next two loops indicated
Continue to repeat from * to work the cord for the desired length. Finish with a sl-st into the last two loops.
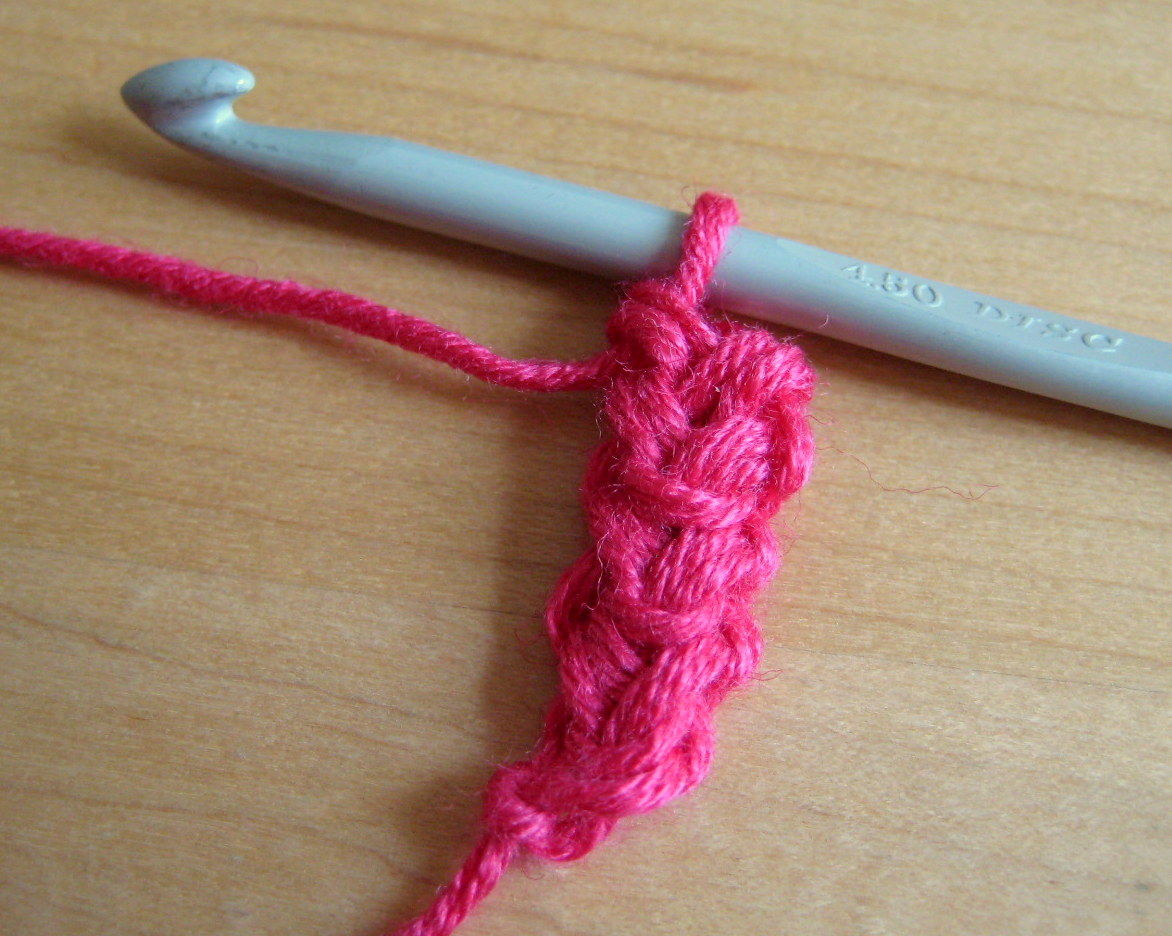
Continuing in lobster stitch
How to add beads:
I recommend you learn how to make a plain cord before you try adding beads! Look at your plain cord; there are two places you can add beads in during each sc. The first is along the side loops, the second is along the loops which run across the (flatter) front and back of the work.
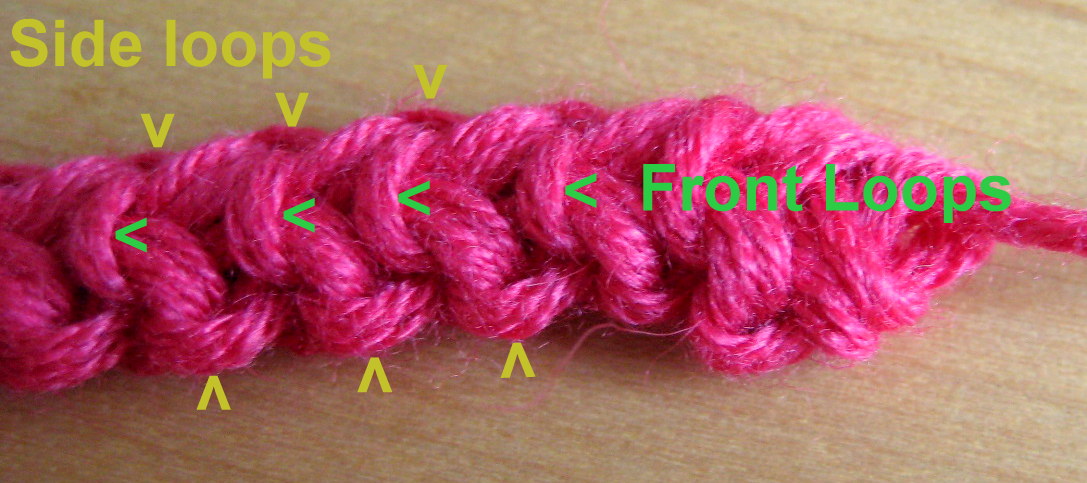
Places you can add beads
Thread beads onto yarn before you begin.
To add beads to the front of the work:
Start by doing a few lobster sts. After completing a sc, slide up a bead. Pivot the piece and complete the next sc. If you just want beads on one side, complete the next sc without inserting a bead. Then repeat along the length.
L-R: Sliding up a bead; Inserting hook; Sc completed; Sliding up next bead
Inserting the 3rd bead
Shell beads all added to front loops only
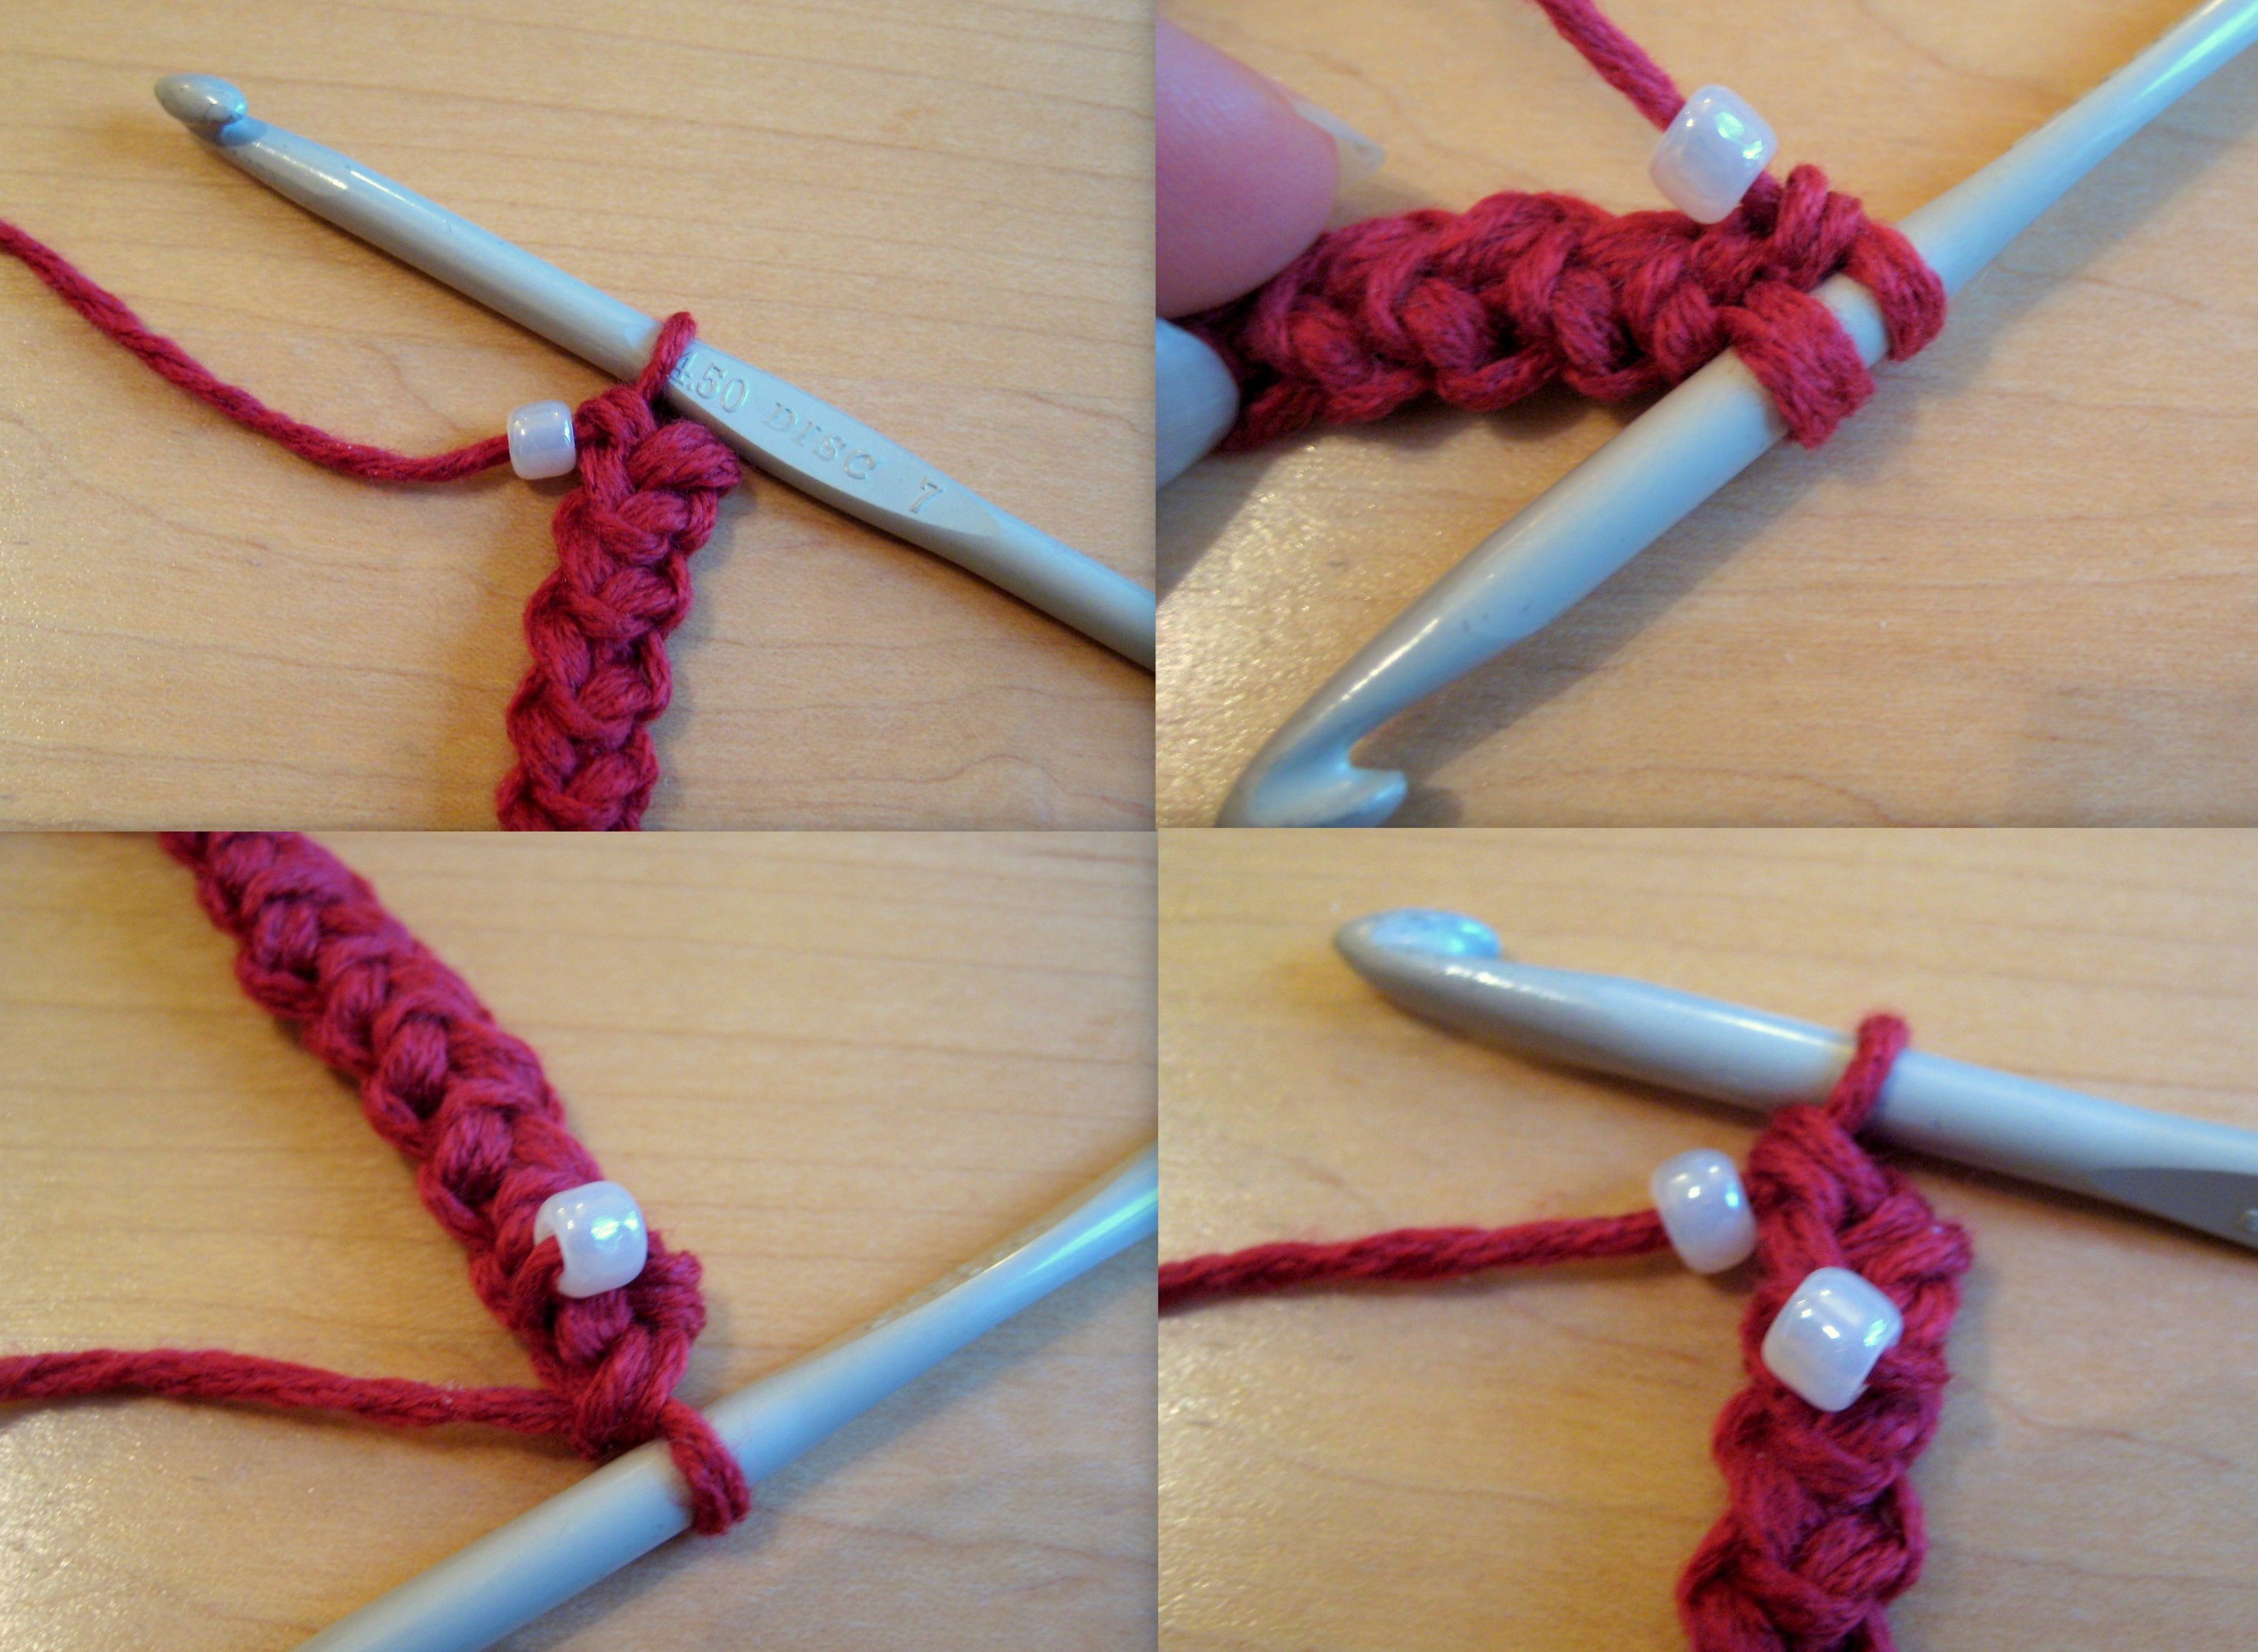
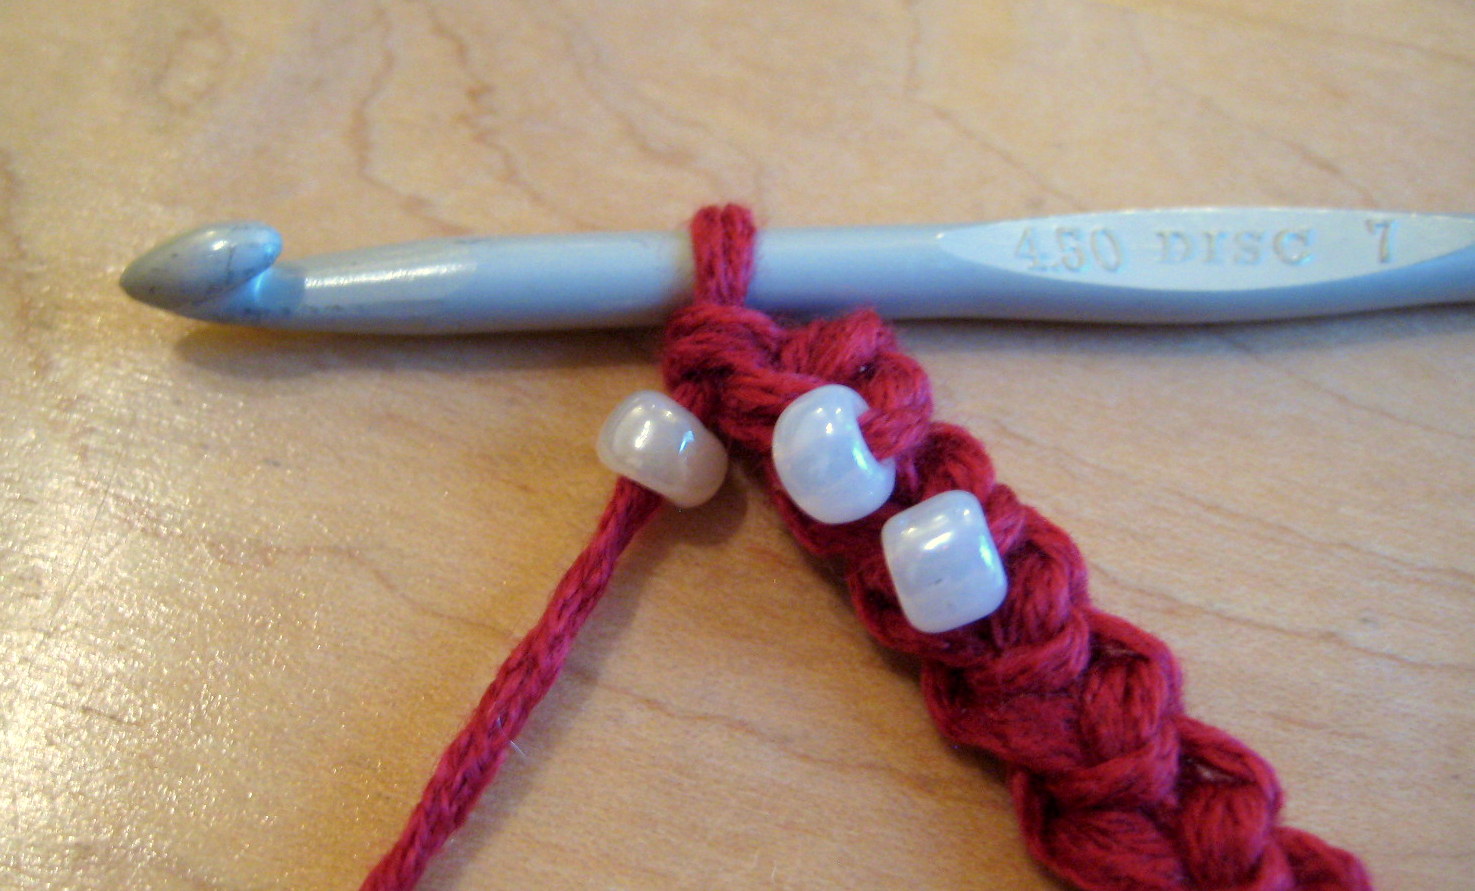
To add beads to the side loops:
I recommend smallish beads for side loops as they can get in the way of the hook otherwise.
Start by doing a few lobster sts. Pivot the piece and insert hook in next set of loops as usual. Slide up a bead before doing a yarn over. Then yarn over and complete the sc as usual. Repeat in the next st, and until the piece is your desired length.
L-R: Insert hook and slide up bead; Complete sc; Repeat (two beads inserted)
Beads worked into side loops only
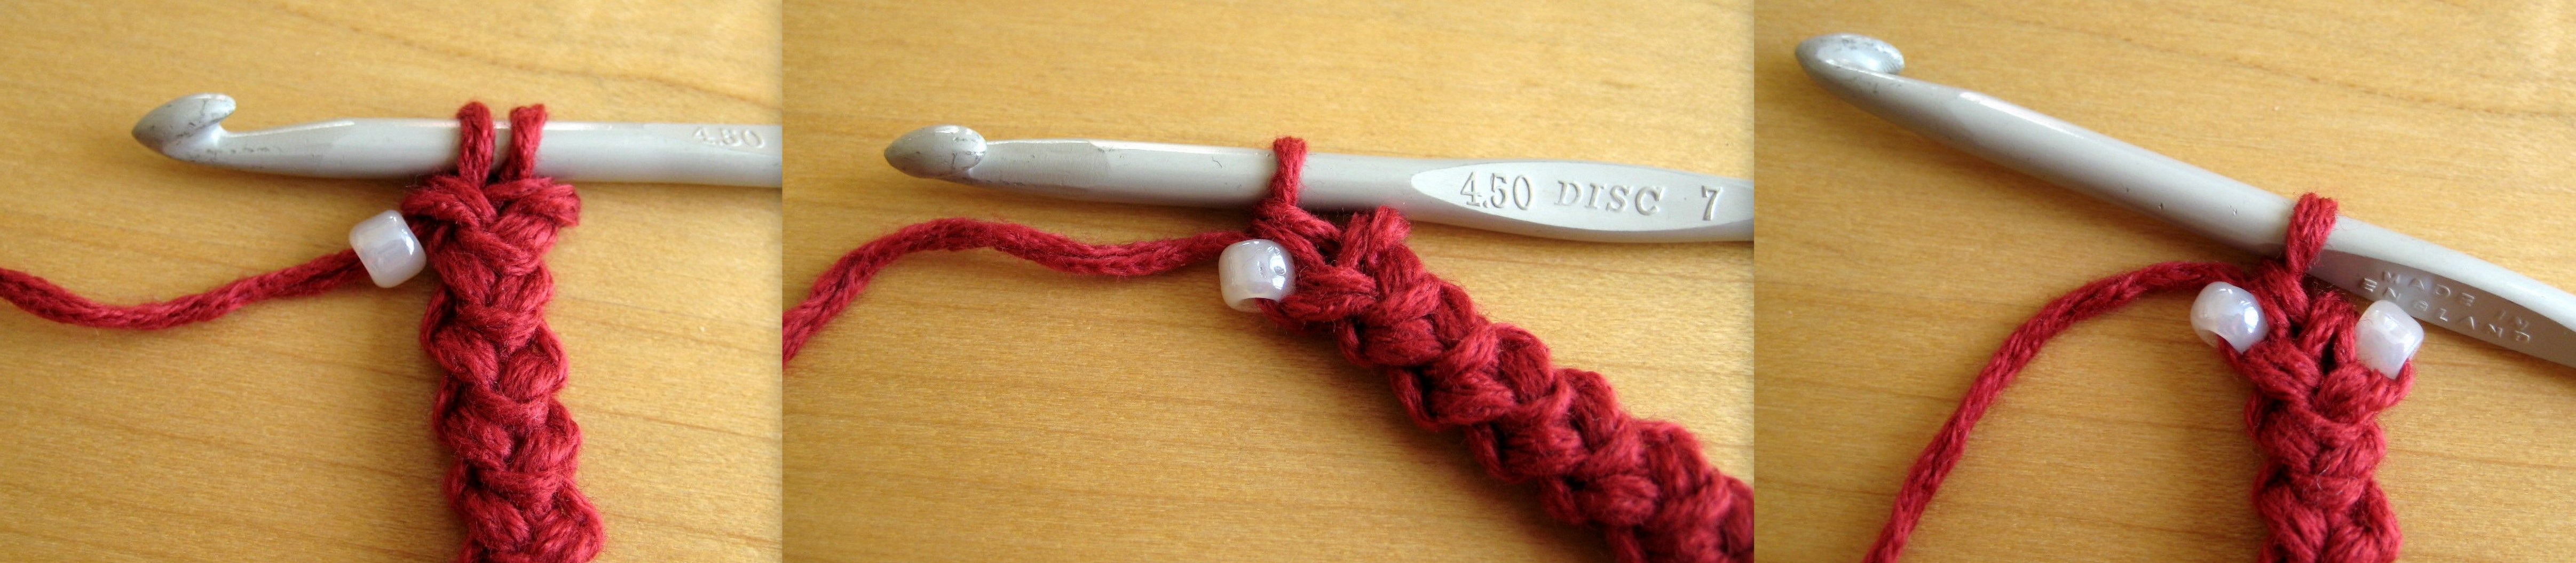
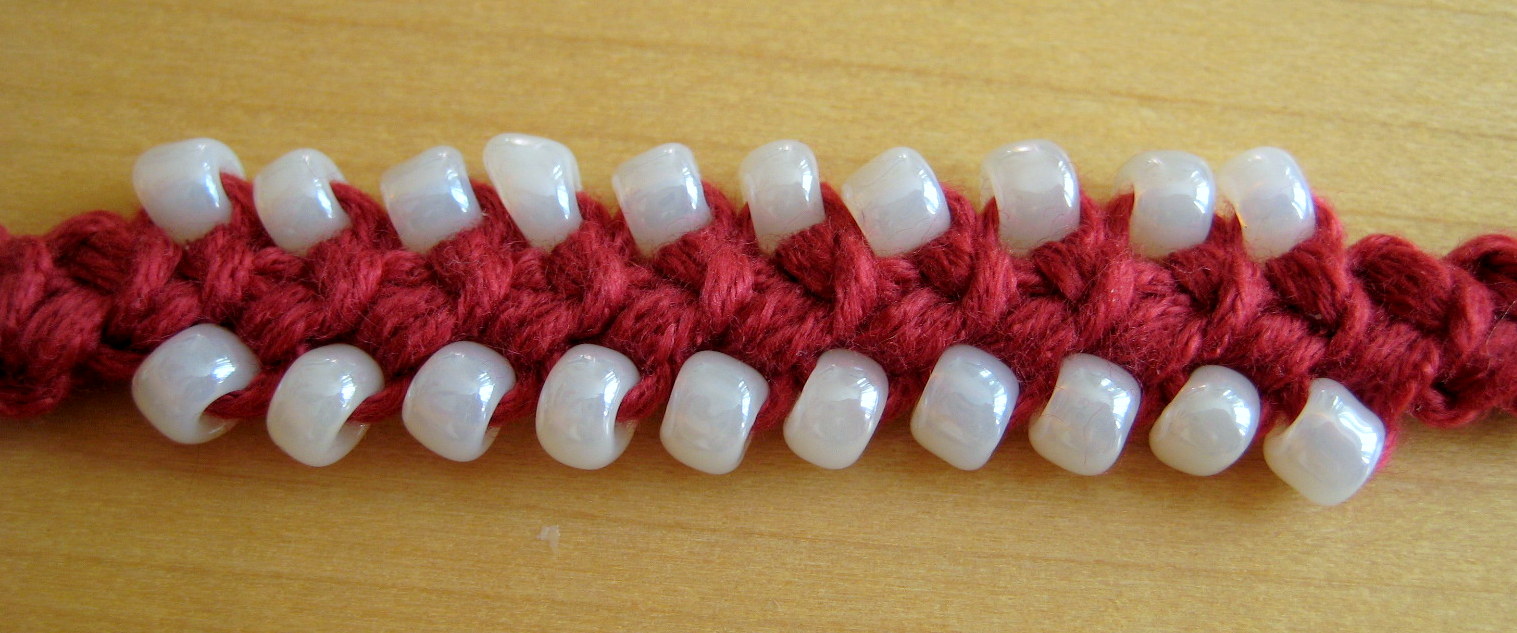
To add beads in all the loops:
I recommend you try adding in beads on to the front loops only and then the side loops only before you try this as it is a little fiddly to get going.
Beads worked into side loops and front (and back) loops
Start by doing a lobster st. Now slide up a bead, pivot the piece and insert the hook in the next set of loops as usual. Slide up another bead, yarn over, and complete the sc (two beads inserted). Repeat until you have the desired length.
To make these beaded cords into bracelets I added a lobster claw clasp (very fitting!) and jump ring to the ends using the tail ends of my yarn, before weaving in.


Great tut! Thanks again! And of course everything is fabulous!
Thanks! :)
I can’t wait to try these. They look fab. X
Thanks! :)
Pingback: Back to School PE Bag | Make My Day Creative
Your explanation was extremely clear and concise. Loved it! Thanks for taking the time to explain this stitch, and the “how to” on beading with it.
You’re welcome Jackie! Glad you found it useful. :)
This was a great work of art! I love those Lobster Cord Bracelets. The different designs are extremely great. Anyway, thanks for a simple tutorial on how it is done. Fabulous! GoghJewelryDesign.com
Thank you for this! I just made a few bracelets. I love the stitch, it’s just so elegant and pretty!
Thanks! I love it too, I find it really versatile. :)
Pingback: Little Hearts Drawstring Bags | Make My Day Creative
Pingback: Bracelet Patterns | Make My Day Creative