
Hand tied with semi-precious stones
I had a really good response to this post on some shamballa bracelets I made. So I thought I would do a how to post to show how they are made.
If you like this bracelet, you can win it now in my current giveaway! Also keep an eye out for similar items in my shop soon…
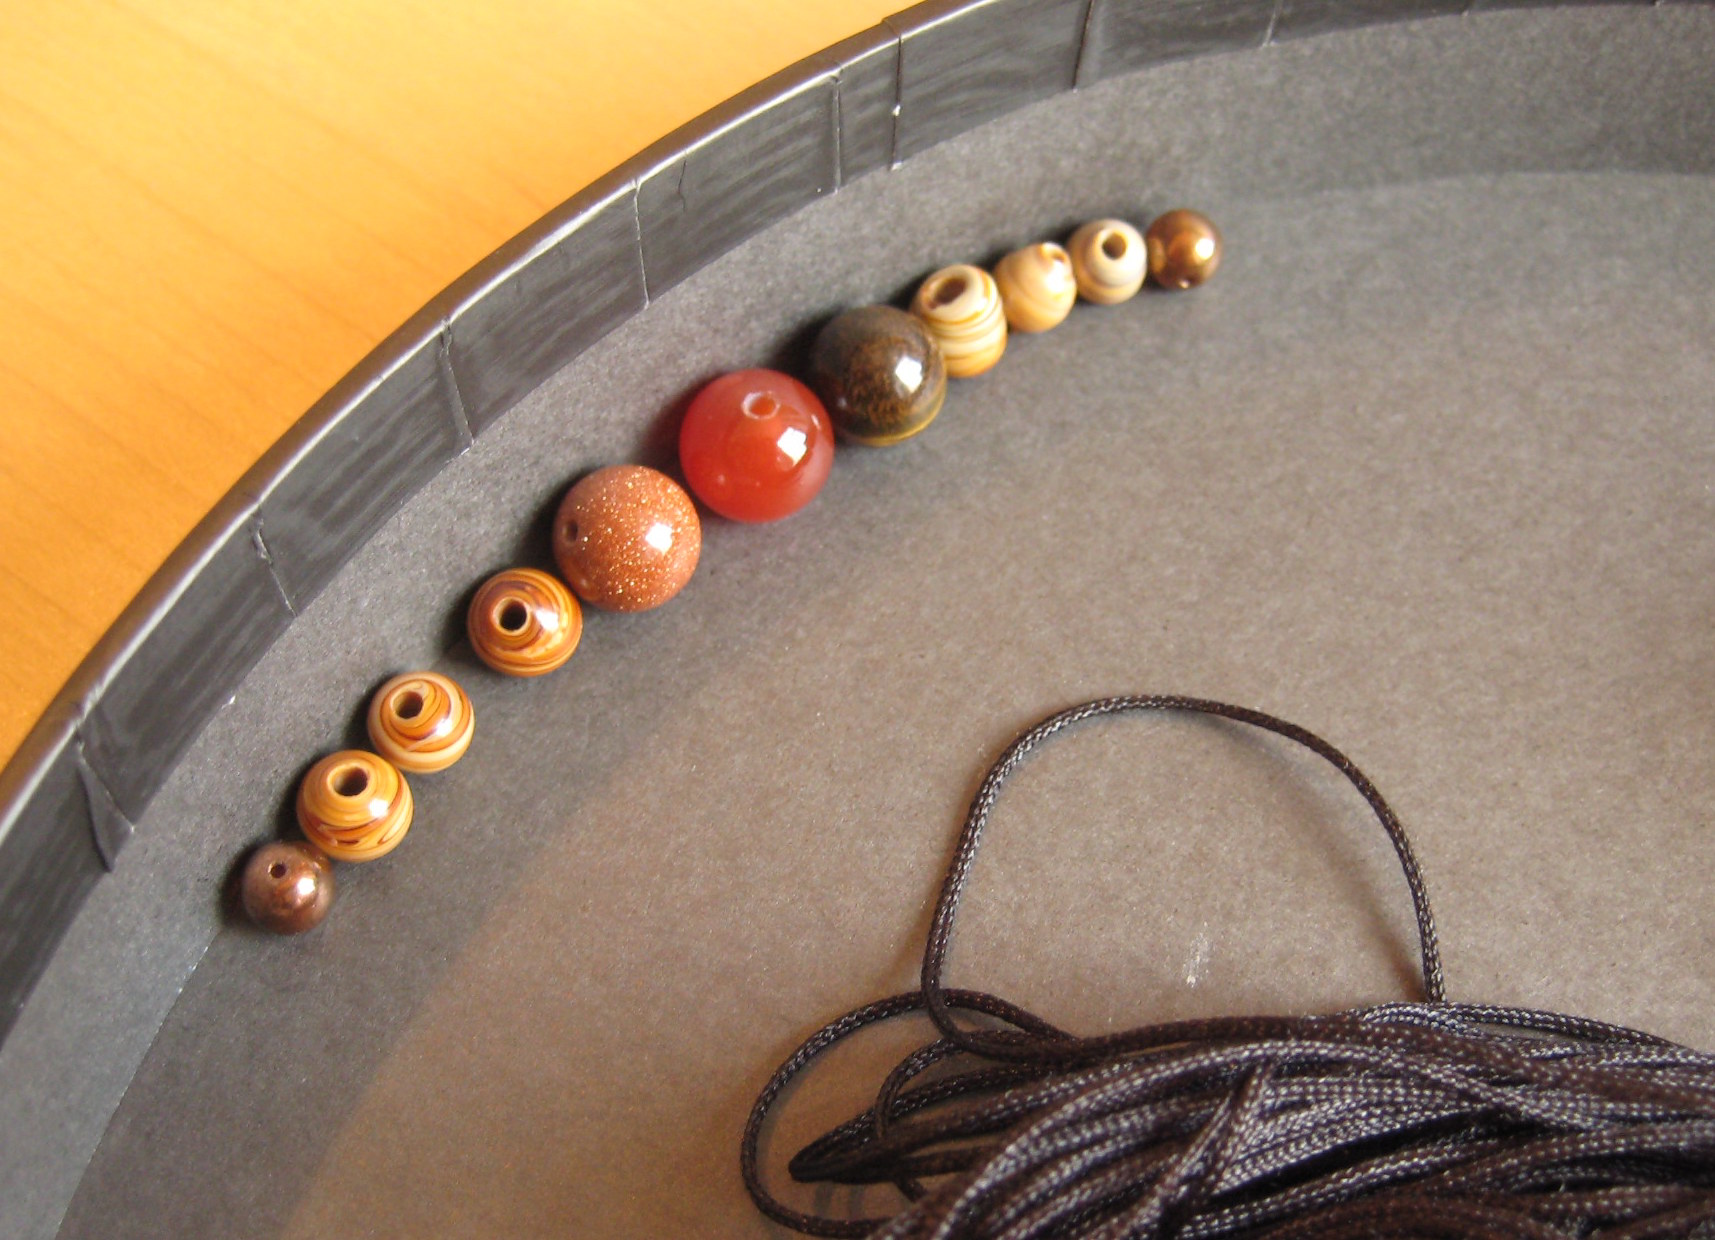
Supplies
You will need:
- 9-11 beads size 8-12mm
- 2 smaller beads (6-8mm)
- 30cm nylon thread, 0.8mm thick
- 1m plus 60cm nylon thread, 1.2mm thick
Check you can thread the beads onto the thin thread before you begin!
The bracelet is made by tying a series of “square” knots around the central thread. To begin, tie a knot at the end of the short, thin thread around a safety pin and pin it to something like a cushion to hold it in place. This is the central thread.
Then slide the 1m thread underneath with the same amount of thread on each side.

Setting up for the first knot…
Now tie the first square knot:
Thread 1 starts on the left hand side and thread 2 on the right.
Step 1:
Pass thread 1 over the central thread. Pass thread 2 over thread 1, then under the central thread.

Step 1: tying the first part of the square knot.
Now pass thread 2 up through the loop left by thread 1 on the left hand side (thread 2 goes under then over thread 1). Pull to tighten.

Finishing step 1
Step 2:
Now thread one is on the right hand side and thread 2 on the left.
Pass thread 1 over the central thread. Pass thread 2 over thread 1, then under the central thread. Now pass thread 2 up through the loop left by thread 1 on the right hand side (thread 2 under then over thread 1).

Step 2
Pull to tighten.

One square knot finished
One square knot completed!
Tie 4 more square knots (or more if you want a larger bracelet) following the same process. Slide a bead up onto the central thread and up to the last knot.

5 knots done and first bead inserted!
Now tie a square knot to secure the bead in place. Slide on the next bead, tie a knot, and so on until all your beads are secured on the bracelet.
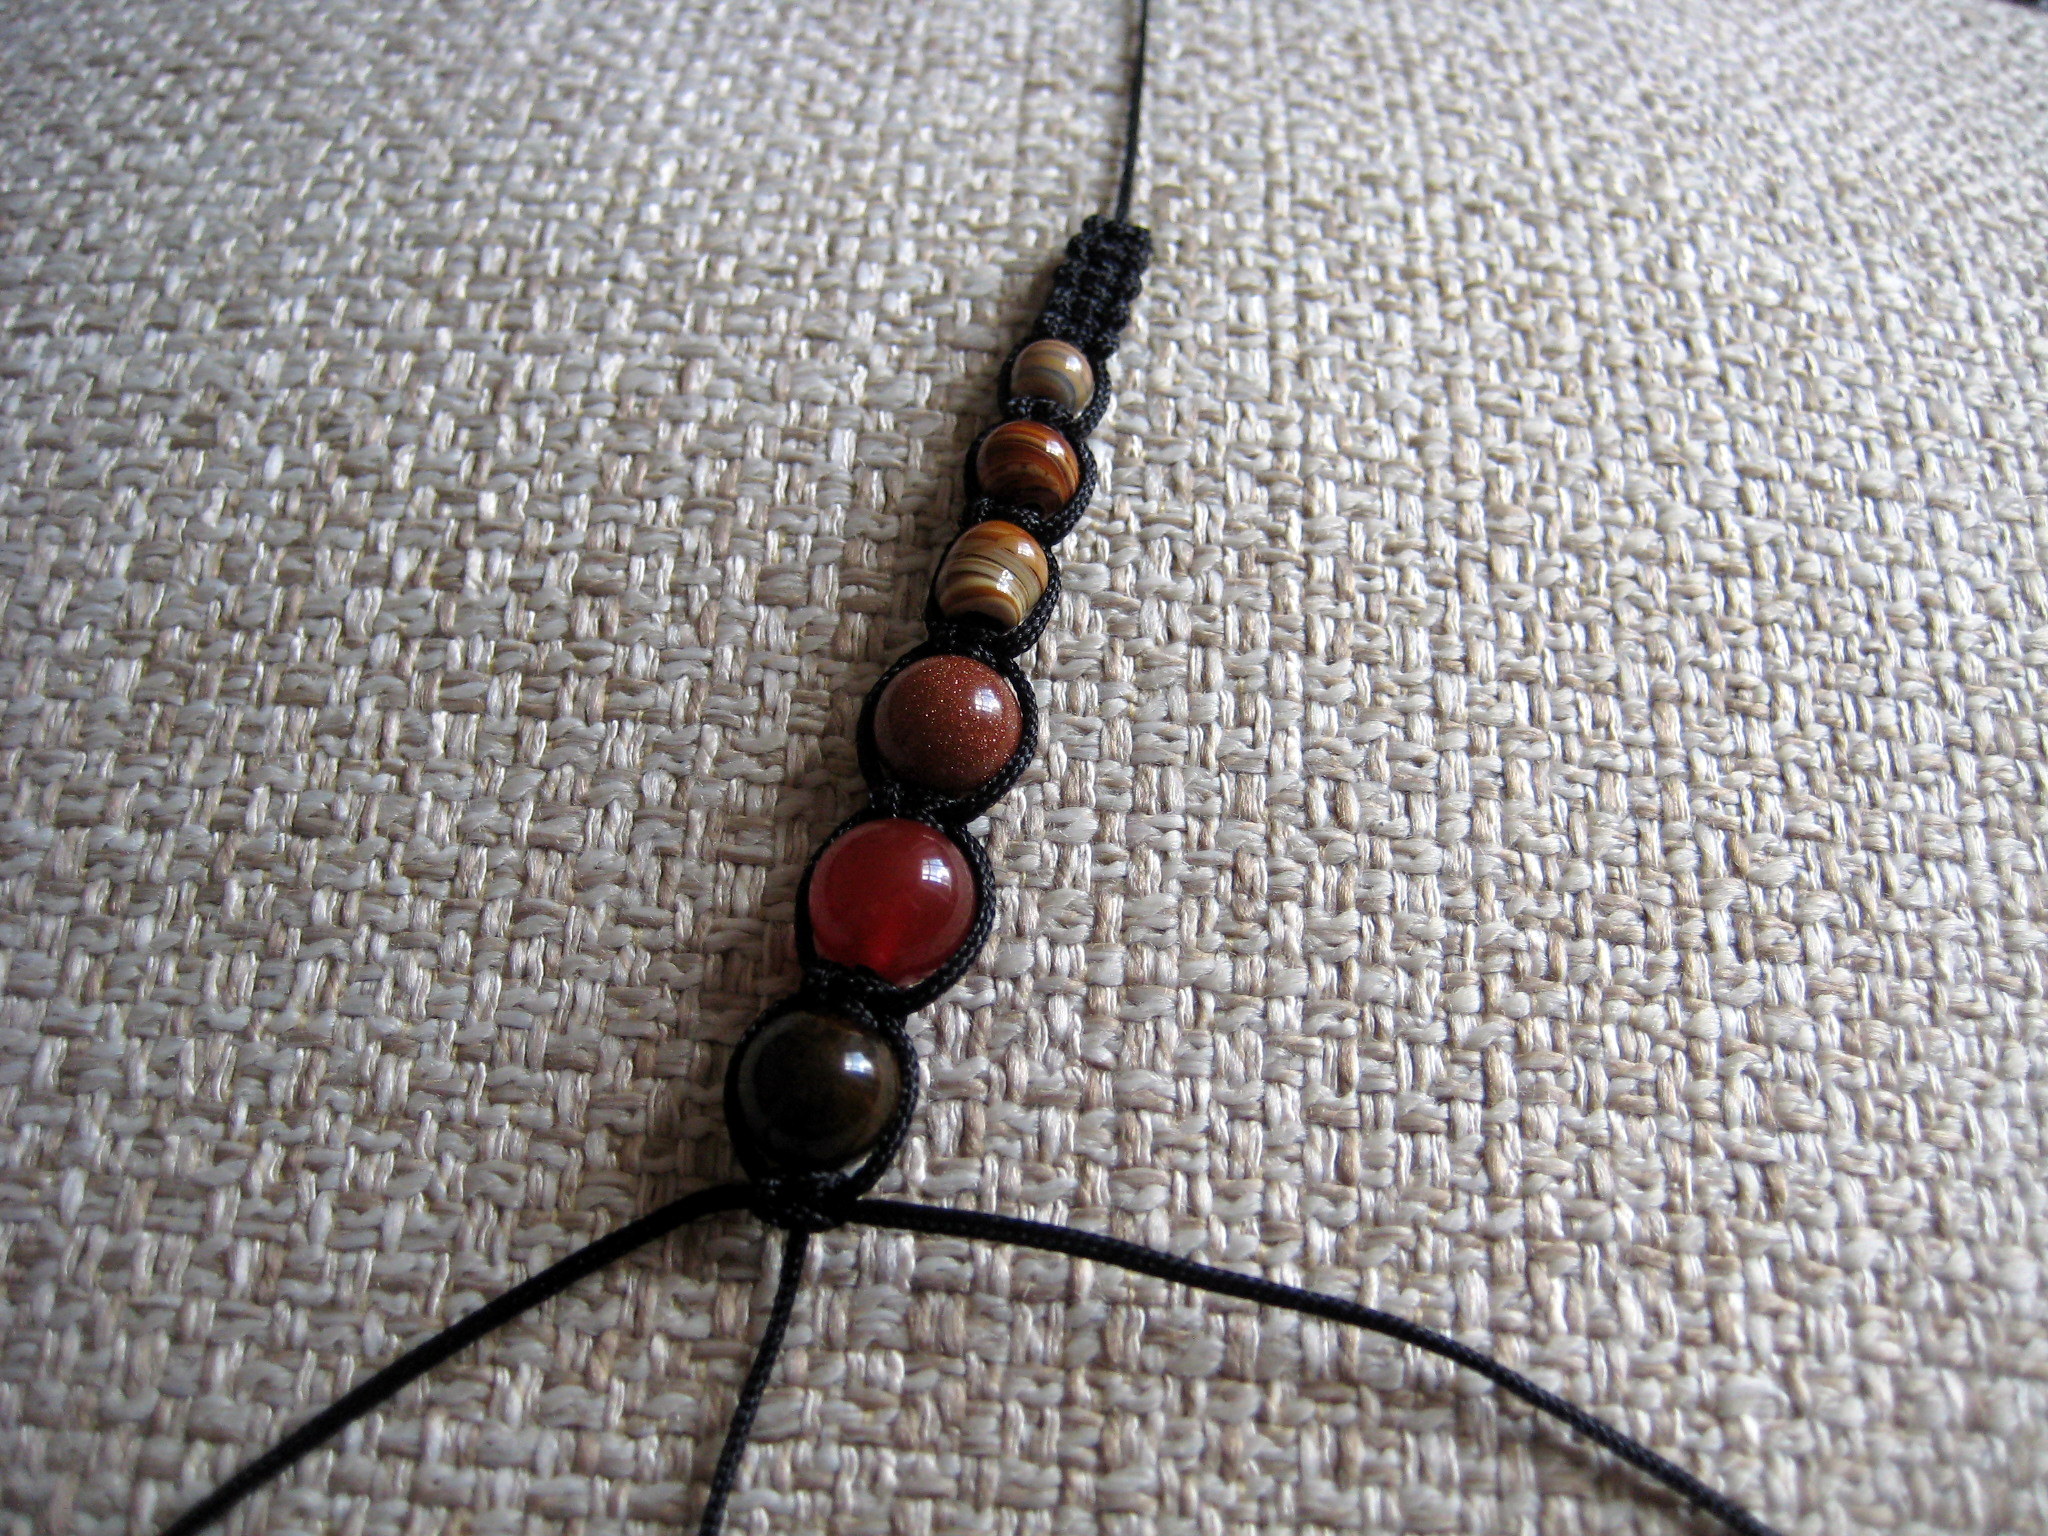
6 beads on…
Finish by tying 4 knots (or however many you need to make the sides even). Pull the thread very tight on the last knot, and cut the thicker threads 3mm from the knot.Secure the last knot by melting the 3mm ends of the thread using a lighter or match. Careful here! Use glue if you prefer.

How to finish the last knot
Now the main section of the bracelet is finished, untie the top knot at the safety pin. At this point you can slide the work down the central thread to make sure it is central on the thin thread if needed.
To make the fastening, lie both ends of the thin thread across each other as shown in the photo. Slide the 60cm piece of thread underneath the two threads and tie a square knot as described before.

Making the fastening
Keep tying knots (you will need around 10) until the fastening can be closed around the wrist without showing the central threads. Finish the last knot by melting the ends as before.
Now slide a small bead onto each of the loose ends and knot the threads to secure them. Melt the very ends of the threads to prevent fraying.
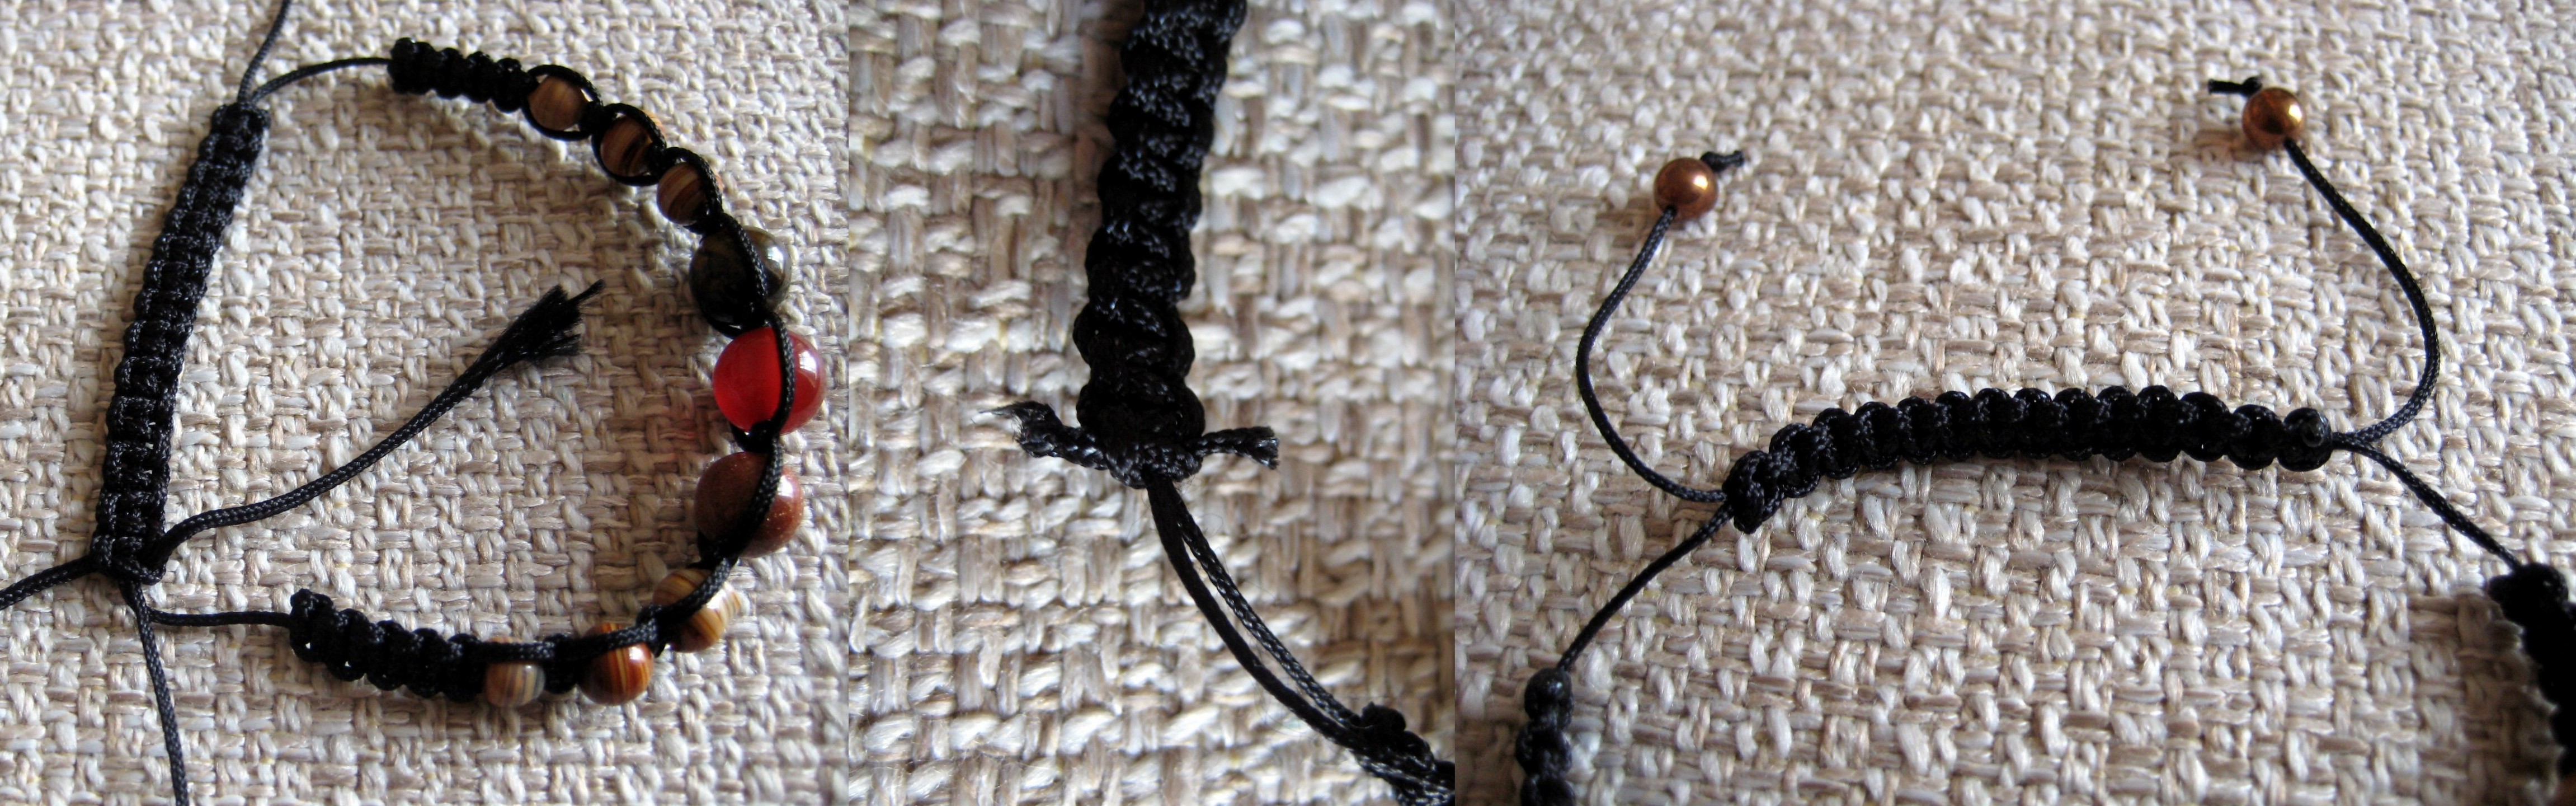
Finishin the ends off
Your bracelet is now finished!

Finished article :)


You did a great job at showing how to do the knots :) I wanna make one!
Thanks! I hope yours turns out well! :)
I love the different beads in this one!
Thanks! This item will be featuring in an upcoming giveaway in the next couple of weeks… so keep an eye out and you might win it! :)
Pingback: Lots of Bracelets | Make My Day Creative
Nice am trying this now :)
Love it . Thanks so much : )
You’re welcome Jayne! :)
Pingback: Bracelet Patterns | Make My Day Creative