I’m very blessed to have a husband who remembers our wedding anniversary. If it wasn’t for him reminding me I think I’d forget every year! This year is 7 years for us. A great year because traditionally the gift given is wool… and this is what he chose for me! A lovely textured alpaca yarn with a chainette construction. I am one happy wife!
I’ve been contemplating what it should be for a while. I didn’t want to fight the lovely texture of the yarn so I kept it simple with these fingerless gloves (or wristers, I’m not entirely clear on the difference myself!)
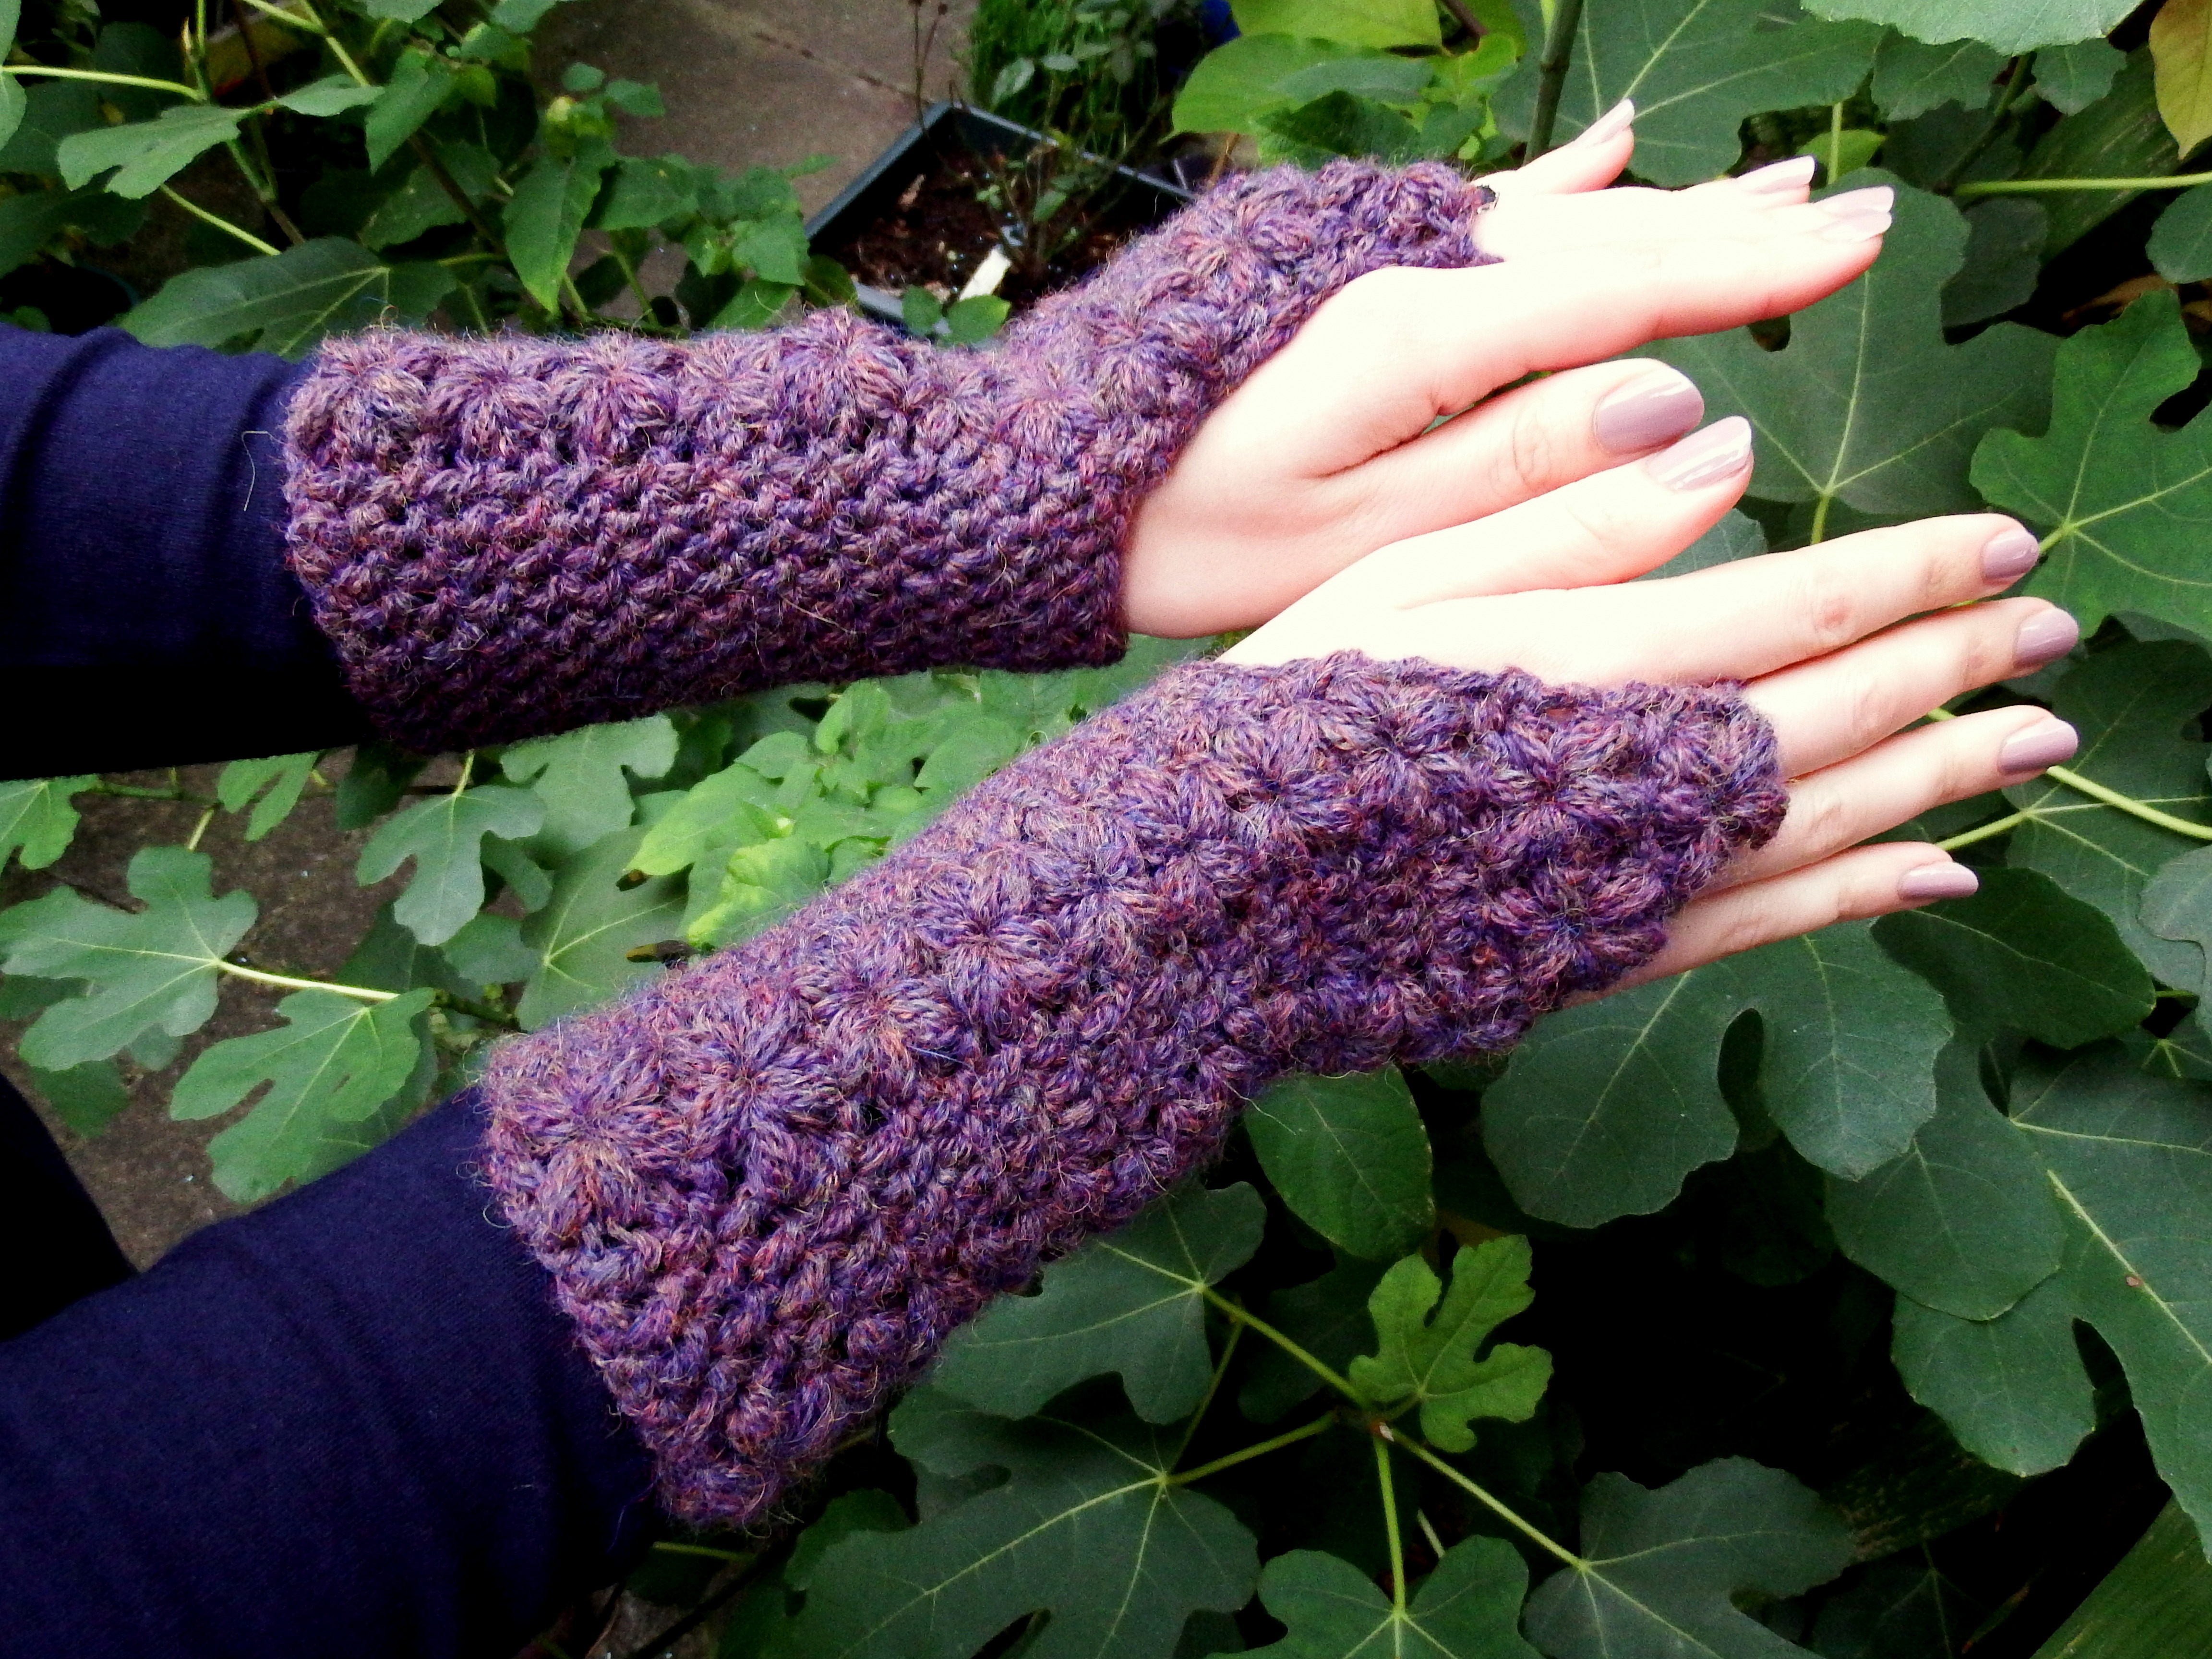
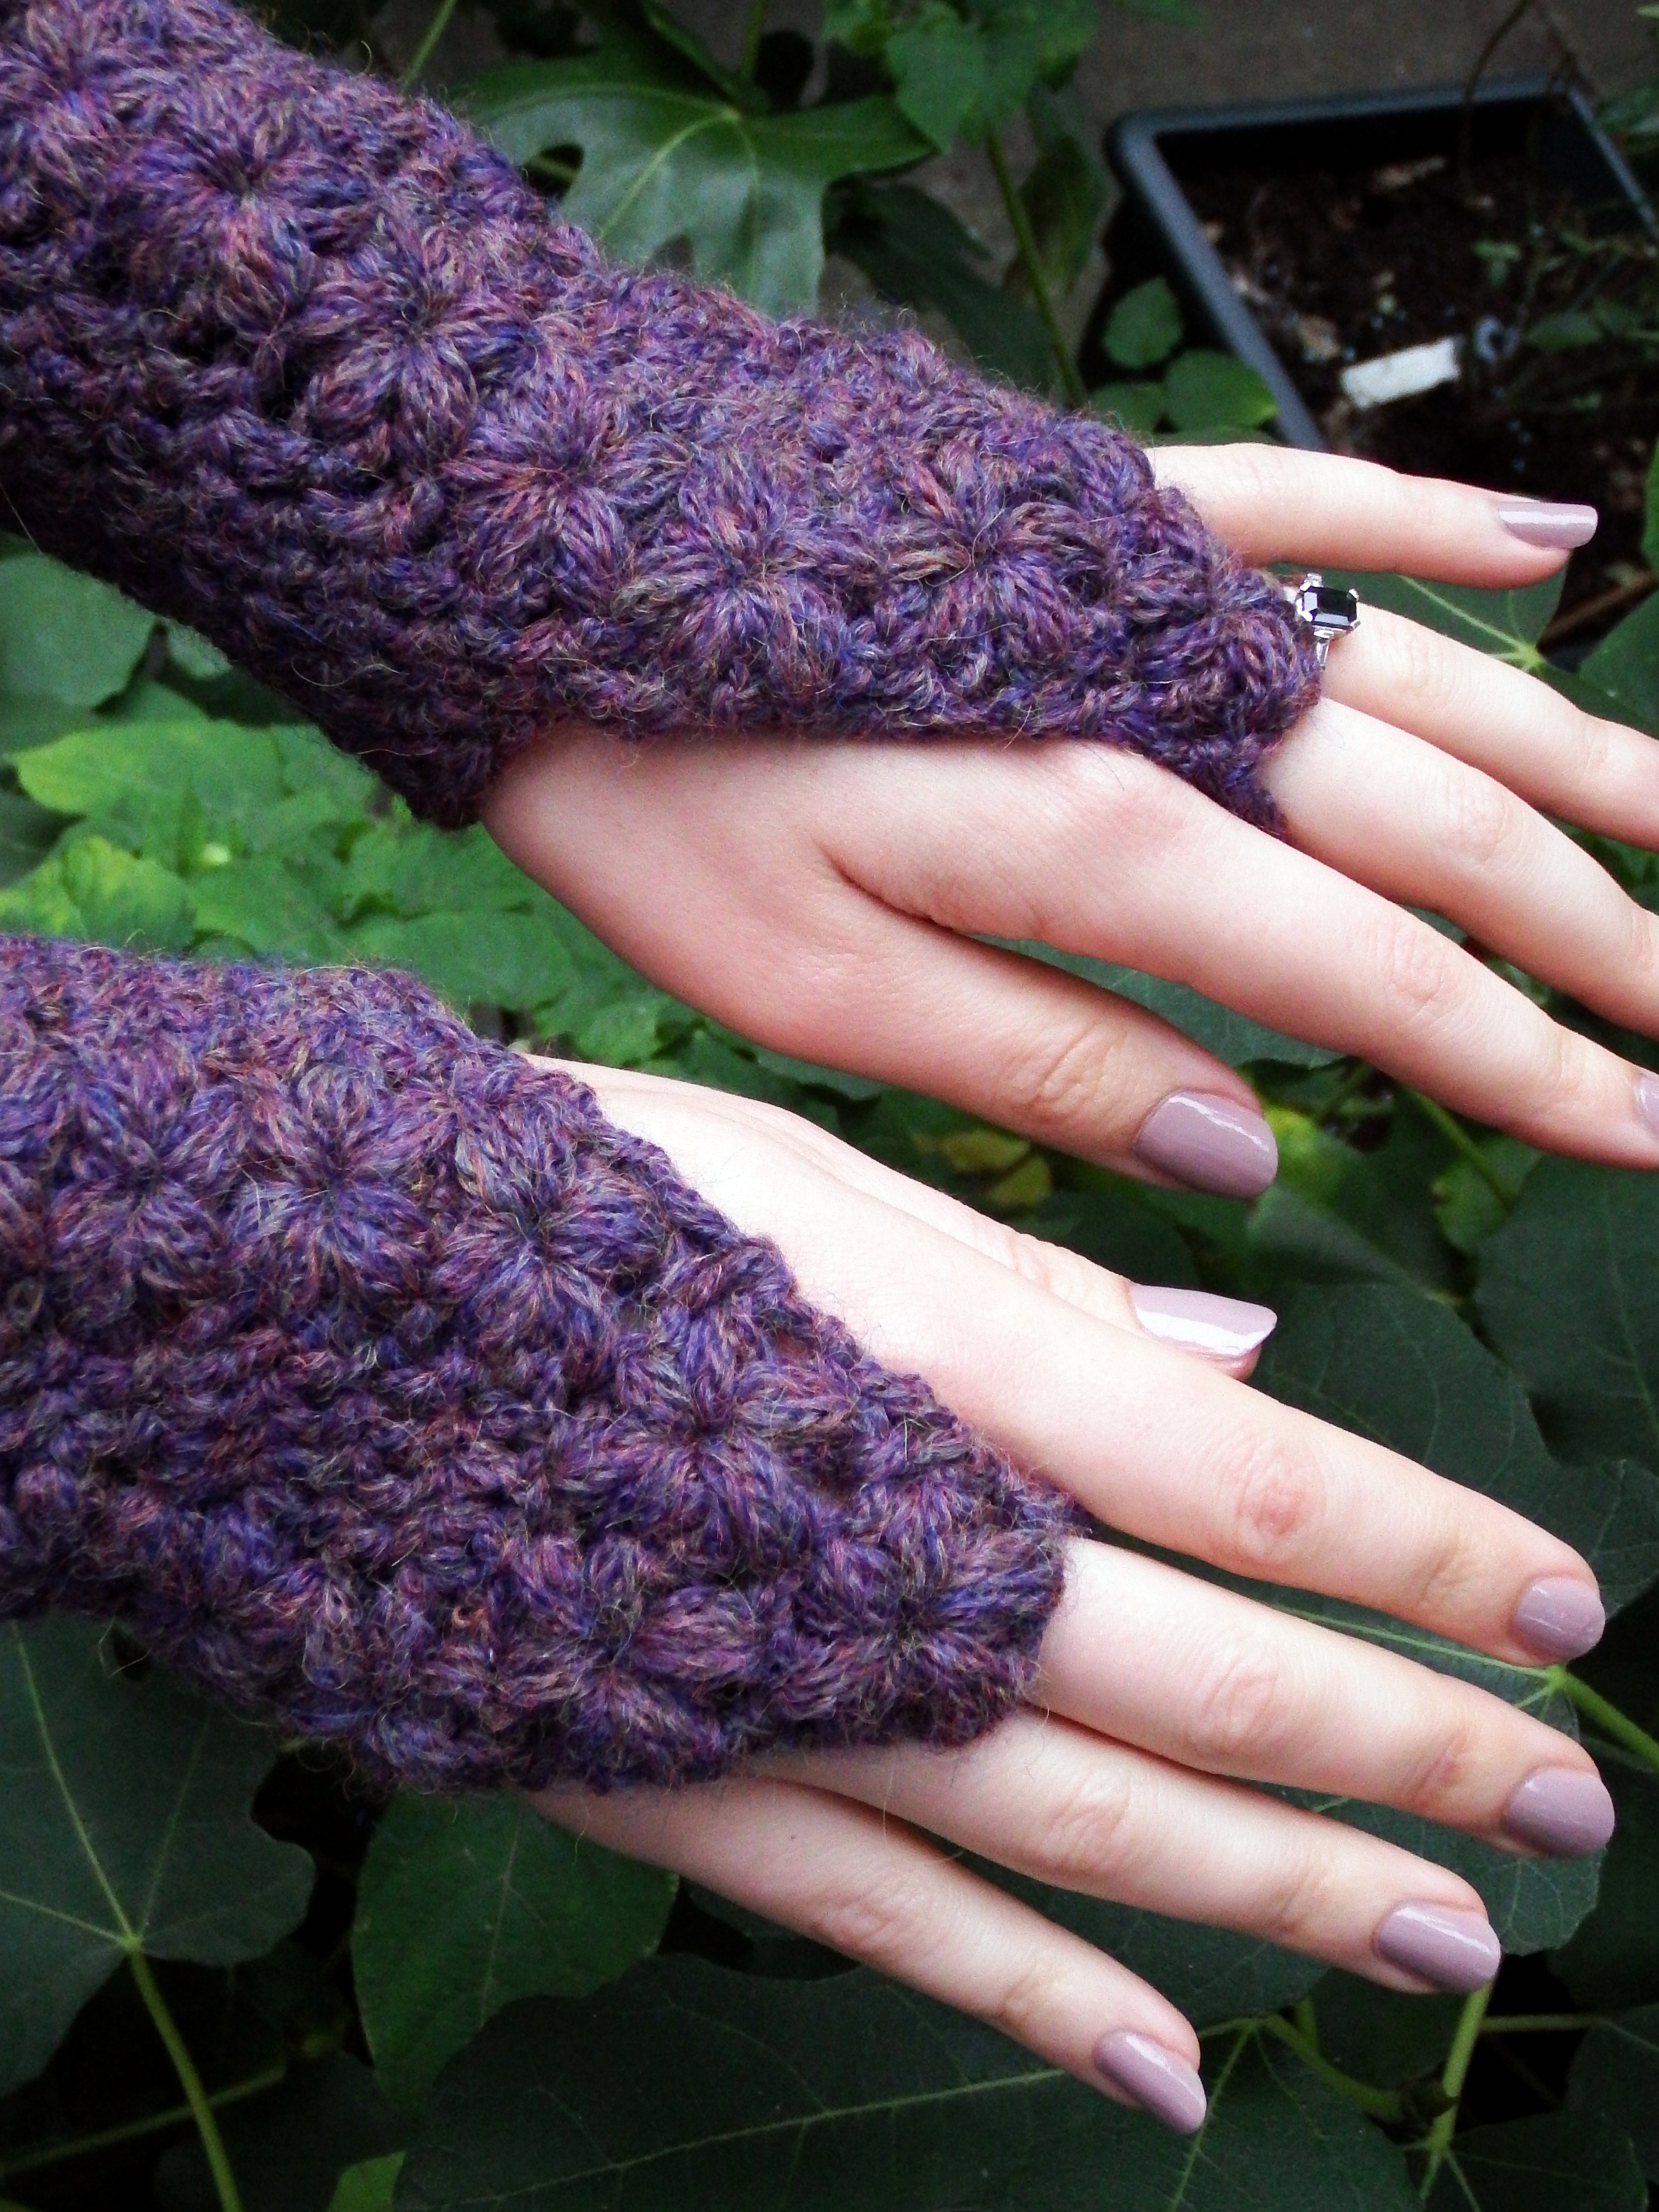
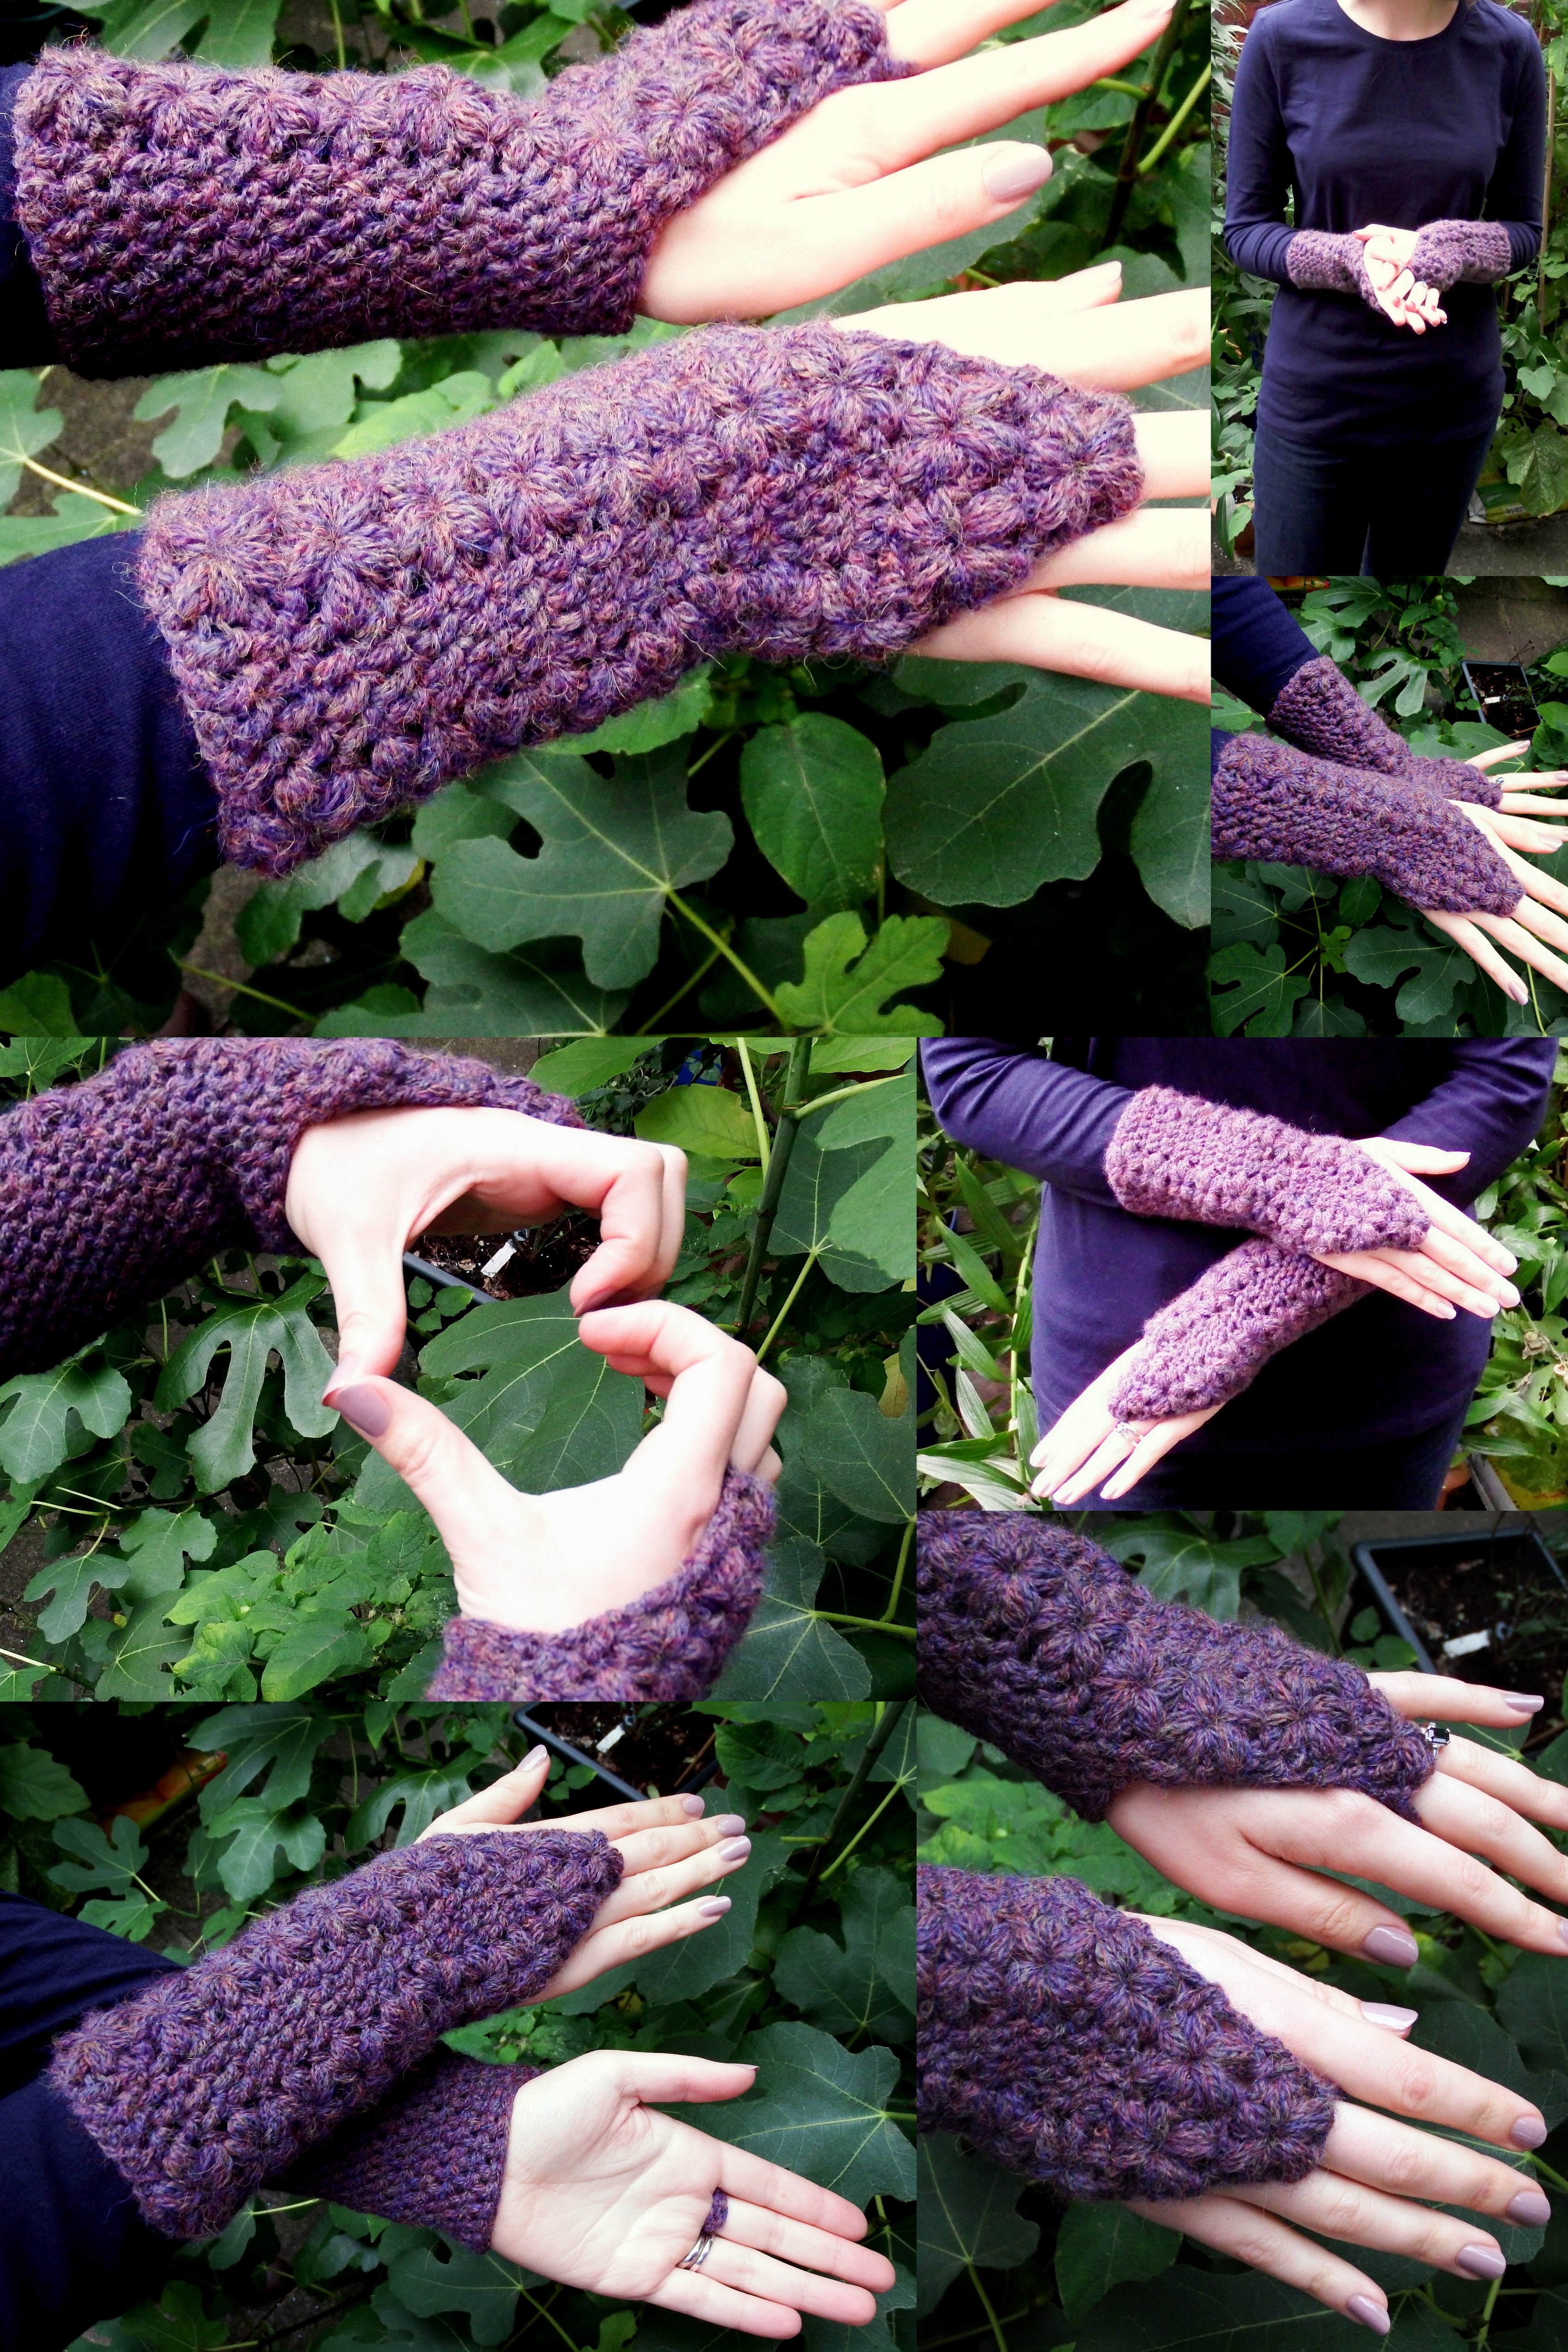
Simple Flower Trails Fingerless Gloves Crochet Pattern by makemydaycreative.com
 The puff stitch flowers work well with this yarn as it is nice and lofty thanks to the chainette twist.
I used exactly one skein of yarn, so this is great for a single skein project.
Scroll down for pdf patterns! (US and UK notation)
Materials
- 120m Rowan Lima yarn – or substitute your dk yarn of choice
- Size 4.0mm hook
Special Stitch: Puff stitch flowers
The flowers in the pattern are made using 6 puff stitches. Petals 1-4 are made in one row of the pattern, and then petals 5 and 6 are made in the following row. The whole flower uses 4 stitches from the row below.
I’m going to be making a video tutorial on how to do this stitch next week – so don’t be afraid of trying these out! If you prefer a puffier petal, just add more yarn overs.
Petals 1-4:
- Chain 3, yarn over, insert hook into back ridge of first chain and pull up a loop to the length of the chain, yarn over, insert hook in same place and draw up a loop (5 loops on hook). These loops will form petal 1.
- Yarn over, insert hook into next st and draw up a loop so that it is level with the row of dc’s you are working on. Yarn over, draw up a loop (4 more loops on hook – 9 total). These loops will form petal 2.
- Skip 2 sts. Yarn over, insert hook into next st and draw up a loop so that it is level with the row of dc’s you are working on. Yarn over, draw up a loop (4 more loops on hook – 13 total). These loops will form petal 3.
- Yarn over hook and draw this loop through all 13 loops, ch1 tightly to secure. This makes an “eye” at the flower centre.
- Chain 3, yarn over, insert hook into the “eye” and pull up a loop to the length of the chain, yarn over, insert hook in same place and draw up a loop (5 loops on hook). These loops will form petal 4.
- Yarn over hook and draw this loop through all 5 loops, ch1 tightly to secure. You have now made the 4th loop – the next st will be a dc into the next st.
Petals 5 and 6:
- *Yarn over hook and insert into the “eye” of the flower. Draw up a loop, repeat from * so there are 5 loops on the hook. Yarn over and draw through all 5 loops, chain 1 to secure. (5th petal made)
- Ch2, and repeat the step above to make the 6th (The next st will be a dc in the next dc st which stabilises the 6th petal).

Simple Flower Trails Fingerless Gloves Crochet Pattern by makemydaycreative.com
Pattern (make 2):
The gloves are worked in one piece, in the round from the arm to wrist, and then in rows from wrist to finger loop. You can adjust the size to suit your arms by adding or subtracting any amount from the foundation chain – the back is plain double crochet so these could go right up your arms if you wanted – just work some decreases in the plain section to keep them fitted!
Ch2 at the start of the round counts as a dc – ch3 if you prefer.
Fsc 30 and join with a sl-st to work in the round (12sts will be used for the flower trails and 18sts will be the sides and back of the tube).
R1: ch2 , dc in next st. Make the first 4 puff petals (see instructions above), dc 4 times, make the second set of 4 puff petals, dc in each of the next 16sts, join with a sl-st into starting ch (22 dc’s and 2 sets of 4 petals).
R2: ch2, dc in next st, make the 5th and 6th puff petals as described above, dc 4 times, make the 5th and 6th puff petals of the second flower, dc 16 times, join with a sl-st (22 dc’s and 2 completed flowers).
R3: repeat R1, but when you make the 2nd and 3rd petals, insert the hook into the ch made to secure the 5th and 6th petals made in the row below respectively.
Repeat rounds 2 and 3 3 more times – you will have made a tube 4 and a half flowers tall – or do as many repeats as you prefer until you get to just before the wrist. We will now be narrowing the tube for the wrist by decreasing in between the flowers.
R4: ch2, dc in next st, make the 5th and 6th puff petals as described above, dc2tog twice, make the 5th and 6th puff petals of the second flower, dc 16 times, join with a sl-st (18 dc’s and 2 completed flowers separated by two dc2tog sts).
R5: Repeat R3, but only work 2 dc’s in between the flower sts (20 dc’s and 2 sets of 4 petals)
R6: Repeat R2, but only work 2 dc’s in between the flower sts (20 dc’s and 2 completed flowers).
We will now be increasing the tube back to original size to adjust for the width increase at the hand:
R7: Repeat R5, but work 2dc into each of the two dc between the flowers (22 dc’s and 2 sets of 4 petals).
R8: Repeat R2
The tube is now complete. We will now be working the hand cover in rows.
R9: ch2, dc (counts as a dc2tog st). Make the first 4 puff petals (as per R3), dc 4 times, make the second set of 4 puff petals, dc2tog (4dc, 2 sets of 4 petals, 2 dc2tog sts)
R10: ch2, turn, make the 5th and 6th puff petals of the first flower, dc 4 times, make the 5th and 6th puff petals of the second flower, dc into final st (6dc’s and two completed flowers)
R11: turn, ch2, dc into ch-sp between the 5th and 6th petals of the row below (counts as a dc2tog st), make 4 puff petals – for the 2nd and 3rd petals insert the hook as follows: for the 2nd petal – into the ch made to secure the 5th petal of the row below, for the 3rd petal – into the 2nd dc of the 4 dc in the row below. Do not make a dc after the 4th petal is completed – continue to make the chain for the first of the next set of 4 petals. Complete the 1st petal as usual. For the second petal, insert hook into the next st – it will be the 3rd dc of the 4dc between the flowers in the row below. For the 3rd petal – insert hook into the ch securing the 6th petal of the row below. Complete the 4th petal as usual. Dc2tog – working the first dc into the ch-sp, and the second into the final st. (two sets of 4 petals, 2 dc2tog sts)
R12: ch2, turn, work the 5th and 6th petals of the first flower as normal, and then the second set of 5th and 6th petals (without a dc in between), dc into final st (2 dc’s, 2 complete flowers)
R13: turn, ch2, dc into ch-sp between the 5th and 6th petals of the row below (counts as a dc2tog st), make 4 puff petals – for the 2nd and 3rd petals insert the hook as follows: for the 2nd petal – into the ch one to the right of that made to secure the 5th petal of the row below, for the 3rd petal – into the ch 1 to the left of that used to secure the 6th petal of the second flower in the row below, dc2tog – working the first dc into the ch-sp, and the second into the final st. (4 petals, 2 dc2tog sts)
R14: ch2, turn, work the 5th and 6th petals of the flower as usual, dc in final st (2dc, 1 complete flower).
Do not fasten off.
Make the finger chain: Insert hook into the bar of the dc just made and draw up a loop (two loops on hook. Ch1 through the first loop and then yarn over, draw through both loops on hook. This makes the first fsc st for the finger loop. Make 5 more fsc sts (or required amount for your finger) and join to the dc on the other side of the final flower with a slip st. Fasten off and use the tail to attach the chain of the fsc sts into the same st.
Weave in all ends.
Simple Flower Trails Fingerless Gloves Crochet Pattern by makemydaycreative.com


Esther,
What a lovely take on fingerless gloves. I happen to have quite a bit of Rowan Lima on hand to try your pattern. I am constantly admiring your creations such as your multiplicity buttoned shawl, doily bag, water lily, just to name a few. (-: Thank you, Susiee
Thank you Susie! I’m so pleased you are enjoying my site! I have another post coming soon with the same yarn so keep a look out! :)
what a sweet pattern! thank you kindly for sharing it with us! :)
Thank you Jen! I hope you have fun making it!
Thank you so much for the pattern!!! These are so lovely1
Thank you! I’m enjoying wearing them already. Even though it’s not quite cold enough yet!
Very Pretty!!! Love the yarn selection :)
Thanks! I may have to buy more of this. Chainette yarn is nice to crochet with as it doesn’t untwist!
Pingback: Puff Stitch Flower Video Tutorial | Make My Day Creative
Pingback: Pocket Full of Posies Pouch | Make My Day Creative