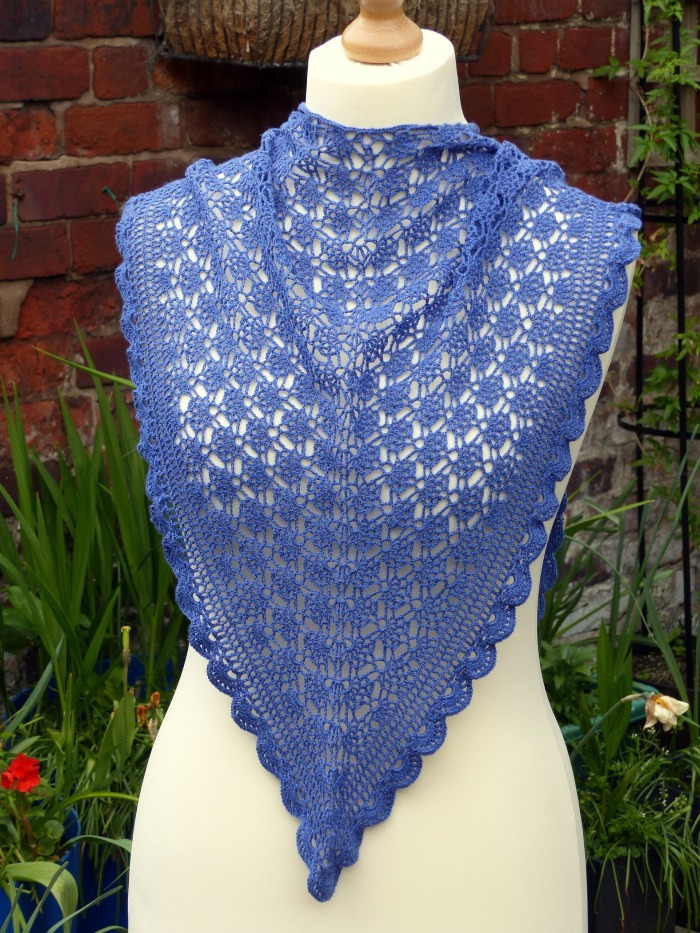
I’m so pleased to have this pattern ready to share with you at last! I’m continuing the theme of ocean inspired shawls (click through for Atlantic Lace and Pacific Rim shawls) and, as I began this one while on a plane to Morocco I have called it Mediterranean Lace.
Mediterranean Lace Shawl – Free Crochet Pattern from Make My Day Creative
I know that I have been teasing you with shots of this one in progress for a long time. I actually started it back in October 2015 – but don’t worry it did not take me all this time non-stop! This was a convenient project for taking on my holiday (just one ball and a hook to pack). But after my holiday, I got started on Christmas projects, and have been distracted ever since not least because of the somewhat complex (and exhausting) recovery which I am still making from my wisdom teeth extractions.
Scroll down for the downloadable pdf patterns and charts! (US and UK notation)
Pattern Notes:
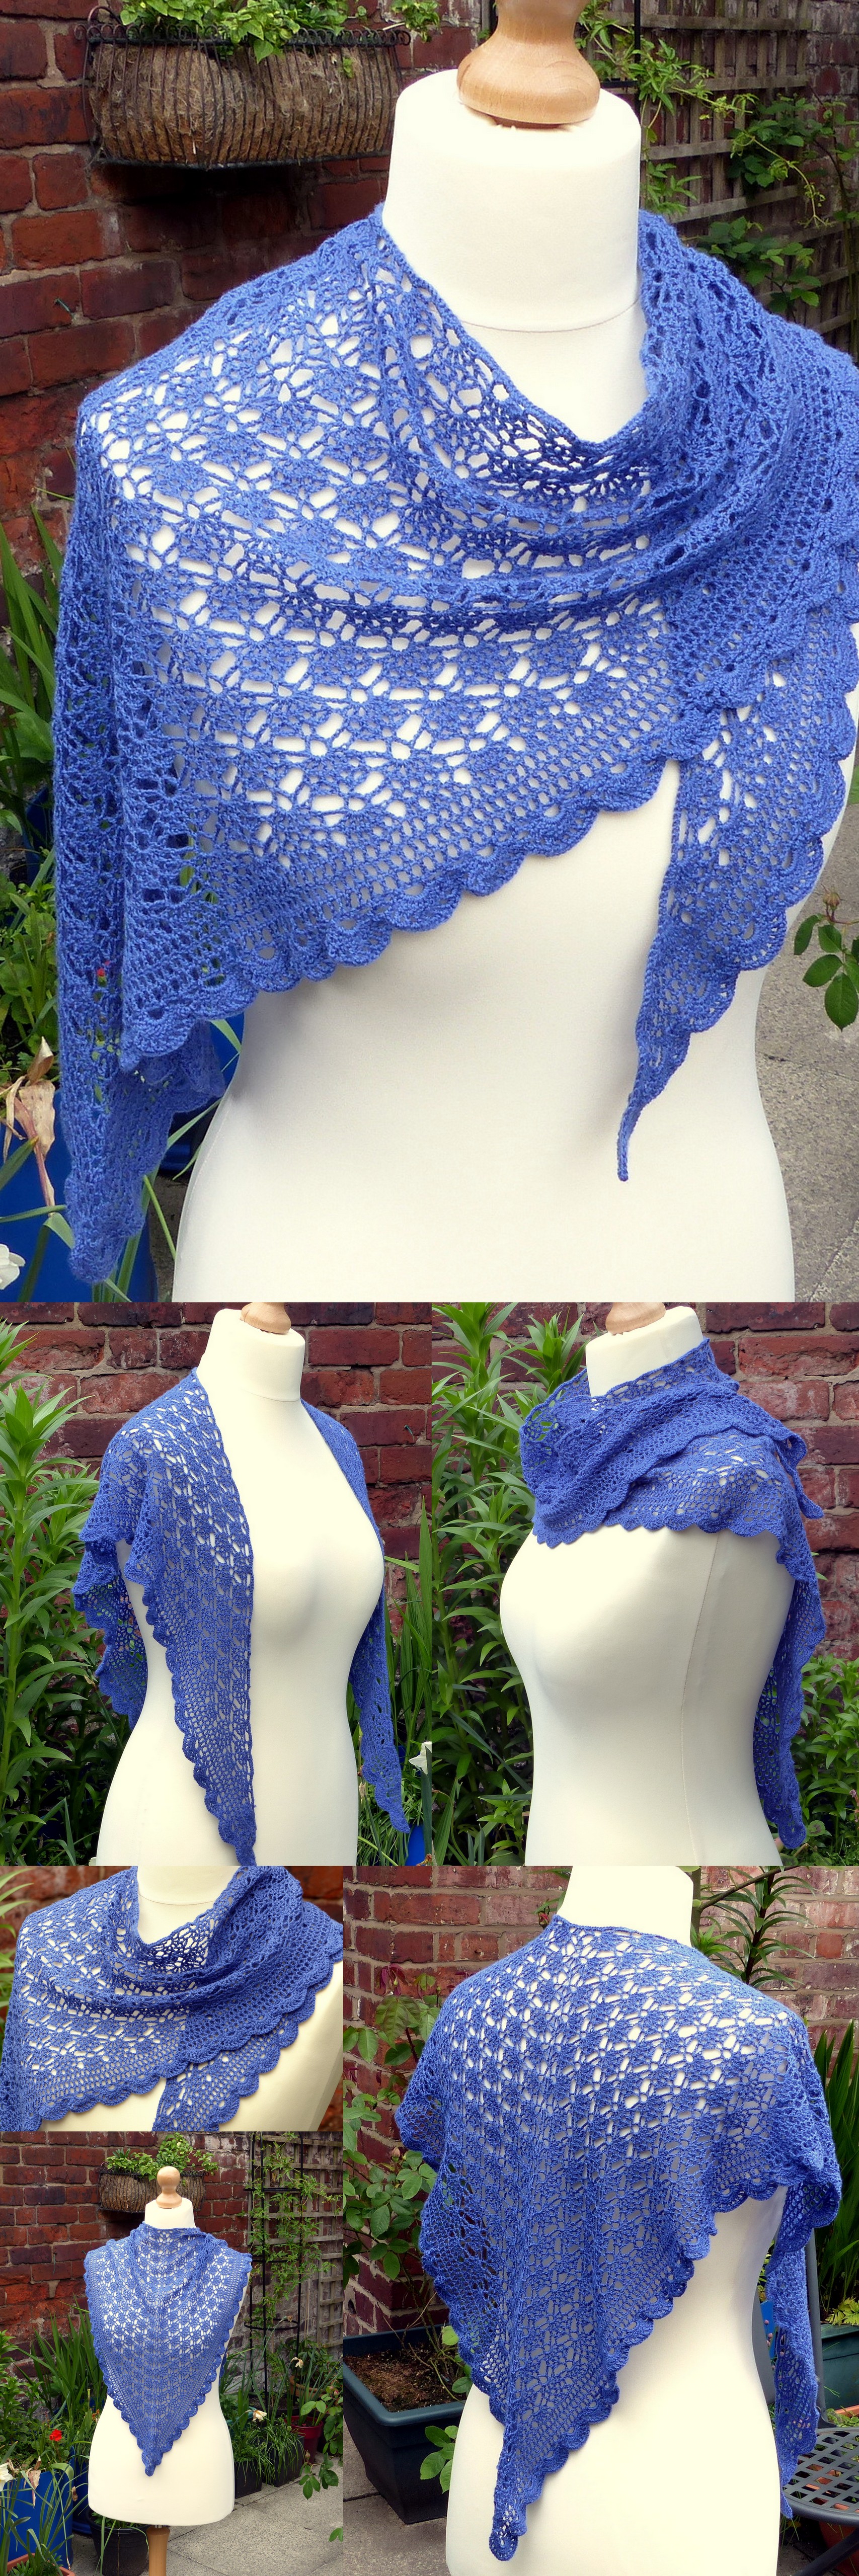
The shawl is worked from the centre top out, and the pattern results in an arrowhead shape ideal for wrapping and draping over the shoulders without slipping.
Because of the design gauge is not critical and you can just keep crocheting until your shawl is the desired size (or you run out of yarn).
The example shown is worked in lace weight yarn with a 2.5mm hook. You could size up yarn and hook up to a 4mm and dk if you prefer though the effect will be different and you may want to modify the boarder scallops if you so size up. I recommend any yarn which has some stretch (e.g. a yarn with at least 30% animal fibre content), as you will need to block this lace quite strongly once you’re done.
Materials:
655m (84g) Debbie Bliss Rialto Lace (I used shade: Royal (19))
2.5mm hook
Stitch marker for centre loop (optional)
Measurements:
Pre blocking the shawl had a wingspan of 94cm (measured tip to tip). The top edge measured 130cm from tip to centre top to tip (i.e. along the top “v””). The drop from centre top to bottom point was 58cm.
After blocking the shawl had a wingspan of 127cm (measured tip to tip). The top edge measured 148cm from tip to centre top to tip (i.e. along the top “v””. The drop from centre top to bottom point was 64cm.
Pattern:
Main Body:
The main body pattern is a two row repeat. Please refer to the chart at the bottom of the page.
Shell: ch1, (dc, ch1) 6 times into next ch3-sp (always between a dc pair)
R1: Ch11, dc in 8th ch from hook, ch1, dc in next ch, ch6, sl-st into 5th ch from hook (place st marker in this loop just made by closing with a sl-st if you like – this is the centre loop), ch 1, dc in next ch, ch1, dc in final ch, ch3, dc in final ch. Make the “set up loop” which will later be used to anchor R3 as follows: Ch10, sl st in 5th ch from hook, sl-st in each of the next 3 sts (4 sl-sts made, 2 ch left unworked).
R2: Turn to work back into the ch3 space made between the dc sts. Shell, sk 2 ch-spaces to work the following into the centre loop: dc, ch6, sl-st into 5th ch from hook (place st marker in loop if using), ch 1, dc. Sk 2 ch-sp and work a shell into the final ch-sp, dc into the 4th ch of this ch-sp, and work the set up loop for the next row: ch6, dc into 3rd ch from hook.
You should now have the start of your two sides made of a shell each, with a “set up loop” at each end and a central loop.
R3: Ch 6, turn, dc into the space between the ch2 and dc just worked. Ch3, skip the remainder of the “set up loop” chain and the first ch1 sp. (Sc, ch3 into next ch1 sp) 5 times, (dc, ch3, dc, ch1, tr, ch1, tr, ch1, dc, ch3, dc) into central loop, place marker between the tr sts (if using), ch3, sk 2 ch-sps (to work into the ch1 sp between the first two dc’s of the next shell), (Sc, ch3 into next ch1 sp) 5 times, (dc, ch3, dc) into the ch4 “set up loop” (i.e. skip the final ch-sp and 4 sl-sts). Make the next set up loop: Ch10, sl st in 5th ch from hook, sl-st in each of the next 3 sts.
R4: Turn to work into ch3-sp. Shell, sk 1 ch-sp. (Sc, ch3) into each of the next 3 ch-sps, sc in next ch-sp, sk 1 ch-sp, shell, sk 2 ch-spaces to work the following into the centre loop: dc, ch6, sl-st into 5th ch from hook (place st marker in loop if using), ch 1, dc. Sk 2 ch-sp and work a shell into next ch-sp, sk 1 ch-sp. (Sc, ch3) into each of the next 3 ch-sps, sc in next ch-sp, sk 1 ch-sp, shell into final ch-sp. dc into the 4th ch of this ch-sp, and work the set up loop for the next row: ch6, dc into 3rd ch from hook.
Row 5 and 6 form the 2 row repeat:
R5: Ch 6, turn, dc into the sp between the ch2 and dc just worked. Ch3, skip the remainder of the “set up loop” chain and the first ch1 sp.
[(Sc, ch3 into next ch1 sp) 5 times, sk2 ch-sps, (dc, ch3, dc) into next ch-sp, ch3, sk2 ch-sps.] Repeat [] until there is only 1 shell remaining before the central loop.
(Sc, ch3 into next ch1 sp) 5 times, sk2 ch-sps.
(dc, ch3, dc, ch1, tr, ch1, tr, ch1, dc, ch3, dc) into central loop, place marker between the tr sts (if using), ch3, sk 2 ch-sps (to work into the ch1 sp between the first two dc’s of the next shell).
[(Sc, ch3 into next ch1 sp) 5 times, sk2 ch-sps, (dc, ch3, dc) into next ch-sp, ch3, sk2 ch-sps.] Repeat [] until only 1 shell remains before the “set up loop”.
(Sc, ch3 into next ch1 sp) 5 times, (dc, ch3, dc) into the ch4 “set up loop” (i.e. skip the final ch-sp and 4 sl-sts). Make the next set up loop: Ch10, sl st in 5th ch from hook, sl-st in each of the next 3 sts.
R6: Turn to work into ch3-sp.
[Shell, sk 1 ch-sp. (Sc, ch3) into each of the next 3 ch-sps, sc in next ch-sp, sk 1 ch-sp]. Repeat [] until only one (dc, ch3, dc) remains before the central ch-cp.
Shell, sk 2 ch-spaces to work the following into the centre loop: dc, ch6, sl-st into 5th ch from hook (place st marker in loop if using), ch 1, dc. Sk ch-sp and work a shell into next ch-sp.
[sk 1 ch-sp. (Sc, ch3) into each of the next 3 ch-sps, sc in next ch-sp, sk 1 ch-sp, shell ]. Repeat [] until the end of the row, dc into the 4th ch of this ch-sp and work the set up loop for the next row: ch6, dc into 3rd ch from hook.
Repeat row 5 and 6 until the shawl is approaching your desired size – finish on a row 6 to begin working the edging.
Modify the set up row on the final R6: ch10, dc into 5th ch from hook.

Mediterranean Lace Shawl – Free Crochet Pattern from Make My Day Creative
Edging:
The edging is worked in 2 sections – a mesh followed by a scalloped edge.
ER1: Turn to work back along the modified “set up loop” just made. Sk1 ch, (ch1, dc), Sk1 ch, (ch1, dc), sk 1 ch and 1 st to work into the ch-sp, (ch1, dc).
*Into each ch-sp of the shell, work a (ch1, dc) – you are making 5 dc per shell.
Sk ch-sp, (ch1, dc, ch1, dc) into each of the next 3 ch3sps. – you are making 6 dc per group of 3 ch3sps.
Repeat from * until you have worked the 5dc’s into the final shell before the centre. Sk 1 ch-sp, (ch1, dc) into next ch-sp before centre loop. (ch1, dc, ch1, dc, ch1, tr, ch1, tr, ch1, tr, ch1, dc, ch1, dc) into centre loop, mark central tr with st marker if using. Ch1, dc into next ch-sp. Repeat from * again until you have completed the 5dc’s into the final shell. (ch1, dc) into last ch-sp, work 2 (ch1, dc’s over the sl-st section of chains, (ch1, dc, ch1, tr) into the final “loop”.
ER2: Ch4, turn, dc into tr just worked, *(ch1, dc) into next dc, repeat from * until centre, (ch1, dc, ch1, tr, ch1,dc) into central st, mark tr with a st marker if using, *(ch1, dc) into next dc, repeat from * until the end finishing with a (ch1, dc, ch1, tr) into the 2nd ch of the final ch-sp.
Repeat ER2 two more times, or as desired to complete the mesh section of the edging.
The scalloped edge uses a multiple of 6 ch1-sps plus 3 for each side. Example shawl had 207 ch-sps (34*6 + 3). Your shawl does not need to have this number, modify as described if you wish:
The first row is a good place to make adjustments if you have somehow ended up with an uneven number of sts on each side or do not have this multiple. When working ER3, either skip an extra ch-sp or do not skip a ch-sp to either subtract or add in ch-sps. Do this at the beginning or end of ER3 to hide the adjustments. You are aiming for a multiple of 3 chain spaces at the end of ER3, but the most important thing is to end up with the same number of ch-sps on each side because you can adjust the pattern if needed.
ER3: Ch6, turn, sc into ch-sp. *Ch4, sk1 ch-sp, sc in next ch-sp, repeat from * until 1 ch-sp remains before the central stitch. Sk this ch-sp, (sc, ch6, sc) into tr, *Ch4, sk1 ch-sp, sc in next ch-sp, repeat from * until you have just worked an sc into the final ch-sp, ch3, tr into 2nd ch of turning ch.
You should have a multiple of 3 ch-sps on both sides at this point, not including the central ch6 loop. If you do not, as long as both sides are the same, just make a symmetrical adjustment to the pattern about the central point.
ER4: Ch4 (counts as dc+ch1), turn, (7dc) into ch-sp, sc into next ch-sp, ch4, sc into next ch-sp, *(8dc) into next ch-sp, sc into next ch-sp, ch4, sc into next ch-sp, repeat from * finishing in the final ch-sp before the central loop. (12dc) in central loop, *sc into next ch-sp, ch4, sc into next ch-sp, (8dc) in next ch-sp, repeat from * until end.
ER5: Ch4 (counts as dc+ch1), turn, (dc in next dc, ch1) 7 times, *sc in next ch-sp, ch1, (dc in next dc, ch1) 8 times, ch1, repeat from* until 1 ch-sp before centre group of 12 dc, sc in ch-sp, ch1, (dc in next dc, ch1) 12 times, ch1.
*sc in next ch-sp, ch1, (dc in next dc, ch1) 8 times, ch1, repeat from* until the end of the row.
ER6: Turn (you made a ch1 at the end of ER5 – does not count as a st). Make 2sc in each ch-sp between dc sts, make 1sc in each ch-sp between dc and sc sts.
Top edge finishing:
Ch1 and rotate to work back along the top edge. Work a row of sc evenly across, placing approximately 1 st in each ch-sp for each ch, 2 sts for each dc, etc. Fasten off and weave in ends.
Blocking:
Blocking opens up the lace and adds drape. Block using your preferred method. I wet block mine. Make sure you pin the shawl out symmetrically about the centre line. Here is the difference blocking makes:

Mediterranean Lace Shawl – Left side is unblocked, Right side is blocked – Free Crochet Pattern from Make My Day Creative
I hope you enjoy trying this one! If you do, please share your FO’s with me via Ravelry or Instagram, or leave a comment below, I’d love to hear what you think!
Mediterranean Lace Shawl – Free Crochet Pattern from Make My Day Creative
Downloadable pdf patterns and charts:


This is beautiful! Thank you!
Thank you Charne!
I love this shawl! Thank you so much for the pattern . . . just beautiful!!!!!
I’m glad you like it! :)
Reblogged this on fpvj.
Gorgeous! Will definitely be giving this a go – thank you for being so generous with the pattern 😀
You’re welcome Liz, I hope you enjoy it!
Gorgeous! And I really like the colour you chose. Thanks for sharing!
That blue is lovely! Nice and summery. Thanks!
Looks fantastic, love the colour
Thank you Lucy Ann! :)
Thank you so much for this…I now know what my holiday project will be. I’m off to Canada for three weeks and needed a small size but engaging project to take with me.
Ooh have fun! I loved Canada when I visited in 2014 :)
Looks gorgeous – I’m anxious to try it. Thanks so much for sharing your talent!
Thank you Ginny!
Lovely shawl, thank you for the pattern
You are welcome Margaret Anne :)
Just beautiful – thank you for sharing!
Glad you like it Jeannette!
I love this shawl and am eager to start it, could you let me know how many chains you start with as I cannot see it on the pattern. Your work is beautiful.
Hi Moreen! I’m glad you like this! You start with a Ch11, this is included in Row 1 in the pattern. Do have a look at the chart as it may help you to see how to begin! It’s a centre top down construction so no long starting chains :)
The shawl is amasing! I started crochetting it but i can’t sort out how the “set-up loop” should be done without turning. How can i double crochet back, where do I insert the hook and where the yarn is placed at that moment? Cause if i make slip stiches without turning they appear at the bottom. Could you help please?
Hi Lia, glad you like this! You make the sl-sts the same way you would if you were making a picot (i.e. you don’t need to turn the work, just work into the chain) but it really doesn’t matter too much if you find it easier to turn here rather than at the start of the next row. If you’ve read the pattern to the end you’ll see that the top edge gets crocheted over to neaten it all up, so it doesn’t matter too much if your sl-sts are “on the wrong side of the chain” or even if the chain gets twisted because it won’t show. Have a look at the chart if you need to see how this bit is working. Hope that helps!
Esther, thanks a lot for a quick reply. I’ll try it. Hope it works cause I planned it to be a present for my friend.Thanks for your help)
gorgeous, thanks for sharing.
Thanks Carrie! Hope you enjoy it :)